Replacing your porch railing can make your home look better, feel safer, and increase its value. It’s great for both people who love DIY projects and those trying it for the first time. You can choose from materials like composite, wood, or metal. This lets you pick something that fits your home’s style and fixes any safety issues with old or broken railings.
Key Takeaways
- Wood railings require frequent maintenance but offer classic appeal.
- Composite railings provide durability and low maintenance, ideal for busy homeowners.
- Metal railings offer rust and corrosion resistance, especially in coastal areas.
- PVC railings offer a variety of styles and are low-maintenance, attracting a significant number of homeowners.
- Safety concerns are a primary reason for replacing old railings, influencing around 40% of decisions.
- Material choice significantly affects long-term costs and labor, influencing many homeowners’ decisions.
Why You Should Consider Replacing Your Porch Railing
Changing your porch railing is an important update with lots of benefits. New railings make homes safer, helping to stop falls and injuries. Since the International Residential Code requires guardrails to be at least 36 inches high, following this rule is key for keeping your family safe.
Old railings often have cracks, splinters, or peeling paint. These signs mean it’s time for a new one. Worn railings not only pose a safety risk but also make your house look bad. Choosing strong, modern materials can boost your home’s value by making it look better from the outside.
Adding new railings can also make your home look more inviting. A new, stylish railing can catch the eye of neighbors and people looking to buy a house. You can pick from wood, metal, or synthetic materials to match your home’s style.
Some materials, like cedar, are stable and don’t warp easily but need regular care to avoid rot. Synthetic materials may cost more at first but don’t fade, splinter, or crack, saving you from resealing them.
So, updating your porch railing is a smart choice for both safety and style. It’s an investment that makes your home safer and more attractive.
Choosing the Right Material for Your Railing
When picking materials for your porch railing, think about looks and function. The choice affects your outdoor area’s style and upkeep.
Wood railings bring a timeless beauty and can be more affordable at first. But, they need regular care like staining or sealing to avoid damage. High-quality wood, like Ipe, costs more because of its superior qualities.
Composite railings are easy to keep up. They cost more than wood initially but have a 25-Year Limited Fade and Stain warranty. These materials match well with different porch design styles, from Victorian to modern.
Metal railings, like powder-coated aluminum and wrought iron, are durable and stylish. Aluminum is light and affordable. Wrought iron offers a strong, classy look but needs more support. Aluminum is notable for its resistance to weather and lasting quality at a good price.
Glass railings and cable systems offer a modern, clean look with clear views. However, glass needs regular cleaning, which can be tough with pets and kids around. Cable railings are popular for their simple design but keeping them spotless can be hard.
Vinyl and PVC railings are low-cost choices. They’re light and flexible but may fade or crack with weather changes or impacts. Their quality can vary widely between brands, even though they’re easy on your wallet.
Finding the best railing material means looking at costs, maintenance, and style. Whether you want something easy to care for, budget-friendly, or stylish, there’s a wide variety of outdoor railing options to fit every home. Consider each material’s pros and cons to choose the best one for your space.

REFRESH YOUR OUTDOOR SPACE: Transform your porch, deck, patio, or balcony railing with the Weatherables Greenwich Deck and Porch Railing Kit. Our vinyl rail kit offers a sophisticated look, is easy to install, and is made to withstand time and weather.

High-quality materials: Deck railings are made of high-strength metal to ensure durability and long-term reliability. Each railing is 36 inches long. Whether it is rainstorms, sun exposure or humid environments, the deck spindles can remain intact and will not easily fade or rust. They remain sturdy and durable for long-term use.
Tools and Materials You’ll Need
Starting a DIY railing installation project is exciting but needs careful planning. You’ll need the correct tools and materials for a good job. No matter your railing material, some tools are essential for all projects.
- *Tape Measure*: For precise measurements.
- *Saw*: Required for cutting the railing pieces to the correct length.
- *Drill*: For executing clean and accurate holes.
- *Level*: To ensure your railing is perfectly aligned.
You might also need special tools for working with metal or composite materials. Getting high-quality hardware like screws and brackets is vital for a strong install. Sometimes, you’ll need concrete or anchors too.
Don’t overlook the building supplies for railings like the railings themselves. Whether you choose wood, metal, or composite, using top-notch materials like stainless steel screws improves durability. This is crucial in places with severe weather.
Here’s a quick overview of materials and what they’re best for:
| Material | Typical Use |
|---|---|
| Wood | Traditional esthetics; suitable for diverse finishing. |
| Metal | Modern appearance; ideal for straightforward maintenance. |
| Composite | Durable and resistant to rot; low maintenance. |
Choosing the right building supplies for railings and tools is crucial. It ensures your railing is both safe and looks great. Your project might need minor changes to these suggestions, depending on personal taste and local rules.

Multi-Angled and Wide-Adjustment: This cable railing kit works for 1/8" wire rope in multi-angled stairways as well as horizontal sections. The multi-angle feature and adjustable closed-body enables the turnbuckle to rotate from 0-180 degrees and adjust freely from the max length of 10.1 inch to the min length of 6.8 inch

【APPLICATIONS】3/16" Stair cable railing hardware kit fits for 3/16" stainless steel cable. The multi-angle feature and adjustable closed-body enables the turnbuckle to rotate from 0-180 degrees and adjust the length freely. The swage toggle turnbuckle hardware can be used at angle stair railing or horizontal cable guardrail. Suitable for outdoor or indoor.

【Applications】Swage lag screw system is a streamline stainless steel wire balustrade systems for straight, stair or angled sections. BLIKA high-quality stainless steel wire balustrade hardware that is suitable for indoor and outdoor applications. Cable railing swage lag screws perfect for planning your DIY cable railing project, staircases, balconies and decking areas. Get the job done effortlessly with our extra-thick wrench—built to outlast others.
Step-by-Step Guide to Removing Old Railing
Getting rid of old porch railing requires careful steps for a smooth change to new installation. Whether doing it yourself or getting help, following these steps avoids damage and keeps things safe. First, check the structure for any damage like rot or mold, which can affect up to 30% of outdoor wooden structures.
Begin by taking out any loose nails and screws. With a post-hole digger and pry bar, carefully pull out the old posts. If you have wooden railings, make sure the balusters are spaced right, according to local codes. And, be gentle to avoid damage. Always wear safety gear like glasses and gloves to protect yourself.
Now, take apart the railing sections. Use tools like a post-hole digger and pry bar for this. Also, check the deck or porch below to make sure it’s not damaged. If you find damage like rot or mold, fix those parts before putting in new railing.
After the railings are off, you need to get rid of the old stuff the right way. If some parts are still okay, reuse them or take them to a recycling center. With these steps done, you’re ready for the next part: getting set for new railing installation.
Before moving to installation, make sure to pull out all old nails and screws. Also, drill small pilot holes to keep new wood from splitting. Doing this makes sure putting in your new porch railing goes smoothly and safely.
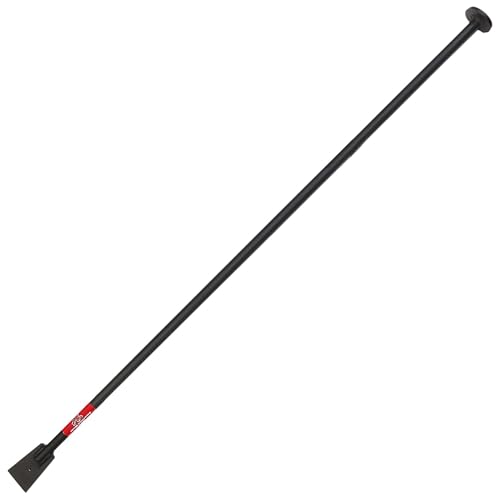
100% MADE IN THE USA: Proudly crafted in the USA, the Bully Tools Steel Tamping and Digging Bar features a solid 1-inch steel bar and 3/8-inch thick plate for maximum strength and durability, built to handle tough digging and tamping tasks.

Comprehensive Package: our chisel digging bar is available as a complete single-piece package, ensuring you have everything you need right out of the box; It's designed to simplify your toolkit with its multi-functional capabilities
Round replacement handle for digger
Installing New Porch Railing: A Detailed Process
Installing a porch railing requires careful planning. Start by measuring and marking your layout accurately. This ensures every post is in the right place for a sturdy build.
First, secure your posts into the deck or ground firmly. Use a 9/64” drill bit for pre-drilling to avoid misalignment. This also makes sure the handrail is attached well. Metal railings need posts 6 to 8 feet apart, following building codes.
Next, attach the rails and balusters. Keep balusters less than 4 inches apart to meet U.S. codes. Pre-drill holes before screwing them in to prevent shifting. The number of screws needed varies, but always use at least one on each side.
Cut the handrails with a diamond-tipped saw blade to the length you need. Remember, it should not be over 20 feet. Always wear protection for your eyes and ears during this. For wrought iron railings, plan to repaint them every one or two years, especially after winter.
Fix the handrails with at least two clamps during installation. Work on one rail at a time for better precision. For DIY projects, a miter saw, table saw, and pneumatic stapler are helpful tools for a smooth job.
Attach each handrail to a corner post with two rails per post. Make sure the rail’s height is between 34 inches and 38 inches, based on U.S. codes.
After installation, check that everything is level and tight. Inspect regularly for loose parts to keep it safe. For wooden railings, reapply stain or paint every couple of years. Aluminum railings are low maintenance and can last over 20 years for stress-free use.

NO SKATE TIP: Accurate starts

[9/64 Inch 20PCS] A pack containing 20 pieces 9/64"(Dia 3.572mm) cobalt metal drill bits comes in plastic storage case for easy storage.

Size and material:Each metal drill bit has a diameter of 9/64 inch and is made of cobalt M35 high-speed steel (hss), which has superior toughness and durability
Painting and Staining Your New Railing
Painting porch railings or staining wood ones is key to their longevity and looks. Proper finishing shields them from the weather while making them look great.
Clean thoroughly before starting. Use a pressure washer, or a brush and cleaner if that’s not an option. Let the cleaner sit as the instructions say, then rinse it off.
Pick paint or stain made for outdoor use. Mix paint from different cans in a large bucket to keep the color even. When using stain, a precise spray tip gives you better control.
Applying primer before painting makes the color look richer and stick better. Using an airless sprayer helps avoid brush marks and saves time.
Always prioritize safety. Wear gloves, safety glasses, and a dust mask. Use lower pressure for stains to spray evenly. Let the stain absorb for about 20 minutes. Keep applying it evenly to avoid marks.
To keep your railing looking good longer, follow these tips:
- Ensure it won’t rain for 48 hours after cleaning, before staining.
- Let dry for 48 hours before removing any protective covers.
- Wait 2 days before touching the railing post-stain.
- Check for damage and sand as needed for smoothness.
- Dispose of oil-soaked rags in a sealed, water-filled metal bucket.
Painting or staining your railings not only makes your home look welcoming but also helps the railings last against the weather.

Apply to metal, wood, plaster, masonry and unglazed ceramic

Ready to use, pre-mixed door and trim paint offers a fresh new look on interior or exterior metal, wood and fiberglass

Perfect for refinishing and protecting exterior wood such as picnic tables, chairs, swing sets and more
Maintenance Tips for Your New Porch Railing
Keeping your porch railing in top shape is key to making it last longer and look great. Follow these tips to take good care of your outdoor railings:
Regular checks are very important. Inspect your railing often to catch any problems early. Look for loose parts, rust, or rot, based on what it’s made of. Fixing issues fast helps your railing last longer and stay safe.
Clean your railing now and then to keep it looking nice and strong. Use mild soap and water for wood railings, and avoid strong cleaners on metal or composite ones. A soft brush can get rid of dirt without hurting the railing.
If you have a wooden railing, put on a new coat of stain or paint every year. This protects it from bad weather and the sun. It also makes it look better and keeps moisture and UV light from damaging it.
Metal railings need care to avoid rusting. Use rust-resistant primer and paint to make them last longer. Also, make sure to tighten any loose screws to keep the railing secure.
Composite railings don’t need much upkeep, but they still need some attention. Clean them with the right products and check for damage. This will help your porch railing stay beautiful and useful for a long time.
To sum up, good railing care means checking, cleaning, and fixing it on time. A little bit of work can make your porch railings last longer and keep your outdoor space safe and lovely.
Final Thoughts on Your Porch Railing Project
Adding a new porch railing improves both safety and looks. Think about the hard work and planning you put in. This made sure your railings met all rules, making your space look great.
During the work, you found out your porch was low enough to not need a railing. You got to try different designs without blocking your windows. This choice made your porch better without losing the view.
Your project made your home’s outside look way better, going from a low rating to great curb appeal. The railings, which are less than 8 feet and 55 inches, show your smart spending of around $350 and a day’s work. For more ideas, look into building porch railings.
Now, as you enjoy your improved porch, think about what’s next. Any extra touches or fixes can make it even better. Your hard work now will help you with any porch updates in the future.

