Changing a porch light bulb can be easy with the right steps. It’s important for both outdoor light upkeep or when you need a new porch light. This guide will show you how to pick the right bulb and dispose of the old one safely.
Key Takeaways
- Select the appropriate bulb type for your porch light fixture.
- Ensure all safety precautions are followed during the replacement.
- Understand the specifications of your porch light fixture.
- Prepare adequately before starting the bulb replacement process.
- Follow a step-by-step guide to ensure a smooth and safe light bulb change.
- Regular maintenance extends the life of your porch light fixture.
- Know when to call a professional for help.
Tools You’ll Need for the Job
To change your porch light bulb safely, you need the right gear. Having the right light bulb changer tools and safe bulb replacement tools makes the job easy and safe. Here’s a list of what you’ll need:
- Sturdy Ladder: It’s crucial for reaching high places. Make sure it’s stable and on a flat area.
- Screwdrivers: You’ll need both Flathead and Phillips to handle various types of screws in light fixtures.
- Gloves: These help with grip and protect your hands from cuts and heat.
- Voltage Tester: This tool tells you if the power is off with a green light, for safety.
- Lever Nut Wire Connectors: These are better than old wire nuts for a tight and safe wire connection, reducing wire loosening risks.
- Bulb Changer Tool: Great for changing bulbs that are high up or hard to reach, making the replacement safer.
Another key tool is a non-contact voltage detector. It’s vital for ensuring the power is off before you begin. Using these tools keeps you safe and efficient when changing bulbs. Also, remember, using exterior caulk to seal gaps stops water and bugs from getting in. This helps your light fixture last longer.

Designed in the USA with quality materials

Versatile 3-Piece Set: Includes a recessed bulb changer, floodlight bulb changer, and a suction cup light bulb changer, accommodating various bulb types like standard, incandescent, and LED.

Durability and Safety tested for the toughest situations
Understanding Your Porch Light Fixture
Improving your home’s look and safety starts with knowing about porch light fixtures. These range from wall lamps to recessed lights, each offering different advantages. They also have specific needs for setting them up.
Before looking into porch lighting options, figure out what kind you have. The main types of porch light fixtures are:
- Wall-mounted fixtures: Best placed at eye level, between 65 and 75 inches from the ground.
- Ceiling fixtures: Require a minimum clearance of 7 feet from the ground.
- Double sconces: Typically installed 6 to 12 inches from the door casing.
- Flush-mount fixtures: Suitable for a sleek look, using 23- to 40-watt LED bulbs.
- Pendant lights: Often utilize single 23- to 40-watt LED bulbs with opaque glass or smaller bulbs with clear glass.
Knowing these basics aids in choosing the right bulb. It also helps with fixture upkeep or improvements. For example, switching to LED bulbs cuts energy use—by as much as 75% less than old bulbs. Timed switches can also cut costs by up to 20%, by turning lights on and off at set times.
How you install lights can vary by type. Wall-mounted lights generally need a 13- to 15-watt LED bulb for good light without wasting energy. Pendant lights, however, might need brighter or more bulbs.
Safe installation and upkeep matter a lot. For covered spots, UL Damp-Rated fixtures work best. In open air, you’ll need UL Wet-Rated ones. Taking care of your fixtures, such as using car wax to protect metal parts each year, is important.
By knowing about your porch light, smart choices can be made. This leads to a home that looks good, stays safe, and uses energy wisely.
Preparing to Change the Bulb
Before you start, the right setup can help save time and keep you safe. Here are some steps for getting ready to replace bulbs:
Turn off your porch light at the breaker first. This avoids electrical dangers and is a must-do.
Gather your tools like a screwdriver, a ladder, and the new bulb. Use a sturdy ladder to reach high fixtures safely.
Let the old bulb cool off if it was on before. Trying to remove a hot bulb could cause burns or breakage.
Some fixtures, like Endon or Elstead lanterns, have specific instructions. For example, you might have to remove the canopy first. If you’re stuck, check the original installation guide in your “Home Improvement” folder.
Different models may need different bulbs. An Astro Lighting model might use a 60 W E27 GLS bulb, while Elstead lanterns need a 100 W ES GLS bulb. Make sure you pick the right one.
For added flair, consider using dimmable or colored bulbs during holidays. This lets you change your lighting for the mood or celebration.
Finally, check the IP rating of your lantern. Many are rated IP44, meaning they can withstand light moisture. This is good to know in damp climates.

High Quality Illumination: E26 Led light bulbs with high colour rendering (CRI > 85) provides vivid and natural colour, 1100LM high brightness, And 360 degree beam angle, led...
Step-by-Step Guide to Changing the Bulb
Changing your porch light bulb can be easy if you follow a step-by-step bulb change. First, make sure to turn off the power. This is very important for staying safe and avoiding any electric shocks. Next, get to the fixture safely, using a ladder or step stool if needed.
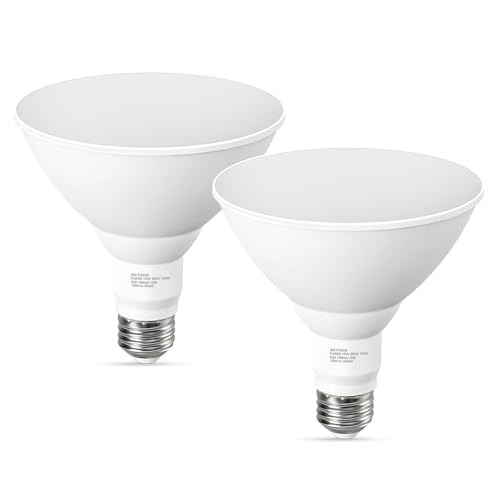
It’s time to remove the cover next. Usually, you unscrew a few bolts or clips to do this. After the cover is off, carefully unscrew the old bulb. Handle it carefully to avoid any breakage. Then, get ready to put in the new bulb. Make sure it fits your fixture. An LED flood light bulb is the best choice because it uses less energy and lasts longer—up to 25,000 hours compared to 1,000 for old bulbs.
Put the cover back and tighten all screws or clips. This makes sure everything is secure. Double-check everything to make sure the bulb is in right and the cover is tight. Now, you can turn the power back on and see how it looks. LED bulbs are energy savers and shine brighter, with a life ranging from 30,000 to 100,000 hours.
Don’t forget to properly get rid of the old bulb. Many places have recycling options. This way, you help the environment too. By following these how to replace light bulb steps, you keep things safe and efficient. Choosing the right bulb improves your porch light, making it brighter while using less power.
Ultra bright 5000K daylight for clear visibility: experience vibrant daylight with 5000K color temperature that mimics natural sunlight. Pperfect for outdoor areas like driveways, security lighting, garages, and warehouses.
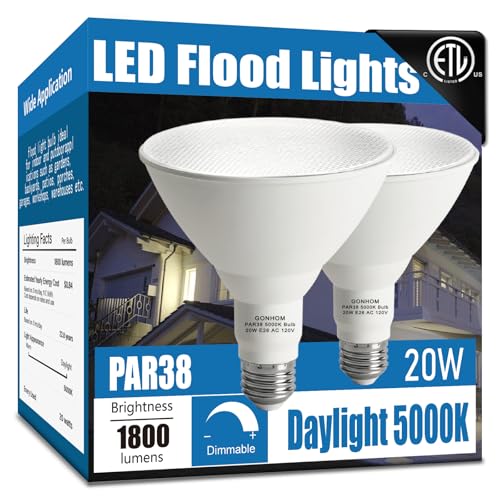
Energy Saving: Par38 LED flood light outdoor bulb use only 20W, equivalent to 200 watt LED bulbs, enjoy 1800 LM daylight lighting saving up to 85% electricity bill.

Simple Setup: Screw GE LED+ Motion Sensor light bulb into a fixture that fits an E26 medium base and turn on the power; light will turn on automatically when motion is detected at night - no app, hub or Wi-Fi needed!
Safety Tips While Changing Bulbs
Safety should always come first when changing porch light bulbs. By following key safety steps, many common accidents can be avoided. Did you know that around 30% of home electrical accidents happen during tasks like changing light bulbs? Here are some crucial electrical safety tips and safety guidelines for changing bulbs to keep you safe:
First, always turn off the power at both the switch and the breaker before starting. This simple action cuts the risk of electric shock by half. Also, it’s important to use a stable ladder for reaching overhead lights safely. Ladder falls cause over 20,000 injuries a year in the U.S. Avoid using chairs or tables as they make falls 40% more likely.
Be careful when touching bulbs with your bare hands, especially if they’re hot or broken. Incandescent bulbs can get as hot as 300°F (149°C), leading to severe burns. Always wear protective gloves or use a cloth when handling these bulbs. Also, LED bulbs have small amounts of heavy metals, so handling them carefully and washing your hands after is wise.
Over-tightening a bulb can cause problems too. It might break the bulb, damage the fixture, or cause electrical issues. Stick to the fixture’s recommended wattage. Using a bulb that’s too powerful can hugely increase fire risks. An example is using a 200W bulb in a fixture rated for only 60W.
Lastly, think about adding protective covers on bulbs that are exposed to heat to stop them from shattering. Using safety features like Ground Fault Circuit Interrupters (GFCI) helps prevent electrical shock accidents. These are important for both indoor and outdoor lights.
Common Issues When Changing Bulbs
Running into common light bulb issues can be annoying. Here are some problems you might face:
- Burned-Out Bulbs: Often seen in outdoor lights. How often they burn out depends on how much they’re used.
- Flickering Lights: This could mean loose connections, bad bulbs, or other electrical issues. It’s best to check these quickly.
- Lights Not Turning On: This could be due to no power, a tripped breaker, or fixture problems.
- Water Damage: Regular check-ups are key. Moisture can cause short circuits or rust.
- Inconsistent Lighting: This might be caused by voltage drops. Make sure to check the transformer’s wattage and use the right wire.
- Light Fixture Damage: Damage can happen from weather, hits, or just getting old. It’s good to keep up with maintenance.
- LED Lifespan: LEDs last way longer than traditional bulbs, making them a solid choice.
- Energy Efficiency: LEDs use less power, so they’re kinder to your wallet and the planet compared to standard lights.
- Low Voltage: Operating at 12V, LED lights are safer and lower shock risk.
- Environmental Impact: LEDs are better for the planet as they don’t release harmful stuff.
- Integration with Smart Systems: Lots of LED lights work with smart homes for extra convenience.
For issues like corroded connections, it’s best to clean them and apply corrosion inhibitor. Use weather guards for extra protection outdoors, and always buy good quality bulbs.
Outdoor lights may attract pests or get damaged by weather. Fire ants and rodents like squirrels can be a problem. Regular care is important.
Vibration can break delicate bulbs. LEDs are tougher against this. Ensure sockets are tight to avoid electrical problems. Having an electrician check your lights can prevent issues.
By knowing these common light bulb issues, you can fix them faster. Keeping up with maintenance helps your outside lights last longer and work better.

【Smart Dusk to Dawn Automation】 Equipped with an advanced light-sensitive sensor, this LED bulb automatically turns ON at dusk and OFF at dawn with precise on/off auto control. No timers, apps, or photocells needed—just screw it in and enjoy effortless 24/7 outdoor lighting.

Ideal Solar Outdoor Lights: 27 ft long durable Chistmas string lights with 12 LED lights and detachable solar panel with on/off switch located on the back. 20" between bulbs, 6' from solar panel to the first bulb. The lighted portion is 20 feet. LED bulbs last 20,000 hours and solar panel is rated at 1,000 charge lifespan (can last approximately 2.5 years). Direct sunlight is best for a full charge, though you can get some use from charging in indirect light.

ENERGY SAVINGS: Cut down your energy costs with 60 watt LED light bulbs that use only 9 watts of power, saving you $55.87 over their lifetime compared to traditional incandescent bulbs
Maintenance Tips for Porch Light Fixtures
Keeping your porch lights working well makes your home bright and safe. Here are tips for good outdoor light care:
- Regular inspections can prevent 30% of potential safety hazards associated with damaged fixtures.
- Cleaning your light fixtures outside can make them 50% brighter. This means better light and function.
- Bad weather can shorten your lights’ life. Weather-safe fixtures cut down on costs by around 40%.
Using LED bulbs helps you change them less often. LEDs last more than 5 years, saving you 50% to 75% on bills.
Changing things up with the seasons can make outdoor lights 20% more effective. Trim tree branches that might hurt your lights. Keep plants away to avoid blocking them.
About 15% of outdoor lighting problems come from bad wiring. Checking often reduces this risk. Surge protectors keep your lights safe from power spikes.
Cleaning isn’t just for looks; it helps lights work better. Use white vinegar and baking soda for brass. For tarnished copper, lemon juice, salt, and cornstarch are best. Always turn off the power before cleaning to stay safe. Choose soft cleaners to avoid scratching metals.
Taking care of outdoor lights can make your home look 60% nicer. It can also increase your home’s value. By following these tips, your porch lights will light up your home well for a long time.

【 50ft LED Connectable String Lights 】- This outdoor light comes with 25+2 G40 LED bulbs. Each bulb is 2 feet apart for a total length of 50 feet. It supports an end-to-end connection of up to 14 strings, allowing you to customize the length you need. These lightweight and convenient patio lights are easy to carry and store

Durable LED Solar Powered Outdoor String Lights: 48 ft long Christmas string lights with 15 LED lights and detachable solar panel with on/off switch located on the back. 3' between bulbs and between the solar panel and first bulb. The lit portion is 42 feet. LED bulbs last 20,000 hours and solar panel is rated at 1,000 charge lifespan (can last approximately 2.5 years). Direct sunlight is best for a full charge, though you can get some use from charging in indirect light.

[Smooth Dimmable] Our PAR38 outdoor LED flood lights provide a seamless dimming from 10% to 100%, you can adjust the brightness according to your preferences, creating different atmospheres as desired; compatible with various dimmers, flicker free and eye-protective
When to Call a Professional
Some jobs are perfect for DIY, but other times you need a pro. Like when your porch light keeps flickering or dimming. These signs can point to big electrical troubles. Ignoring them might lead to electrical fires, power surges, or damaged appliances.
Seeing your circuit breaker trip often? Smelling something like burning? Or finding your bulbs burn out too fast? These are signals to get an electrician. Trying to fix these issues yourself can be very risky. Plus, electrical problems cause many home fires in the U.S., hurting people and costing a lot for repairs.
Fixing small lighting problems yourself is usually okay. But with complex issues, like weird wiring or strange smells, call an expert. Making sure your porch light is set up and maintained right is key. Safety first. Always know when it’s time to bring in an electrician for these important tasks.

