Want to enhance your porch’s look? Installing porch columns can change the whole vibe, whether it’s for support or just for style. This DIY porch column installation guide will show you every step. You’ll learn about different column types and how to add the final touch. Soon, your porch will be the best view on your block!
Key Takeaways
- Columns can be used for both load-bearing and non-load-bearing applications.
- Fiberglass Reinforced Plastic (FRP) columns must have level top and bottom edges for even load distribution.
- Tools you will need include a hammer drill, masonry drill bits, and safety gear.
- Non-tapered PVC columns require specific trimming for proper fit.
- Regular maintenance and reapplication of protective coatings are crucial for longevity.
Understanding the Different Types of Porch Columns
Choosing the right porch columns means looking at all the options. They are key for support and style. Let’s dive into the types of porch columns and their special features.
Smooth Columns: These are sleek with no marks or grooves. They offer a modern vibe.
Raised Panel Columns: Found on square columns. They have a design that looks like panels. This adds elegance.
Fluted Columns: These are known for their grooves. Square ones have 5 to 6 grooves on each face. Round ones have grooves all around.
FRP Columns: Made of Fiberglass Reinforced Polymer. They’re strong and fight off moisture, rot, and pests. They’re great for support or decoration.
PVC Column Wraps: Available in two styles: non-tapered and tapered. They’re light, not costly, and simple to set up. They’re mainly for making simple posts look fancy.
Polyurethane Porch Posts: These are perfect for fighting weather and are easy to take care of. They keep your porch looking good with little effort.
Knowing these types of porch columns helps pick the best for your house. Check out this comparison of popular types:
| Column Type | Material | Key Features |
|---|---|---|
| FRP Columns | Fiberglass Reinforced Polymer | Durable, moisture-resistant, pest-resistant |
| PVC Column Wraps | Polyvinyl Chloride | Lightweight, easy to install, affordable |
| Polyurethane Porch Posts | Polyurethane | Weather-resistant, low maintenance, decorative |
| Wood Columns | Wood | Traditional, versatile, requires maintenance |
| Stone Columns | Stone | Durable, elegant, heavy, expensive |
Your decision hinges on valuing durability, maintenance ease, or looks. Whether it’s FRP columns, PVC column wraps, or polyurethane porch posts, understanding your choices means a stunning, lasting porch.

Premium Aerospace-Grade Aluminum: Our 6x6 post base cover is crafted from high-strength aviation-grade aluminum alloy. Its surface undergoes chemical pretreatment followed by UV-resistant powder coating at high temperatures, delivering waterproofing, corrosion resistance, UV protection, and salt/alkali tolerance. It withstands diverse climate tests.

Designed for Post-Top Light Fixtures: Securely mounts compatible outdoor post-top lanterns and light fixtures to columns, piers, deck railings, and other flat surfaces; designed for fixture mounting only and not intended to support a lamp post

PATIO CHAIR COVER: Our durable cover fits most standard stackable patio chairs, high-back chairs, and bar stools up to 27" L x 27" W x 49" H. It does not entirely cover the chair's legs or wheels.
Tools and Materials You Will Need
To install porch columns, you’ll need various tools and materials. You must have load-bearing posts, pressure-treated lumber, and construction adhesive. Also, using the right tools, like circular saws and levels, prevents damage to your materials.
It’s important to know the tools needed for installing porch columns. Here’s a list:
| Tool | Description |
|---|---|
| Circular Saw | Essential for cutting lumber and materials for porch columns to the desired length. |
| Level | Used to ensure that columns are plumb and accurately aligned during installation. |
| Plumb Bob | Helps in achieving a true vertical line for precise column placement. |
| Construction Adhesive | Secures caps and bases, preventing loose fittings and ensuring durability. |
| Fasteners | Includes screws and nails necessary for securing various parts of the column assembly. |
| Hammer Drill | Required for drilling holes into concrete, especially for anchoring porch columns. |
| Safety Gear | Gloves, goggles, and dust masks to protect against debris and dust during installation. |
Choosing the right materials is vital for your porch columns. Using pressure-treated lumber helps them last longer. If you’re working with split columns, cut them a bit shorter than needed for a snug fit. For PVC columns, use E-Z Lock joints and finish nails, leaving a gap at the top for expansion.
For a great finish, put on at least two coats of acrylic latex paint and fit post skirts at the top and bottom. The right tools and materials are key to a successful porch column project.

Powerful 15-amp motor delivers 5 300-RPM for greater speed and faster cuts

Small Bubble Spirit Level Set: our product set includes 6 mini magnetic square drill bubble levels and 3 circular bubble levels, designed to assist in precise leveling tasks in various applications; These tools are especially useful for projects that require accuracy, such as leveling phonographs, cameras, turntables, tripods, frames, drills, and more

POWERFUL MOTOR: Powered by a strong 6-amp motor, this corded hammer drill delivers up to 3,000 RPM, Impact Frequency up to 48000bpm for reliable performance on demanding jobs. Great for drilling and chipping into wood, masonry, steel, concrete, and wall surfaces for home improvement, renovation.
Measuring and Planning Your Installation
Getting your measurements right is key for a successful porch renovation planning. Make sure you have tools like a tape measure, level, and a miter saw ready. Follow this guide to measure for porch columns and plan your installation accurately.
First, figure out the height from the beam to the platform. Remember to include post skirts in your measurements. Measure down to the nearest 1/16 inch. Also, think about the angles you’ll need for installation, especially when cutting column parts. With a miter saw, cut column parts at a 45-degree angle. For AFCO aluminum columns, cut each stave a quarter inch longer than needed. This ensures a tight fit.
When making plans for planning column installation, think about the materials. Cedar posts are a good choice because they don’t easily twist or warp. PVC boards work well for trim. Use a 1×6 board for the top and a 1×8 PVC trim for the bottom. Hold these in place with 18 gauge nails, using an 18 gauge nailer. Adding liquid nails construction adhesive will keep PVC boards stuck to the cedar post and trim pieces.
Marking center lines is crucial when preparing for column installment. AFCO aluminum columns can bear loads, supporting roofs, decks, porches, and carports. Keep your columns straight with a level. You might also want to use AFCO Column Hold Down Clips or AFCO Hurricane Installation Brackets for extra hold.
To fit post wraps, measure carefully and then subtract 1/8 inch from the opening’s height before cutting all four sides. This method ensures a perfect fit. For great results, use paintable caulk to fill seams and nail holes. This makes everything look smooth before you paint. This technique gives your columns a sturdy, “chunky” look that’s both beautiful and strong.
Preparing the Installation Site
Getting your site ready for porch column installation is key. This means clearing the area, checking its condition, and making a stable base. This helps set the porch column base smoothly, whether it’s for looks or structure.
If replacing old columns, you might need to lift existing beams a little. Make sure to lift no more than 1/4 inch to avoid damage. Then, make the ground level and clean up any mess. A solid, level base is crucial for all types of columns.
For extra stability, you may need L-brackets. They need holes of 1 3/8 inches and must be tightly attached. Each split column should have four L-brackets, two on each side.
When trimming columns, cut them a bit shorter, between 1/4 and 1/2 inch less. For wider columns, use spacers every 2 to 3 feet for alignment. Also, leave a 1/4 inch gap at the top for expansion.
If you’re looking for step-by-step help, check the Easy Porch Column Installation Guide. It has detailed instructions.
During the base setting, focus on aligning and securing it well. Use strong adhesives like PL Premium and finishing nails for a neat look. Secure the base and cap, then caulk any gaps for smoothness.
Proper preparation makes your porch column installation solid and lasting. This is how you get beautifully installed porch columns.
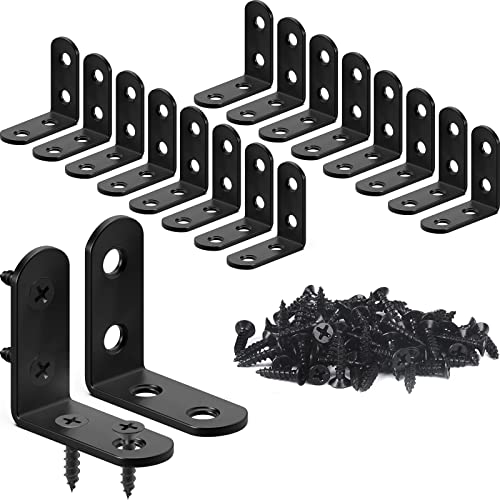
GREAT VALUE & WITH STORAGE TIN: You will get FATLODA 18PCS L brackets (with 72PCS screws) and they come in a cute reusable tin, very convenient to store or carry. Each corner bracket size: 40*40*16mm/ 1.57*1.57*0.63in, the thickness: 2mm/ 0.08in, and the hole diameter: 5mm/ 0.2in. The screw length: 16mm/ 0.63in, screw head diameter: is 7mm/ 0.27in.
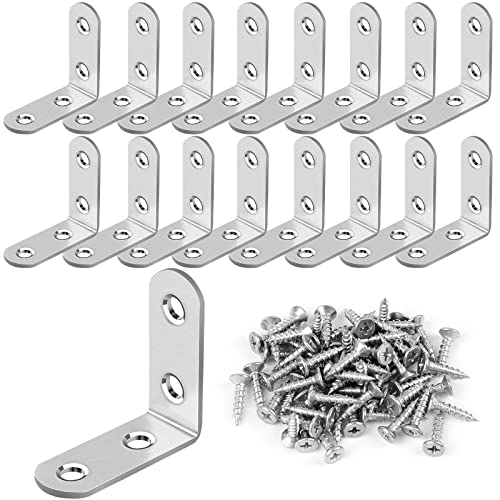
Premium Material: Our L brackets and screws are made of high quality stainless steel material. Rust-resistant and strong, it will last longer. The minimalist silver finish and rounded edges are smooth without burrs. Don't worry about scratching your hands or furniture during use.

SUPER VALUE & COST - EFFECTIVE: Unleash your creativity affordably! Our L brackets kit includes 20 brackets and 80 screws. The sufficient quantity can meet all your different needs and future projects. Each L bracket measures 1.57*1.57*0.63 in, with a thickness of 0.08 in and an aperture of 0.2 in. The screw has a length of 0.63 in and the diameter of the screw head is 0.27 in.
Step-by-Step Guide to Installing Porch Columns
Welcome to your guide on installing porch columns! Following a step-by-step column installation process makes sure your project goes well. It enhances your home’s look and keeps it sturdy.
- Prepare Your Tools and Materials: Gather all needed tools and materials first. This includes a level, rubber mallet, L-brackets, construction adhesive, and PVC or FRP columns.
- Measure and Trim Columns: For straight PVC columns, the inner width should match pressure-treated lumber. For angled columns, cut the shaft 2 ¼” shorter than the space.
- Drill Pilot Holes: Drill holes for screws for a firm fit. This is key for tops and bottoms. For concrete, holes should be about 1/4″ deeper than the bolt.
- Secure Columns with L-Brackets: Secure top and bottom with 1 3/8” L-brackets. Drill clearance holes as needed.
- Apply Construction Adhesive: Spread polyurethane glue as suggested when assembling. Glue between cap and shaft, and base and shaft, must be even for stability.
- Install the Columns: Place each column carefully, ensuring it’s vertical. Adjust with a rubber mallet for a tight fit.
- Add Finishing Touches: Fill any holes with putty. Sand the columns for painting. Apply two coats of primer and paint for protection.
By following this detailed DIY porch column setup, your home’s outside beauty will boost, raising its value. Keep them well-maintained to enjoy your work for many years.
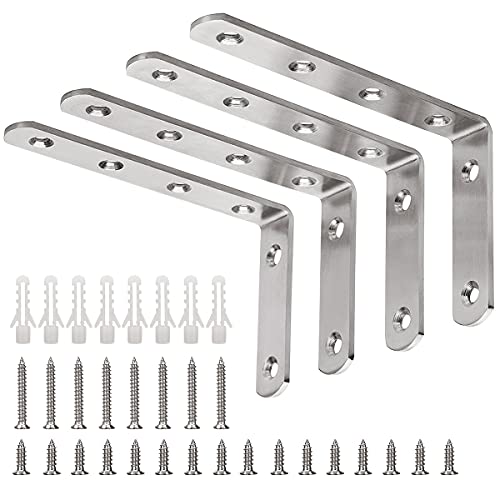
STURDY & DURABLE - Shelf Bracket and the fitting screws are made of solid stainless steel, brushed finish, is rustproof, anti-corrosion, more strong and durable, not easy to bend and deformation

Application: Our adjustable half column deck post base brackets are used to repair and strengthen the post. The half column base adapt to different sizes of wooden columns, such as 1.5" x 1.5", 2" x 2", 2" x 4", 4" x 4". Suitable for deck post supports, wood pile welding project

Durable Carbon Steel: L Shape Flat Bracket are made from heavy duty Q235B steel,no deformation.Black powder coated for a rust free, strong and durable.
Finishing Touches After Installation
After installing your porch columns, you must add the right finishing touches. These improve both the look and life-span. Sanding the columns smooths them out. This step gets rid of rough spots or splinters. After you sand, make sure to clean off any dust and dirt. This prepares them for the next steps.
To finish your porch columns right, you need quality paint. Choose paint that can stand up to weather. Painting your porch columns makes them look new and last longer. Pick a color that looks good with your home’s outside to make it stand out.
Sealing your porch columns is also key. Use the best caulk to seal cracks so moisture can’t get in. Wood columns especially need a protective seal to prevent rot and bugs. Did you know half of the people with wood columns don’t protect them? This leaves them open to damage.
Here’s a detailed table summarizing the important steps and benefits involved in painting and sealing porch columns:
| Step | Description | Benefit |
|---|---|---|
| Sanding | Smooth out the surface of the columns | Better paint adhesion, smooth finish |
| Cleaning | Remove dust and debris | Ensures clean surface for painting |
| Painting | Apply weather-resistant paint | Protects against elements, enhances aesthetic |
| Sealing | Use high-quality caulk and wood sealer | Prevents moisture infiltration and pest damage |
Paying close attention to these final steps makes your porch columns stronger and better looking. Don’t skip them. They’re crucial for keeping your installation in top shape.
Maintenance Tips for Your Porch Columns
Keeping your porch columns in good shape is key to making them last. It’s important to check them often for any signs of damage like cracks or weather effects. Watch out for moisture and bugs that can harm wood columns, and deal with these issues right away.
Using column wraps can make maintenance easier. You can choose from materials like vinyl and cellular PVC. These wraps help prevent rot, insects, and water damage. Vinyl is more budget-friendly but needs more care than PVC. However, PVC wraps don’t need much upkeep and can fight off moisture and bugs. They also look great and can make your porch columns stand out.
If you prefer the look of wood or stone, consider faux wraps. These can mimic the natural style without the downside of rot and bug problems. Polyurethane wraps are an attractive, low-cost option. Keep them looking good with regular cleans and updates on paint or sealant. By following these simple care tips, your porch columns will stay beautiful and sturdy for many years.

