Do you want to make your porch look better or have a new style? Wrapping your porch posts with wood is a great DIY project. It not only brings a natural charm but also stands up to weather better. If you’re set on improving your porch, this guide teaches you to wrap your posts with wood in a wonderful way.
Key Takeaways
- Original post dimensions: 4″ x 4″, final column dimensions: 6.75″ width.
- Three porch posts were wrapped, using six spacers per post.
- Four pieces of lumber were used to create the box around each post.
- The project was finished in one weekend in Michigan.
- Minwax Early American stain and outdoor-safe polyurethane sealant were used.
- Durable through all seasons, including harsh winters.
- Only required a few extra minutes for sanding to achieve a smooth finish.
Understanding the Benefits of Wrapping Porch Posts
Renovating your porch has big benefits, especially with wood posts. Wrapping your porch posts improves looks, makes them last longer, and cuts down on upkeep.
Deck post wraps look fancy without costing a lot. They let homeowners upgrade their decks without spending much. You can pick from many styles, making it easy to change your deck’s appearance whenever you like.
Post wraps also make your deck stronger, helping it resist the weather and last longer. They’re easy to put on by yourself, which saves money on hiring someone. You can finish the job in just a few hours, making it a quick way to upgrade.
| Material | Durability | Cost |
|---|---|---|
| Wood | 5-10 years with regular maintenance | $$ |
| Concrete | Extremely durable, resists rot and warping | $$ |
| Metal | Very durable, withstands severe weather | $$$ |
| Stone | Highly attractive, most expensive | $$$$ |
| 100% Cellular PVC | Durable, low maintenance | $$ |
Wrapped porch posts boost your home’s curb appeal, which is key when selling. Homes with great curb appeal can sell for 7-14% more. Also, doing it yourself can save you half the cost of hiring someone. Most wood wrap projects can even be done in less than a day.
A survey shows that 65% of homeowners enjoy their outdoor spaces more with a nicer porch. So, wrapping your porch posts not only improves the look but also adds to your home’s function and enjoyment.
Choosing the Right Type of Wood
When picking the best wood for outdoors, think about both durable wood types and aesthetic wood choices. These choices shape how long your porch posts last and how good they look. Let’s look at some great outdoor woods, focusing on their strength and beauty.
Yellow Pine stands out as a great pick for porch columns. It’s strong and won’t break your bank. While strong, non-treated Yellow Pine needs regular upkeep to stay in good shape.
If lasting long is key, go for African Mahogany. It’s known for fighting rot and lasting a long time. Plus, its color ranges from light to medium red, making it a top aesthetic wood choice.
Want something that fights rot and bugs without much upkeep? Spanish Cedar is your go-to. Its natural oils keep insects away, reducing the need for chemical treatments.
Here’s a quick look at some durable wood types:
| Wood Type | Durability | Aesthetic Appeal | Maintenance |
|---|---|---|---|
| Yellow Pine | High | Economical | Regular Sealing Required |
| African Mahogany | Very High | Reddish-brown tones | Moderate |
| Spanish Cedar | High | Warm tones | Low |
When choosing your wood, mix aesthetic wood choices and durability for your porch’s needs. Whether it’s Yellow Pine for its cost-effectiveness or African Mahogany for luxury, make sure it fits your style and how much work you want to put into it.
Preparing Your Porch Posts for Wrapping
Investing time in preparing your posts is key for a smooth and professional finish. Proper DIY porch prep involves important tasks. These tasks create the foundation for a successful project.
Start by taking off any old coverings or paint from the posts. Use a scraper or sandpaper for this. Your goal is to have a smooth, clean surface. Sanding helps with tight joints and gives a modern look. Planning the wood is advised for an even smoother finish.
Next, measure your posts accurately. This ensures your cuts are the right size. You have to think about the thickness of the wood planks you’ll add. Usually, you need four planks per post—two for the sides and two for the front and back. For example, for a 6-inch wide post with 0.5-inch thick planks, you’d cut the front and back planks to 7 inches each.
Before cutting, think about which lumber to use. Fir or yellow pine are good if you’re watching your budget. But if you want a premium look, consider oak, birch, or mahogany. Each type brings its own look and durability. Choose what fits your style and budget.
In your DIY porch prep, think about not staining the sides of planks that face the posts. It’s a way to save on materials and work without losing quality. Make sure your screws are long enough to go through the new planks and into the posts. For nails, use 2” 18 gauge brad nails about 1” apart to secure the faceboard.
Keeping track of your progress and materials is easier with a simple table. Here’s a quick guide:
| Lumber Pieces Required per Post | Quantity | Length | Thickness |
|---|---|---|---|
| 1 x 8 Lumber | 4 pieces per post | 8 feet | ¾” |
| Total Lumber for 4 Posts | 16 pieces | 8 feet each | ¾” |
By carefully following these preparatory steps, you’re more likely to have a smooth wrapping process. The effort you put in now will make a big difference in the end result.
Step-by-Step Guide to Wrapping Your Porch Posts
Wrapping your porch posts with wood boosts your home’s look and protects it. Here’s a detailed guide on how to wrap porch posts yourself, from start to end.
First, measure your porch post. They’re usually about 5.5” square. You’ll need four lumber pieces for each post, each being ¾” x 7 ¼”. For four posts, get 16 pieces in total. Your post size will end up about 8” square.
Cut the lumber with a circular saw to the right length. Make sure all pieces are exactly the same size. Trim the sides of the boards to 5.75” for a snug fit.
To start porch post installation, attach the side boards first. Use 3-inch screws that resist weather. Add 2-inch 18 gauge brad nails one inch apart for more strength. Then, put on the front and back boards, leaving the trimmed boards for last.
Use clear PVC glue to join the final pieces. If there are gaps, use shims at heights of 3” – 7” and 33” – 37”. This keeps your wrap solid for years.
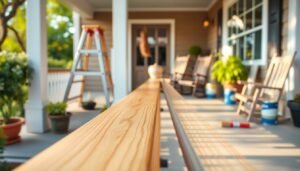
For a polished look, sand the edges with a block and 320 grit sandpaper or finer. Paint with two coats, then apply two clear polyurethane coats. This keeps the wood safe from moisture, bugs, and decay.
Choosing the Right Finishes and Stains
Choosing the perfect finishes for your porch columns is essential. The right wood stains and protections improve both looks and durability. You’ll see a big difference in how your porch looks and lasts.
A great mix is 75% Ipswich Pine with 25% Early American stain. This mix looks good with many house styles. Then, add three layers of tough outdoor poly. This will keep your columns safe from weather damage.
Always try your stains on extra wood pieces first. Since wood varies, this test helps you get the color you want. Making your porch look better can also increase your home’s value. Even though we can’t give specific figures, a nicer porch will impress people.
Did you know, 90% of people with cypress posts do the upkeep themselves to save money? DIY care costs about $80 every 1.5 years. This includes varnish and sandpaper. But, paying a pro can cost about $1,000 due to the hard work involved.
Stained posts in the sun need touch-ups every three years. Reapply marine varnish then for best sun protection. TWP stain/sealer is also recommended. Many users say it’s so good, you don’t need an extra topcoat.
In the end, picking the right finishes and stains is about knowing what works for your porch. With the right care, your porch will look great and last longer.
Maintenance Tips for Your Wrapped Porch Posts
Maintaining your wrapped wood posts is key for a long-lasting, beautiful porch. Make sure they are the right height and width before installing. This prevents any future structural problems.
Regularly check that the panels are secure. Nails need to be every 6-8 inches for the best hold. If nails get loose, nail them back in or replace them.
Don’t forget to look after the painted surfaces. Every few years, put on a new coat of water-resistant, latex-based outdoor paint. Let the final coat dry for at least 24 hours to ensure it sticks properly.
Caulking the edges is also crucial to keep moisture out and stop rot. Caulk drying times range from 3-12 hours. Always follow the caulk manufacturer’s instructions. Proper caulking helps avoid moisture damage.
Adding decorative molding can boost your porch’s look and add protection. Moldings should be about 4-6 inches high and attached with 1.5-inch nails. This not only looks good but keeps the edges sealed too.
Always check for rot or bugs, as wood wraps can easily get damaged. Fix any damage right away to avoid more problems. Small steps like these help keep your porch posts in good shape.
If you don’t want the hassle, consider PVC or aluminum for a maintenance-free option. Yet, if you love wood’s natural look, regular care is a must. Stick to these tips for a beautiful, strong porch for many years.
Common Mistakes to Avoid When Wrapping Posts
Wrapping porch posts can make your home look better. But, making DIY mistakes can mess up your project. It’s important to know about these errors to save time, effort, and money. One big mistake is not measuring correctly. Make sure to measure every side of each post well. Since houses aren’t always straight, precise measurements are key to avoid a bad wrap job.
Another mistake is not thinking about water. Rain can really harm your project. For example, all the corners and joints in some projects came apart after getting wet. Plus, it was found that oil paint may crack and peel when exposed to moisture. Choosing PVC over wood for column bases is smarter. PVC, like 1 inch by 8 inch boards, is better at handling moisture.
Handling gaps is also important but often overlooked. Leaving a 1/2 inch gap between the PVC and floor helps air flow. The gap between molding and floor should be from 1/16th to 1/8th inches. But, if gaps are not managed right, they can cause problems. Use good outdoor filler or caulk to fill gaps from wood warping.
Choosing the right tools and materials is key in porch projects. You’ll need a nail gun, miter saw, and clamps to keep boards straight. Boards from stores like Lowe’s and Home Depot might not be straight, which can mess up your project. Clamps help fix this and make sure the fit is tight. When nailing, put at least two nails in each board. Adding more nails will make it more stable.