Welcome to our detailed guide on making a burlap wreath! We’ll show you how to create a beautiful wreath that fits any season or event. Burlap wreaths bring a touch of rustic charm to your home. By following this guide, you’ll learn to make a stylish wreath base. You can then personalize it with different decorations to showcase your style.
Key Takeaways
- A 14″ wire wreath form is the standard size used for making burlap wreaths.
- You will require 24-30 pipe cleaners to secure the burlap or deco mesh.
- Two rolls of wired ribbon, each at least 9 feet long, are recommended for decoration.
- DIY burlap wreaths take about 1-2 hours to make, perfect for beginners.
- 60% of DIY enthusiasts find that using materials from dollar stores reduces costs.
What You Need to Get Started
Making a beautiful burlap wreath at home is both fun and fulfilling. To start, you’ll need some essential supplies. Grab a wire wreath frame that’s about 14.5 inches wide. Also, make sure to have two rolls of burlap ribbon. Each should be 5.5 inches wide and 30 feet long.
Don’t forget other important items like zip ties or pipe cleaners. They help secure the burlap in place. Sharp scissors are a must for cutting the ribbon. These simple items are what you need to begin your wreath.
You might want to add some special touches such as floral picks, sparkly stems, or bows. These decorations can make your wreath stand out for any event like Christmas or the Fourth of July. For burlap, check local craft shops or online stores like Amazon to find a variety of options.
| Material | Specification | Cost |
|---|---|---|
| Wire Wreath Frame | 14.5 inches in diameter | $5 |
| Burlap Ribbon | 2 rolls, each 5.5 inches wide and 30 feet long | $10 |
| Zip Ties or Pipe Cleaners | Pack of 50 | $3 |
| Scissors | Sharp and durable | $2 |
With about $20 and roughly 35 minutes, you can make a unique burlap wreath. It’ll reflect your personal style and match the season’s decor.
Understanding Different Burlap Types
Starting on a crafting with burlap project means knowing the types of burlap you can use. This will help your crafting go smoothly and make your creations look good and last long.
Burlap types mainly fall into loose or tight weaves. Loose weave burlap is perfect for a homemade, breezy look. It’s great for simple or seasonal decorations. You can make a lovely looped wreath for less than $10. Tight weave burlap, though, has a neater and stronger feel. It’s best for fancier designs.
When planning, think about how much burlap you need. A 12-inch wreath frame might use 10 yards of burlap. An 18-inch one could need about 20 yards. Burlap strips should be 3 to 4 inches wide. For looped wreaths, 3 to 6-inch wide ribbon is good. You’ll likely buy 3-4 rolls at $2 to $5 each for a thick wreath.
Picking the right burlap also involves considering decorations. For seasonal wreaths, you might add 3 to 5 decorations. Burlap is a favorite for about 70% of crafters because it’s cheap and flexible. Choose the burlap that matches your idea the best.
Preparing Your Work Area
Having a neat workspace is key to an easy crafting adventure. Make sure to have a big, clean area ready, with all materials close by. This makes organizing your supplies simpler and gets your project ready faster.
Start making a burlap wreath by collecting everything you need, like burlap, a wire frame, scissors, and decorations. Keep these items in marked containers or drawers to keep things tidy.
A 18-inch wire frame and 6-inch wide burlap are perfect for most wreaths. You’ll need about 20 yards of burlap for a 18-inch frame. Plan to make 6 loops in each section of the frame.
| Item | Details |
|---|---|
| Burlap | Approx. 25 yards (6-inch width) |
| Wire Wreath Frame | 18-inch for standard size |
| Time to Complete | Approx. 20 minutes for burlap part |
| Loops per Section | 6 loops (3 slats each) |
| Loop Size | 4-5 inches |
| Decorative Elements | Big burlap bow, flowers, family initials, etc. |
It’s a good idea to use a protective mat in your crafting area to catch burlap bits. This step keeps your area clean and makes the project set-up easier. Organizing your supplies beforehand saves time and lets your creativity soar.
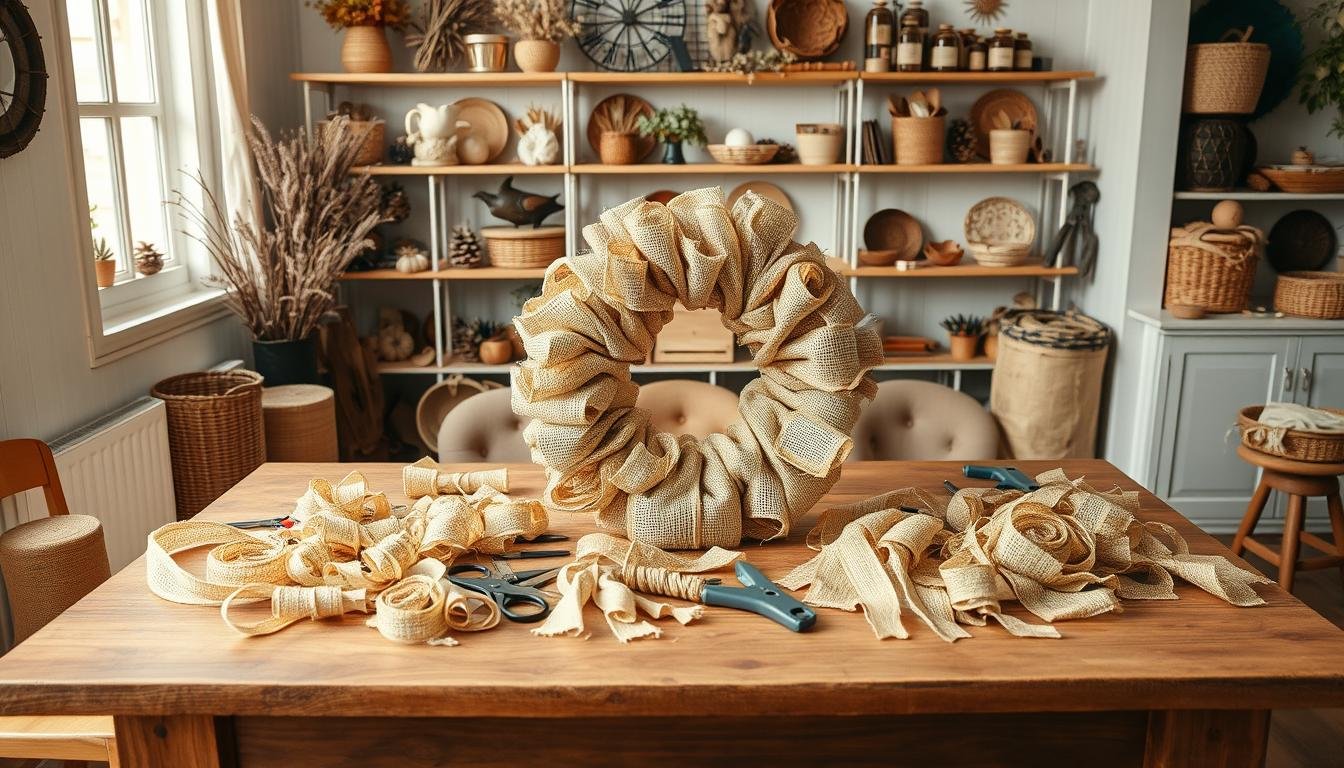
Step-by-Step Instructions
Making a burlap wreath is both fun and worthwhile. This burlap wreath tutorial has every step you need. You’ll end up with a beautiful decoration for your home by following these step-by-step DIY wreath instructions:
Materials Needed:
- 16-inch wire wreath frame
- 15 feet of burlap ribbon per quarter frame
- 3 spools of 18-foot accent ribbon
- 3 artificial accent flowers
- One wooden letter
- Two 10-inch pieces of twine
- High-temperature glue gun
- Small pliers
- Protective sealer spray paint (for outdoor use)
- Optional: Battery-operated mini LED string lights
Techniques:
Ready to craft your wreath? Learn the scrunch-and-poof and the wrap-and-bunch methods. These methods are about attaching and shaping burlap on a frame. They help you get just the right look.
- Scrunch-and-Poof Method:
This approach gives your wreath a fluffy look. Begin by fixing one end of your burlap to the frame with pliers. Then, make loops around 6-7 inches big by bunching the ribbon. Secure these loops at intervals. Keep going until the frame’s full.
- Wrap-and-Bunch Method:
Want a more organized look? Start by attaching the burlap ribbon’s end to the frame. Wrap the burlap tightly around, creating bunches for volume every couple of inches. Make sure the layers look even.
- Accent Ribbons and Flowers:
Cut your accent ribbons and make knots at the wreath’s back for neatness. Use a glue gun to attach the flowers. For a unique touch, tie on a painted wooden letter. Consider adding some LED lights.
- Finishing Touches:
If your wreath will be outside, don’t forget to spray it with sealer. This protects it from water damage. To display, simply use a wreath hanger or nail to hang your lovely burlap wreath.
This DIY project takes just a few hours, perfect for a fun day with friends or family. With this how to make a burlap wreath guide, you’ll make something special. Enjoy!
Tips for Weaving Efficiently
For efficient wreath making, it’s crucial to keep your workspace neat. Start by organizing your burlap strips well. Trim any frayed edges to keep things looking clean. Using tools like zip ties secures the burlap and avoids future adjustments.
Avoid fluffing your burlap until the wreath is fully made. This makes the crafting process smoother and quicker. Using burlap strips of the same width, about 6 inches, ensures an even look. Picking classic colors like red and green adds to a festive Christmas wreath.
Experimenting with different securing methods, like pipe cleaners or zip ties, can boost efficiency. Choosing the method you prefer can greatly enhance your crafting flow. Each crafting step, from careful cutting to smart securing, makes your wreath-making more seamless and fun.
Lastly, think about your decorations. Over 75% of wreath makers say using natural accents like pine cones makes wreaths look better. These additions, along with your efficient techniques, create a beautiful and lasting wreath for any event.
Customizing Your Burlap Wreath
Starting to personalize burlap wreath offers endless possibilities. Pick decorations that match the season or your style. For spring, floral picks are perfect; for the holidays, glitter stems add sparkle. Turn a plain burlap wreath into an eye-catching piece for your home with these DIY wreath decoration ideas.
Adding rustic items like pinecones or dried wheat brings texture and depth. Creating bows from various ribbons can also enhance your wreath. With burlap, wire frames, and floral wire, you can start a budget-friendly DIY project—usually under $20. For beginners, there’s a helpful tutorial here.
Add a large initial or monogram to make your personalize burlap wreath stand out. Paint a wood letter and seal it for a custom, affordable touch. These wreath customizing tips let you change up your decor with each season, creating something truly unique.
Burlap wreaths are versatile and easy to adapt. Decorate with more greenery for fall or go festive for Christmas. The supplies, like 30 inches of wired ribbon and a 6-crossbar frame, make crafting fun. Even beginners improve with practice, making it a rewarding project for all DIY fans.
Caring for Your Burlap Wreath
Looking after your burlap wreath right helps it stay pretty year after year. When it comes to maintaining burlap wreaths, easy steps can make a big difference. Start by keeping the wreath clean and free of dust. You can use a soft brush or a hair dryer on cool to gently get rid of dust.
It’s very important to store your DIY wreaths the right way. They should be kept in a cool, dry spot where the sun doesn’t reach. This stops colors from fading and the material from getting ruined. Use things like wreath boxes or big plastic bags to keep them safe from dampness and dust. Below is some advice on the best ways to store DIY wreaths and other important care tips.
| Wreath Care Tips | Description |
|---|---|
| Cleaning | Use a soft brush or cool setting on a hair dryer |
| Storage | Store in a cool, dry place away from direct sunlight |
| Protection | Use wreath boxes or large plastic bags |
| Longevity | Proper cleaning and storage extend lifespan |
By keeping these wreath care tips in mind, your burlap wreath will stay looking vibrant for many future seasons. A bit of care makes all the difference in maintaining burlap wreaths, no matter the occasion.
Conclusion and Final Thoughts
Making your own burlap wreath mixes fun and usefulness, leading to great results. It only takes about 30 minutes and costs roughly $10, making it quick and affordable. You’ll spend about 10 minutes getting ready and 20 minutes creating, using a 12-inch base and wide burlap ribbon.
Finishing a project like this is rewarding and makes your time valuable. You can personalize it with colorful fake leaves and sunflowers if you like. The materials are eco-friendly, and you can reuse things like pins. It’s also a fun activity for kids, so the whole family can join in.
In conclusion, making wreaths is more than just a craft. It’s a way to express your style, whether simple or fancy. DIY projects are not only fun but also good for the planet. They bring joy to your home decor. When you hang your wreath, feel proud of your creative effort. It makes the whole process worthwhile.