Experience the joy of making your home decor special by learning to tie a wreath sash. This guide will help anyone, whether you’re new or experienced, make their door or wall look great. Mastering the wreath sash knot is key for holidays, celebrations, or just to add seasonal beauty.
Learn more about secure and damage-free hanging techniques for your wreaths. This complements your festive look.
Key Takeaways
- Choosing the right materials is crucial for a beautiful and durable wreath sash.
- Preparation of both wreath and sash ensures easy and flawless tying.
- Mastering the wrapping technique can make your sash look professionally done.
- Creating the perfect bow adds the finishing touch to your decoration.
- Final placement tips will help you showcase your DIY wreath decoration in the best light.
Choose the Right Material for Your Wreath Sash
Choosing the best material for your wreath sash is important. It affects how it looks and lasts. Fabrics like silk and velvet add a touch of luxury, perfect for fancy places. For a country or outdoor vibe, burlap or linen are great. They go well with nature.
When picking out fabric, think about its feel, weight, and color. These features should match your wreath sash design well.
| Material | Attributes | Recommended Uses |
|---|---|---|
| Silk | Smooth, luxurious, vibrant colors | Elegant settings, formal events |
| Velvet | Soft, rich texture, opulent look | Holiday decor, winter themes |
| Burlap | Rough, natural, durable | Rustic, outdoor decor |
| Linen | Lightweight, earthy, versatile | Farmhouse styles, spring themes |
| Painter’s Drop Cloth | Affordable, versatile, easy to dye | DIY projects, casual settings |
For example, making a monogrammed wreath sash usually needs just 1/3 yard of fabric. A typical fabric size for a sash is 12 inches wide and 54 to 60 inches long. The best width for a sash is between 5 and 5-1/2 inches. This allows the embroidery design to be at least 4 inches tall so it’s easy to see. Hand embroidery is getting popular again thanks to Instagram and YouTube. It adds a special and personal touch to your wreath sash.
Prepare Your Wreath and Sash
Before you set up your wreath, check that both the wreath and sash look perfect. For faux wreaths like the boxwood, make sure they’re clean and undamaged. Fresh wreaths need to stay wet to look good. Take a good look at your wreath to ensure it’s ready for decorating.
Now, get your sash ready. Spread it out and smooth away wrinkles or folds that could spoil the look. This step helps you get a sleek, nice look for your DIY wreath project.
Choosing the right sash for your wreath matters a lot. If you have a round wreath, pick a wide sash. For square or different shaped wreaths, a narrow sash works better. The aim is to make the sash and wreath look good together.
To make a deco mesh snowman wreath, you need to plan ahead. You will need:
- 2.5 rolls of 10” deco mesh
- 26” of white 21” deco mesh
- 1 large orange chenille stem for the nose
- 2 black pom poms (2” size) and 4 black pom poms (1” size) for the face
- 4-5 black chenille stems and 2-3 white chenille stems for putting it together
- About 5 yards of 2.5” wired ribbon for the bow
- A 12” cake board for the base
- 12 x 18” white craft foam for the back
- 5 pipe cleaners for the hat
- Some hot glue
The materials you pick are key to how your wreath turns out. You can use hoops, straw, wire, foam, ropes, or vines for the base. Fresh grapevines are easy to shape, but dry ones can break easily. Adding herbs like lavender adds both scent and beauty, perfect for summer.
For a fall wreath, try using wheat, oats, millet, goldenrod, or broom corn. These give your wreath the feel of fall and add interesting textures. Remember, it’s better to use herbs that dry well.
If you’re making a fabric rag wreath, you might need about 2.5 yards of fabric for a 14-inch form. For anything bigger, you’ll probably need more fabric. This is a fun craft you can do while watching TV or a game.
| Wreath Type | Materials | Notes |
|---|---|---|
| Deco Mesh Snowman | Deco Mesh, Chenille Stems, Pom Poms, Cake Board, Craft Foam, Ribbon, Hot Glue | Viral Trend |
| Fabric Rag Wreath | Fabric Strips | Requires 2.5 yards of fabric for 14-inch form |
| Herb Wreath | Lavender, Rosemary, Thyme, Other Hardier Herbs | Herbs should be 4-6 inches long |
Follow these steps to prep your DIY wreath. Each wreath type needs different materials and care. But with the right prep, your holiday decor will stand out.
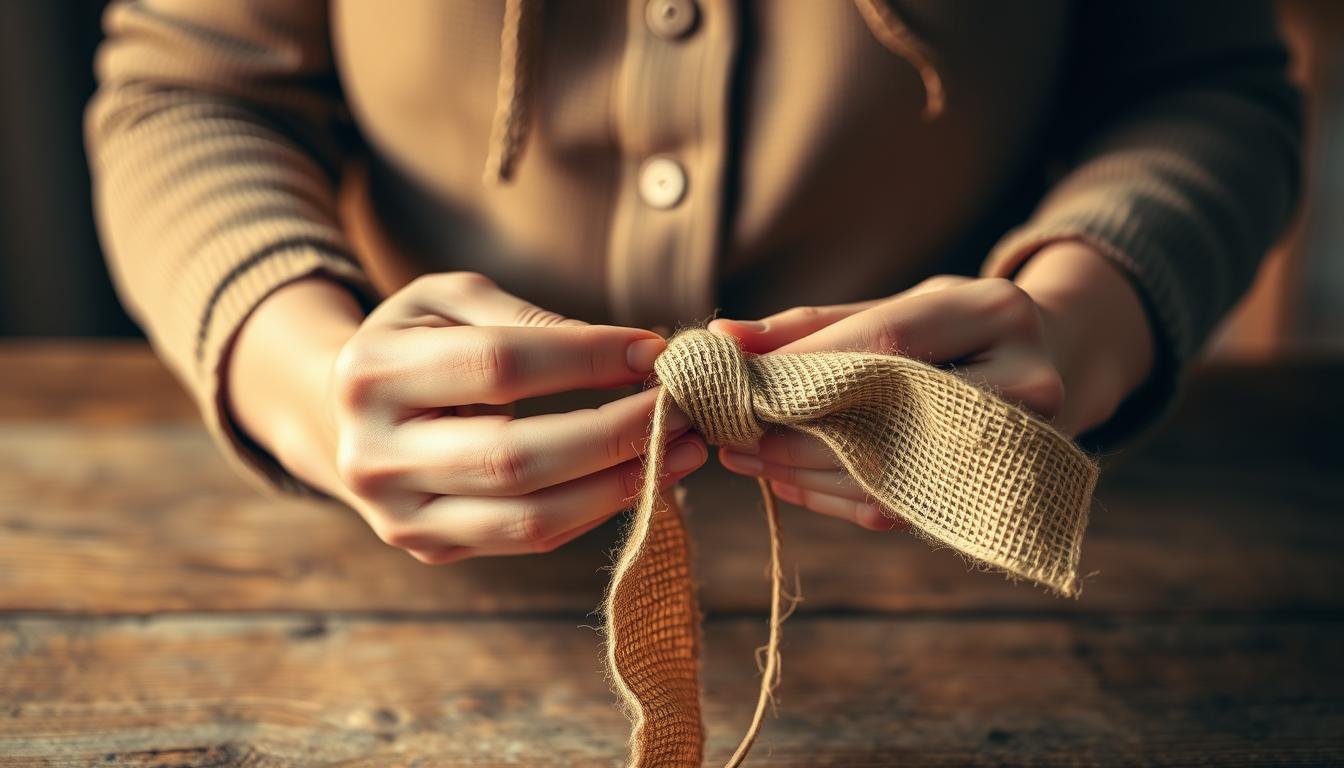
Master the Wrapping Technique
Learning how to wrap a wreath sash means more than just tying a knot. It’s about making the wreath look balanced and beautiful. First, make sure you’ve got an extra-wide ribbon, about four inches wide, on hand. This size makes the wreath stand out compared to the thinner, standard 2.5-inch ribbon. Now, let’s look at the wreath decorating techniques that will bring your decoration to life.
Start by positioning the sash so the knot is at the wreath’s bottom. This makes the wreath look even and draws attention to the center. As you wrap the sash, ensure it’s tight but gentle to keep the wreath’s shape. You may want to use sturdy but thin floral wire to secure the sash in place.
If you’re looking for guidance, this sash tying tutorial has useful advice. Use wired ribbon since it stays in shape well, much like Spanx. For a big, detailed bow, you might need around three yards of ribbon, depending on size and style.
When decorating, making sure everything looks even is crucial. It’s smart to buy more ribbon than you think you’ll need for adjustments. Be patient, as mastering this might take some time. It’s all part of learning.
Create the Perfect Bow
Making a perfect bow can make your wreath’s appearance stand out. It becomes the centerpiece that catches your guests’ eyes. Picking a velvet or satin ribbon brings luxury. Using a wire-edged ribbon helps keep the bow’s shape easily.
First, think about the bow style you like. For a classic bow, use a wide ribbon in traditional colors like red or green. Most holiday ribbons are 2.5 inches wide. Yet, a 4-inch ribbon looks more eye-catching. The ribbon length you need changes based on the bow’s size and style. A big bow might need 3 yards of ribbon, with about 12 inches between the loops.
If you want a unique DIY wreath bow, rosette bows are great. They usually have 16 to 19 loops, especially with satin ribbon. Satin keeps its shape and fullness well. For a fun look, try curly bows. These bows need 24 to 36 inches of wired ribbon to keep the curls.
Layered bows look amazing. Choose ribbons twice as long as your intended bow size. Start with the widest ribbon at the bottom. This creates a strong base. To hold any bow type in place, use tarnish-resistant florist’s wire or a stapler. These keep your bow firm and stable.
Experimenting with natural elements is fun too. Using live magnolia leaves with floral wire can make a natural bow. This looks great for a rustic or nature-themed wreath.
Bow making takes practice. Don’t be discouraged if it doesn’t come out right the first time. Always start with more ribbon than you think you’ll need. This avoids running out mid-project. A 2.5-inch ribbon is good for indoor and outdoor wreaths, fitting many themes.
Creating the perfect bow adds beauty to your wreath and shows off your creativity. Enjoy making your bow!
Final Touches and Placement Tips
Adding the final touches to your wreath sash is important. Start by making the hydrangeas and greenery look full and even. This step makes the wreath look better, ensuring it doesn’t appear bare in spots. If you’re using fake hydrangeas, pick different shades for a vibrant look. Trim any extra stems to keep things tidy.
To keep your decorations from falling, glue them well to the wreath. Use a hair dryer to get rid of glue strings, making your wreath neat. Check for anything loose and make any last adjustments. If the bow looks odd, attach it with a hook to keep the wreath from getting too busy.
Choosing where to hang your wreath is exciting. It could go on your door, above your fireplace, or as a table centerpiece. Use a guide to find the best spot with nice lighting. Feel free to personalize it with letters or seasonal items. Hang it securely with safety pins. These final steps make your wreath really stand out.


