Welcome to the exciting world of Easter crafts! Have you ever thought about making an Easter wreath to spruce up your door? You’ve come to the right spot. This easy guide will help you craft a beautiful Easter wreath. It’s a wonderful way to celebrate spring and add festive charm to your place. And the best part? You don’t have to be a craft pro; it’s simple and fun for everyone.
Making this Easter wreath is not just enjoyable but also budget-friendly. You can purchase your materials from Dollar Tree and spend roughly $15. You need a 14-inch wire wreath frame, about 70 mesh ribbon pieces, and some decor items. Soon, you’ll have a gorgeous and unique decoration.
Now, let’s get started on making your Easter wreath. We will guide you through every step, from picking materials to adding finishing touches. Follow along to ensure your wreath turns out amazing.
Key Takeaways
- Create a beautiful Easter wreath at home with this easy-to-follow guide.
- Gather all your materials from Dollar Tree for an affordable project.
- A 14-inch wire wreath frame and mesh ribbons are essential base components.
- Engage in a simple yet fun crafting activity perfect for all ages.
- The total cost for making this Easter wreath is approximately $15.
- Following a step-by-step approach ensures a beautifully crafted wreath.
Gather Your Materials for the Easter Wreath
Before you start making your Easter wreath, you need to collect all the Easter wreath materials. Here is everything you need to begin:
- Wire wreath base – This will be the strong base of your wreath.
- Floral garland and faux flowers – They bring springtime beauty to your wreath.
- Ribbons – They add colorful and textural touches.
- Felt and pipe cleaners – Great for making flowers and animals.
- Embroidery threads in various colors – For adding detailed designs.
- Fabric pieces – To add unique and textured features.
- Glue gun (optional but recommended) – Helps to keep decorations in place.
- Tapestry needle – For sewing parts of the wreath together.
- Pom-poms and ribbons for hanging – To give your wreath a festive look.
You can also use special items like plastic eggs or papier maché to make your wreath stand out. Many of these DIY wreath supplies can be found at local dollar stores, so this project won’t break the bank.
| Material | Usage | Alternative Options |
|---|---|---|
| Wire Wreath Base | Foundation | Thick cardboard cut into a circular shape |
| Floral Garland | Decorative element | Fresh flowers or greenery |
| Faux Flowers | Adding springtime charm | Real dried flowers |
| Ribbons | Adding color and texture | Twine or yarn |
| Felt & Pipe Cleaners | Crafting shapes | Fabric scraps |
| Embroidery Threads | Detailed designs | Colored string |
| Glue Gun | Securing items | Craft glue |
| Tapestry Needle | Threading and sewing | Standard sewing needle |
With these craft supplies for Easter, you’re ready to create your own beautiful and unique wreath. Let your imagination guide you as you combine these items into a stunning Easter decoration for your home!
Choosing the Right Wreath Base
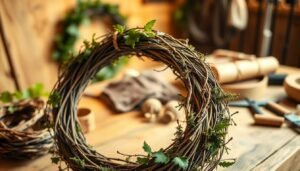
Picking the right base for your Easter wreath is key. The base affects how your wreath looks, how easy it is to make, and how long it lasts. Wire frames, foam bases, and grapevine rings are top picks for a DIY Easter wreath base. Let’s see what makes each one special.
| Wreath Base Type | Advantages | Usability |
|---|---|---|
| Wire Frame | Most popular due to its versatile shape and strength. It can be easily wrapped with various materials. | Highly suitable for diverse designs, offering flexibility in decoration. |
| Foam Base | Lightweight and easy to decorate. Great for securing pins and floral picks. | Ideal for intricate, detailed wreaths, and supports a range of embellishments. |
| Grapevine Wreath | Natural aesthetic, often sourced from florists. Provides a rustic, organic look. | Perfect for decorative themes that embrace natural elements and textures. |
During Easter, people love using *willow wreath bases*. They look natural and elegant, great for spring decor. For something stronger, try rattan rings. They’re tough and perfect for hanging on your door.
If you want something that’s easy to care for, consider artificial foliage wreath bases like Lyvdec’s eucalyptus wreaths. They stay green forever, making them a top choice for nearly 60% of DIY fans. These ready-made bases are simple to use, making your wreath-making fun and easy.
Designing Your Easter Wreath
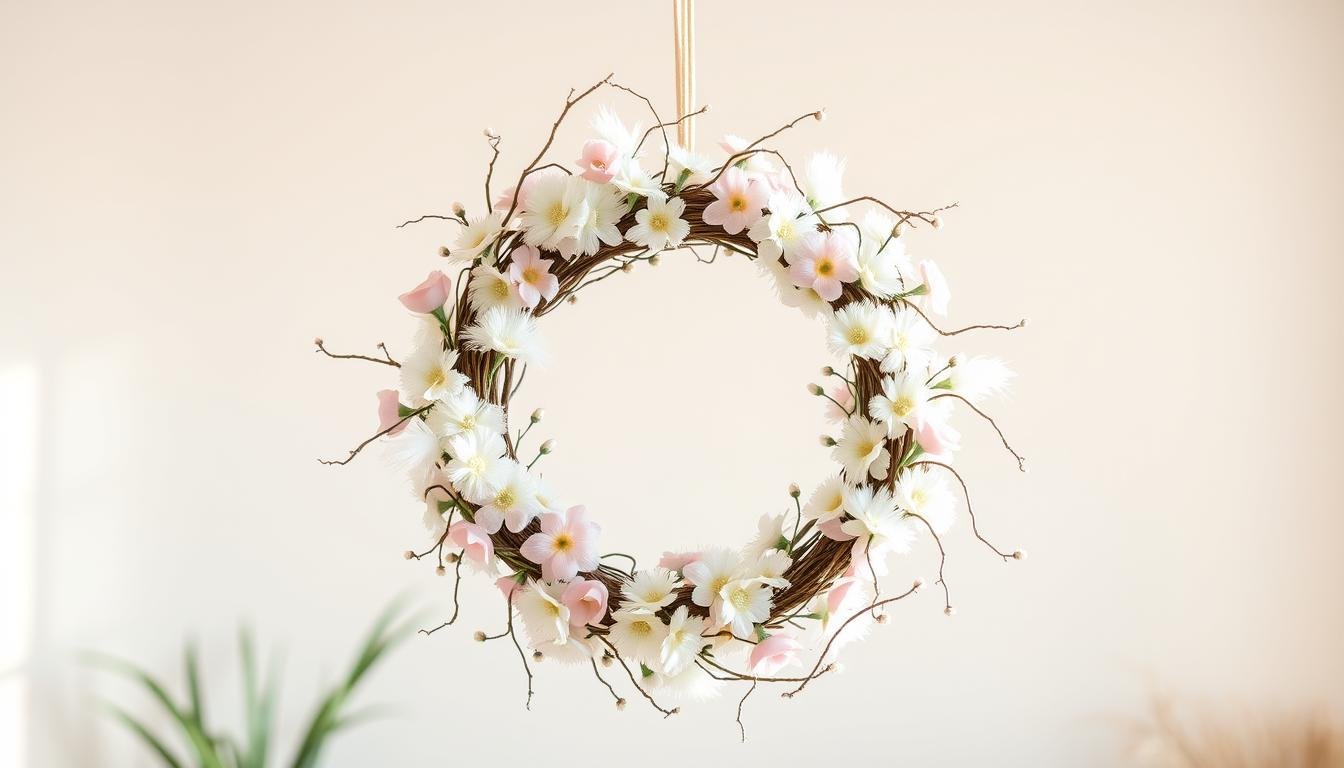
When designing your Easter wreath, start by picking a color scheme. Pastel colors are perfect for Easter, bringing joy and vibrancy. Soft pinks, baby blues, gentle yellows, and lavenders will make your wreath festive.
Think about what you want to put in your wreath. Adding fabric strips of different lengths and textures creates volume and layers. Decorative eggs and bows, along with faux tulips or daisies, add the perfect touch.
There are some creative wreath ideas to make yours stand out. The Pom Pom Bunny Wreath needs 17 large white pom-poms and looks soft and welcoming. Or try the Egg Carton Wreath, made from painted egg cups, for an eco-friendly choice. The Easy DIY Easter Wreath is a quick option that only takes five minutes to make.
If you like traditional styles, add natural elements like faux greenery or dried flowers. The Bird’s Nest Wreath has a rustic charm with its burlap, eggs, and feathers. The Rainbow Egg Wreath, with its colorful papier-mâché eggs, is bright and can be used again and again.
Here’s a summary of different wreath designs to think about:
| Wreath Design | Key Elements | Time Required | Unique Feature |
|---|---|---|---|
| Pom Pom Bunny Wreath | 17 large white pom-poms | 1-2 hours | Soft, fluffy appearance |
| Egg Carton Wreath | Painted egg cups | 2-3 hours | Eco-friendly materials |
| Rainbow Egg Wreath | Paper-mâché eggs | 3-4 hours | Vibrant and reusable |
| Easy DIY Easter Wreath | Dollar store supplies | 5 minutes | Quick and easy |
| Bird’s Nest Wreath | Burlap, eggs, feathers | 1-2 hours | Rustic charm |
Keep these ideas in mind when you design your Easter wreath. You can add your personal style and festive flair to your home decor, creating a beautiful centerpiece.
Step-by-Step Guide to Assembling Your Wreath
Making an Easter wreath is both fun and rewarding. This tutorial will help you place every element just right. Follow these steps to make a stunning centerpiece for your door.
- Gather Your Supplies: Check that you have everything: wreath frame, wire, foliage, flowers, moss, water tubes, and ribbon.
- Prepare the Base: For a moss base, break the moss into pieces and tie it to the frame with wire every inch. This keeps your greens fresh by holding in moisture.
- Layer the Greenery: Start by attaching small bunches of foliage, slightly overlapping them. Use wire or moss pins to fix each bunch to the moss base securely.
| Type of Material | Example Species |
|---|---|
| Foliage | Fern, Pistache, Myrtle, Saliam, Twisted Willow Twigs |
| Flowers | Tulips, Narcissi, Wax Flower, Solidago, Statice |
| Decorations | Easter Eggs, Bunny Cut-Outs |
| Ribbons | Silk, Velvet |
Add your flowers next, using water tubes to keep them fresh. Place each flower carefully to look great with the greens. Use hot glue or wire to add decorations like Easter eggs or bunny cut-outs.
Finish by tying on a pretty ribbon of silk or velvet. By following these steps, you’ll make a beautiful Easter decoration that’s all your own.
Displaying and Caring for Your Easter Wreath
Putting up your Easter wreath is as fun as making it. A favorite way is to hang it on the front door. This welcomes friends and others warmly. You might also place it inside on walls to enhance your Easter decorations. Or, set it on your dining table as a centerpiece to brighten your holiday meals. For extra ideas on showcasing Easter wreaths, check out this guide.
Looking after your DIY wreath is key to keeping it for years. Store it in a cool, dry spot after Easter to avoid damage from moisture or sunlight. Wrapping in bubble wrap or storing in a strong box helps protect delicate parts. Doing so keeps the wreath looking good and ready for next Easter, supporting eco-friendly crafting.
Taking care of Easter decorations includes more than just storage and display. Occasionally dust your wreath and check for any loose parts to keep it looking its best. If parts are wearing out, fixing them is easy. With the DIY craft market expanding, taking good care of your Easter wreath means more moments of joy and celebration.