Want to bring some fall magic into your home? This guide helps you create a cute pumpkin wreath. You will use supplies from Dollar Tree and loop yarn that’s easy on the wallet. It’s perfect for adding holiday cheer to your doorstep.
Follow our easy steps, and in about an hour and for about $14, you’ll make your own fall wreath. This guide helps you craft a beautiful autumn decoration without spending a lot.
Key Takeaways
- Supplies cost approximately $14.
- Completion time is around 1 hour.
- Uses a 12-inch wreath form.
- Incorporates 1 large ball of loop yarn or 2 small balls.
- Majority of materials can be sourced from Dollar Tree.
Why a Pumpkin Wreath is Perfect for Fall
Making a pumpkin wreath brings the cozy feel of fall right to your door. This *seasonal DIY* project really stands out. It lets you show off your creativity with different *autumn wreath ideas*.
Together with 11 other bloggers, we took on a pumpkin DIY challenge, decorating 36 mini white pumpkins. We used an 18-inch grapevine wreath and decorated each 2-inch pumpkin in unique ways, using metallic paint and ribbons.
For a unified look, we picked 6 rolls of sheer ribbon in red and pink hues. We used about ten 10-inch glue sticks to attach everything, which weighed about 5 pounds. Adding tiny orange flowers and wood beads gave it a special touch.
Here’s what you need to know about the materials and time for making your own pumpkin wreath:
| Material | Quantity Used | Time Required |
|---|---|---|
| Mini White Pumpkins | 36 | 10 seconds per pumpkin |
| Grapevine Wreath | 18 inches | N/A |
| Glue Sticks | 5 pounds | 30 seconds per glued section |
| Faux Orange Flowers | 6 pieces | N/A |
| Ribbon (Organza/Chiffon) | 6 rolls | N/A |
| Mod Podge Sealer | 16 ounces | N/A |
| Wood Beads | 150 (0.5 inches diameter) | N/A |
| Greenery Stems | 6 small stems | N/A |
A pumpkin wreath is a great addition to your fall decor. It makes your home feel more inviting. You can choose classic orange or try different colors like copper and pink to capture autumn’s energy.
In summary, a pumpkin wreath is a fantastic *seasonal DIY* project. It takes about 1 to 1.5 hours to complete. It’s a fun way to get creative and make your home feel cozy and unique.
Materials You’ll Need for Your Pumpkin Wreath
Making a pumpkin wreath starts with picking the right materials. For a strong and eye-catching design, you need a 12-inch round wreath form. This acts as the base. Then, use orange loop yarn from brands like Bernat or Lion Brand for a soft, festive look.
To make it prettier, add leaf accents from burlap and green burlap ribbon. You’ll also need scissors and a hot glue gun for crafting. These tools help attach everything tightly, which is key for most DIY wreath creators.
If you want to add a personal touch to your wreath, try using mini pumpkins. But keep them small so they don’t damage your wreath. You can also use metallic paint, fake leaves, and small white pumpkins for extra charm. And don’t forget a foam wreath form. It’s a must for adding flowers and used in all successful projects.
Heading into the crafting, arranging flowers is a bit time-consuming, taking about 10 minutes. This step is the longest for many people. They also use floral wire, often choosing dark colors. This makes the wire blend in, giving the wreath a neat finish.
Choosing the right pumpkin wreath materials makes your final piece both balanced and beautiful. Happy crafting!
Step-by-Step Instructions for Creating Your Wreath
Learning how to craft a pumpkin wreath is super fun. It makes your fall decorations stand out. Just follow these easy steps to make a great addition to your home.
- Start by securing the end of your loop yarn to a 14-inch wire wreath form. One skein of chunky loop yarn (6.4 oz / 180 g) will be enough.
- The process of making a pumpkin wreath at home involves tightly wrapping the yarn around the form, ensuring full coverage. This process should take about 30 minutes.
- After fully wrapping, enhance the wreath’s fluffiness by pushing loops from the back to the front.
- Create a stem using a section of burlap fabric measuring approximately 5 inches by 4 inches. Attach the stem with hot glue for stability.
- Add a bow made from green burlap ribbon. You’ll need three pieces: one 5 inches long and two 7 inches long.
- Attach artificial pumpkins and foliage using a hot glue gun, adding depth and texture to your wreath.
Here’s a detailed breakdown of the materials and steps to achieve the perfect pumpkin wreath:
| Materials | Details |
|---|---|
| Wire Wreath Form | 14-inch |
| Chunky Loop Yarn | One skein (6.4 oz / 180 g) |
| Burlap Fabric | 5 inches by 4 inches for stem |
| Green Burlap Ribbon | One piece 5 inches long, two pieces 7 inches long |
| Artificial Pumpkins and Foliage | Hot glued for attachment |
These steps for a DIY pumpkin wreath mean you get a unique decoration. Enjoy making this wreath at home. It shows off your creativity in the fall season!
Tips for Choosing the Right Pumpkins
When you’re picking pumpkins for DIY wreaths, size, color, and texture matter a lot. Small 2-inch foam pumpkins are perfect because they’re easy to use and customize. Try to pick pumpkins that you can paint or tie with colorful ribbons, like copper and pink. This makes sure your wreath stands out.
It’s key to pick pumpkins with firm skin and a strong stem, as explained in this tip on choosing pumpkins. In Alberta, the best pumpkin growing season is under 90 days. So, it’s smart to choose smaller varieties for crafts. Foam pumpkins work great for adding metallic paints and decorations. Remember to plant pumpkin seeds 36 inches apart to help them grow right.
Think about these pointers for the best craft pumpkins. You can find affordable real pumpkins at farmers’ markets in the fall. While faux pumpkins cost more, they last for many crafting seasons. Keep real pumpkins cool, dry, and well-aired to make them last. Letting them cure in a warm place for weeks will toughen them up.
Check your pumpkins for soft spots every few days. A good stem length for storing is 3 to 4 inches. Pumpkins with hard skins and slight give when squeezed are ready to pick. Clean real pumpkins with a solution like Sanidate to remove dirt and germs before use. A brown, dry stem means the pumpkin is well-prepped.
Following these pumpkin selection tips will make your wreath pop and stay fresh longer. Enjoy your crafting!
How to Personalize Your Pumpkin Wreath
Personalizing your pumpkin wreath makes your fall decor shine. It doesn’t matter if you’re a DIY pro or just starting. You can make your wreath your own. Start by customizing your pumpkin wreath around a theme or colors that you love. Pick colors like orange, red, and gold to reflect the fall season.
Make your wreath stand out by trying different decorating ideas. Wrap your pumpkins in pretty ribbons, paint them with shiny metallics, or use copper leaf for an elegant look. These tricks add beauty and make your wreath unforgettable.
You can also add creative touches to your wreath. Add fake leaves, decorative berries, or signs that match the season. These special touches make your wreath one-of-a-kind and show off your wreath-making skills.
- Step one: Choose a theme and color palette.
- Step two: Decorate the pumpkins using ribbons, metallic paint, or copper leaf.
- Step three: Add faux foliage, berries, and personalized signs.
- Step four: Assemble the wreath, making sure everything looks good and stays in place.
Adding seasonal decorations like silk leaves or fake fruits can make a big difference. Try using 4 big silk leaves or add acorns and tiny gourds for more variety. This adds texture and fits the fall theme perfectly.
Personalizing your wreath shows your creativity and effort. About 65% of people like decor that feels personal. So, your custom pumpkin wreath will likely impress your guests. Plus, with fall decorations making up 15% of decor sales, these projects are very popular.
Why not join the 75% of DIY fans who love seasonal projects? Start your unique wreath design today and enjoy making something special. You can find everything you need at stores like Michaels, Hobby Lobby, or Walmart. With DIY being so popular, now’s a great time to create a unique pumpkin wreath.
Maintaining Your Pumpkin Wreath
Keep your pumpkin wreath looking lovely by putting it in a cool, dry spot. Avoid sunlight. This keeps the colors bright and stops the materials from getting damaged.
Apply protective sprays if you show your wreath outside. This will help it last longer by fighting off bad weather. It’s a key step for caring for your wreath.
Be gentle when you take off and store the wreath’s decorations at the end of the season. Doing this right helps you store your wreath well. Make sure everything is dry first to avoid mold.
For best storage, use a big container that lets air in. This keeps the wreath’s shape. Wrap it in tissue or bubble wrap for more protection.
| Task | Details |
|---|---|
| Location | Cool, dry place away from sunlight |
| Protective Measures | Use protective sprays or finishes |
| Handling Tips | Carefully detach and store decorations |
| Storage Method | Use a breathable container |
| Wrapping Material | Tissue paper or bubble wrap |
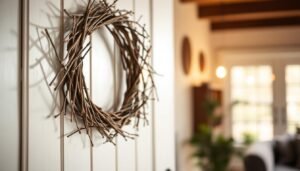
Displaying Your Finished Pumpkin Wreath
Once your DIY wreath is ready, choosing the right spot to show it off is crucial. Hanging it on your front door is a popular way to welcome visitors. You could also place it above your fireplace for an indoor statement, surrounded by fall decorations.
It’s important to hang your wreath where it won’t be damaged by bad weather. Under a porch or an awning is ideal for outdoor displays. Or, you could keep it indoors on walls or in a festive gallery to bring fall’s warmth inside.
When setting up your wreath, mix in fall elements for a complete look. Adding small pine cones, faux foliage, and colorful ribbons will bring your display to life. This blend of decorations with your pumpkin wreath makes a beautiful autumn celebration.