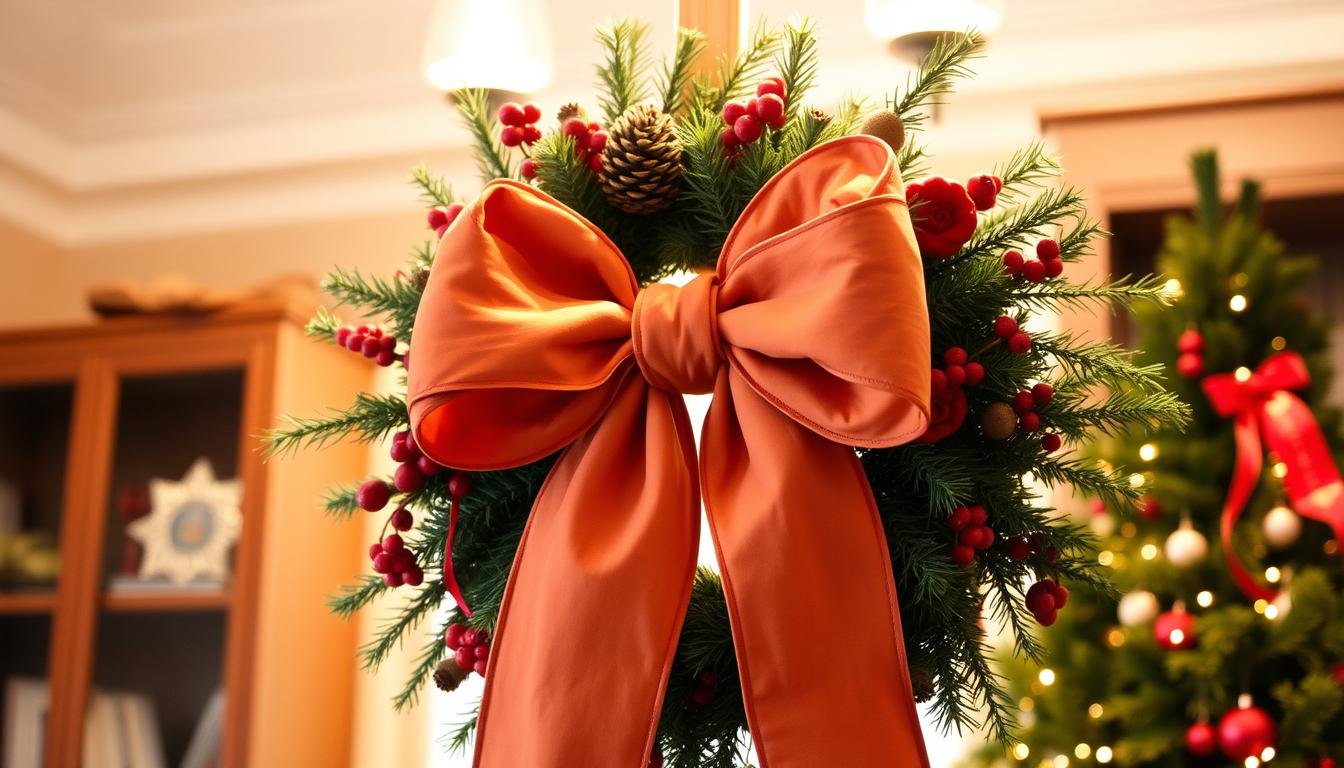
Want a personal touch in your home decor? Try making a DIY big bow for your wreath. This guide shows you a simple yet comprehensive way to add charm and warmth to your doorway. These bows are not just for the holidays but also for everyday decor. Learn the easy art of bow making and improve your decorative skills.
Want better holiday decorations without spending a lot? You’re in the right place! With our easy guide, you can turn a DIY wreath into a festive highlight. Master these simple steps, and soon you’ll make beautiful, cost-effective bows that look as good as those from the store.
Learn how to create a stunning fall wreath and fancy bow using this easy, budget-friendly guide.
Key Takeaways
- You can create a big bow using 3.5-inch wide wired ribbon for optimal shape and structure.
- The bow can be made with any number of loops; 2, 4, or 6 loops are common choices.
- Use zip ties, floral wire, pipe cleaners, or twist ties to secure your bow.
- An 18-inch streamer cut from the remaining ribbon works well for the back of the bow.
- The bow making process consists of at least 10 easy steps, perfect for beginners.
Why a Big Bow is Essential for Your Wreath
Adding a big bow transforms simple wreaths, making your front door more welcoming. The importance of a bow in decor is huge. It turns your wreath into a stunning, personalized piece.
Decorative bows, especially those made with top-quality ribbons from Greenery Market, Trendy Tree, or Carolina Pottery, enhance wreaths greatly. With 10 years of making bows, the author suggests using wired ribbon. This kind of ribbon keeps loops shaped well. A standard bow needs about 7” tails and 12” loops. By adding these up, you get a bow with six loops. This shows how vital bows are in decor.
Making a bow the right way involves tools like a craft mat or ruler, and florist wire. You’ll also need scissors, and wire cutters. This ensures your bows come out perfect. Each bow combines layered designs with two different ribbon widths. This layering results in a rich, textured look. The first layer has 6.5-inch loops, followed by a layer with 6-inch loops. The finishing touch is a 4-inch loop in the center with three 5-inch loops around it. This makes a standout centerpiece.
The guide aims to finish your bow in 15 minutes or less. It focuses on quick, easy steps for creating unique bows. Using tools like the EZ Bow Maker helps beginners. It makes the crafting process simple and fun.
This method proves that a big bow is key in wreath decor. It shows how simple wreaths can look professional. The fact that over 8185 people have shared this, including 8183 on Pinterest, shows many love this crafting tip.
Materials You Will Need
To start your wreath project, you’ll need some key items. For a beautiful bow, grab bow making supplies like wired burlap ribbon, buffalo check ribbon, or satin ribbon. These materials are not only strong but also add beauty to your wreath. A ribbon that is 2.5 inches wide and about 12 feet long is ideal.
You’ll also need pipe cleaners or floral wire to secure your bow. These help keep your bow’s shape, making it look elegant and sturdy. Don’t forget a sharp pair of scissors for cutting ribbons and wire cutters for the floral wire.
A good base is crucial, such as a grapevine wreath form. Choose one about 10 inches across to match your bow size. Using different colored chenille stems can make attaching your bow easier, and it’ll look nice with the ribbon.
Collecting these wreath decorating materials beforehand will make your project run smoother. It takes about 10 minutes to get everything together. Crafting the bow is quick too.
Step-by-Step Guide to Making a Big Bow
Making a big, beautiful bow is easier than you think with the right crafting techniques. Our guide will show you each step to make your wreath look amazing. Just follow these easy steps to learn how to tie a big bow.
Begin by using three yards of a wide ribbon, not the usual holiday ribbon because it’s four inches wide. It’s good to have extra ribbon. This way, you can fix any mistakes.
- Make the central loop: Start with a tiny central loop to draw attention. Hold the ribbon tight and use floral wire or a pipe cleaner to keep it in place.
- Create larger loops alternately: Keep making bigger loops on both sides. Switch sides to make it look even, and flip patterned ribbons so the design shows.
- Gather and secure: After making several loops, bring them together in the middle. Use something strong to tie them, making sure the loops are spread out evenly. Floral wire works great for holding everything together.
- Adjust and fluff: Making your bow look nice takes a bit of art. Move each loop carefully until your bow looks big and balanced. You might need a few tries, but practice makes perfect.
- Attach additional decor: You can also add things like battery-powered lights or different ribbons for a special effect. Adding new elements is a popular thing to do in DIY projects.
Keep trying even if it’s hard at first. With a bit of patience, you’ll learn how to make a big bow that will make your wreath or any project look fantastic.
Personalizing Your Bow
Personalizing your bow can make your wreath stand out. When you pick from many wire-edged ribbons, you create unique bow designs. These designs should match your decor. You might like rustic burlap for a warm touch, satin for elegance, or seasonal patterns. The ribbon you pick is key to how your final product looks.
Learning to make a stunning wreath bow is a great skill. This is true for both newbies and pros, says a tutorial at howtomakewreaths.com. By using different ribbons together, your bow will pop. You could combine two types of 2.5-inch ribbons with two 1.5-inch patterns. This creates a bow with depth. Each bow usually has 10-inch tails and loops between 5.5 to 6.5 inches. This lets you add your personal touch to each wreath.
Picking the right ribbons and how you layer them is very important. But don’t forget the small details. A dovetail cut on the bow tails makes it look neat and skilled. Plus, many crafters like to use wired ribbons. They help the bow keep its shape well.
If making bows feels hard, think about tools like the EZ Bow Maker. Tools like this make making bows easier, leaving you more time to decorate. There’s also a lot of bow-making classes in places like Boston and Portland. This shows people are really interested in learning how to make better bows.
Crafting beautiful bows is all about being creative and skilled. Try different techniques and share your bows with others who love crafting. You’ll find lots of new ideas and inspiration. So, grab your ribbons and start working on your bow. Make your wreath one-of-a-kind.
Tips for Attaching the Bow to the Wreath
Attaching bows to wreaths is simple and can make them look way better. Let’s learn how to do it right so it’s both pretty and secure.
Start by gathering what you need. You will want about 3 feet of ribbon for a big, full bow. And get 6 inches of floral wire or a pipe cleaner to tie it off. Using ribbon that has wire edges is best because it stays put.
Place your bow where you want it on the wreath. Make sure it looks good with the wreath’s design. Tie it on tight with the floral wire or pipe cleaner at the back. This is how it’ll stay on without falling.
If you like big, floppy loops, space the sticks out more when you make the loops. For smaller, neater loops, keep the sticks close. Your bow should have four loops on each side to look full.
The length of the ribbon tails can be as long as you like. Just add another piece of ribbon for that. If the bow moves too much or droops, glue or tape can help keep it in place.
Keeping the bow looking good is key. Make sure you can always see the pattern of the ribbon. When you’ve attached it right, your bow will look wonderful. It will also be sturdy, no matter the weather or if it’s moved a lot.
Following these steps will make your bow the highlight of your wreath. You can hang it on doors, walls, or even chairs.
Maintenance and Care for Your Wreath Bow
To keep your wreath bow looking great, you need to take good care of it. This means storing, cleaning, and handling it the right way. Doing these things can make your bow last longer.
- Storage Tips: When not in use, keep your bow away from direct sunlight and moisture. Store it in a cool, dry place, preferably in a sturdy box lined with tissue paper, bubble wrap, or plastic to protect it from dust and moisture.
- Cleaning: Lightly dust your bow using a soft cloth or shake it gently outdoors to remove dust. For more thorough cleaning, use a mild soapy water solution to spot-clean fabric bows, ensuring they are dried thoroughly afterward.
- Weekly Maintenance: Dust your bow regularly. If needed, use a hair dryer on the lowest setting, held about 6 inches away, to blow off any stuck-on dirt or dust from intricate areas of the bow.
Taking good care of your bow helps it stay fresh. Check it often for any parts that might be coming off. If you find any, just glue them back on. With these care tips, your wreath bow will keep looking beautiful year after year.
Inspiration and Ideas for Your Wreath
Looking to make your wreath stand out? Use big bows for endless inspiration and ideas. They’re perfect for any occasion—holidays, special events, or just to make your home more welcoming. Try themes like autumn leaves for fall, bright flowers for spring, or glitter for the holiday season. It’s all about what you like, with plenty of options to choose from.
Start experimenting with bow decorating by mixing different textures and materials. Try burlap for a country feel or buffalo plaid for something warm and inviting. Wired ribbon helps make crafting easier. With the Bowdabra tool, even if you’re new to this, you can quickly learn how to make bows. It’s a tool many DIY enthusiasts on YouTube prefer because it simplifies crafting and makes it fun.
Bows aren’t just for wreaths. They can beautify garlands, mantles, trees, presents, and even dining chair backs. For the best look, use an odd number of loops. You can also choose to add tails or not, depending on your style. With your personal touch, any wreath can become a reflection of the unique ideas you imagine.