Adding a porch railing can make your outdoor space look better and safer. This DIY porch railing installation guide will take you through the process step by step. It’s great for both experienced DIYers and homeowners wanting to enhance their porch. By following this guide, you’ll make sure your railing is both firmly in place and safe to use.
Key Takeaways
- Understand the different types of porch railings before starting your project.
- Prepare all necessary tools and materials in advance.
- Accurately measure your porch to ensure a precise fit.
- Follow step-by-step instructions for installing the bottom rail, balusters, and top rail.
- Apply finishing touches to ensure your railing is both secure and visually appealing.
Understanding Porch Railing Types
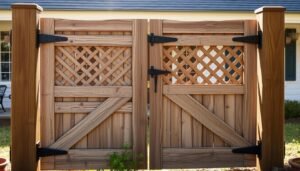
When choosing porch railing for your house, knowing the different kinds is key. You have to think about looks, cost, and upkeep. Wood, metal, and synthetic are some common porch railing materials, each with its own pros.
Wood railings look traditional and timeless. But, they need care to avoid rot and damage. The price of wood changes based on its type. For instance, Ipe wood is more expensive.
Metal railings stand out for being strong and low-maintenance. Powder-coated aluminum is liked for its resistance to weather and easy care. Even though it might scratch, it’s perfect for modern styles. Wrought iron used to be popular. Now, powder-coated aluminum is preferred for needing less care.
Synthetic options like vinyl and composite are durable and easy to maintain. Composite railings offer many colors but might not be as tough as metal. PVC railings are light, weatherproof, and budget-friendly, but their quality can differ by brand.
While choosing porch railing, consider different costs and how they fit your budget. Railings come in various colors. White looks classic, but black or dark gray can make your yard stand out more.
Think about railing features like lighting, hardware, and gates, too. These can change your porch’s look and how you use it. For example, drink rails add a spot for decorations or drinks.
In the end, picking a porch railing that matches your taste, budget, and care needs is vital. It makes sure your porch looks good and stays safe.
Preparing Your Tools and Materials
Before starting your DIY railing setup, make sure you have all the needed tools and materials. This preparation prevents delays and disturbances. Here is what you need for the porch railing installation tools and materials for railing installation:
| Tool | Purpose |
|---|---|
| Miter Saw | For precise cuts on railing components |
| Drill | To create holes and drive screws |
| Level | Ensuring the railings are perfectly straight |
| Tape Measure | Accurate measurement of spaces and heights |
| Various Screws and Nails | Securing rails and balusters |
| Pneumatic Stapler | Tacking nailing strips to balusters |
Choosing the right materials for railing installation is key. Treated lumber is best for structural parts because it’s strong. Cedar is great for its look. You’ll also need concrete mix and post bases to install the posts well.
Installing a porch railing usually takes about 6 to 8 hours. In the U.S., codes say handrails must be between 34 and 38 inches high off the ground. Ideal height is 36 inches. Balusters should be less than 4 inches apart.
To place balusters perfectly, use elastic bands marked every 2 inches. You should use 3-inch ceramic-coated screws to fix the bottom rail. The top handrail needs the same type of screws. For upkeep, check for damage, clean with soap and water, and repaint or restain when needed. Consider vinyl railings for a durable, easy-care option.
Measuring Your Porch
Getting the measurements right is key for installing porch railings. First, measure your porch’s perimeter where you’ll install the railing. Pay attention to different levels or angles. Knowing how to measure for porch railing makes you ready for what comes next.
To figure out the porch dimensions for railing, measure the edge length where railings will be. For straight parts, use a tape measure and add a bit extra for any curves. Writing these measurements down on graph paper helps you plan the setup and avoid mistakes.
Then, find out how tall your railings should be. Building codes usually say they need to be 36 to 42 inches tall. To place balusters correctly, they can’t be more than 4 inches apart. If you’re using 2-inch wide balusters, space them every 6 inches for the right gap. Deck railing kits with pre-drilled holes can make preparing for railing installation easier.
The amount of posts you need depends on your porch size and local codes. Posts must be attached firmly to the deck with carriage bolts or other recommended items. Make sure to follow the instructions that come with your deck railing kit, especially regarding any gaskets or metal parts.
Accurate measurements reduce errors, making your porch railing both safe and stylish. This careful planning ensures a great look for your home.
Installing the Bottom Rail
The bottom rail is key to a strong porch railing system. Getting it right means your whole railing looks good and stays put. Before you start, gather all your tools and materials. Then, line up the bottom rail with the posts to make sure it’s level.
Start by drilling holes carefully to keep the wood from splitting. This is especially important with pressure-treated wood. The rail needs to be parallel to the deck, and usually, it’s set 3-1/2 inches above to let snow pass through easily. Also, keep it 2 to 4 inches off the floor so it looks consistent all the way around.
Then, measure and trim the rail so it fits perfectly between the posts. Use screws that won’t rust, like stainless-steel or galvanized screws, to attach it firmly. Make sure the railing is secured well, with tight screws at both ends. This ensures it’s stable and safe.
By following these steps for attaching the bottom rail, you’ll create a strong base. This will help when you’re adding more to the railing, like balusters and top rails. Getting the bottom rail right affects the porch railing’s look and safety, plus it boosts your home’s visual appeal.
Attaching the Balusters
Balusters play a big role in making your porch safe and good-looking. Learning how to attach balusters the right way is key. You can put them between the top and bottom rails or attach them directly to the rails.
When installing between the rails, spacing them right is crucial. Usually, you can’t have more than 4 inches between each baluster. This not only looks good but is also safe. If balusters are 2 inches wide, place them 6 inches apart. Pre-drilled holes in deck railing kits make this easier.
Face-mounting is another method. It’s less complicated and needs fewer parts. Whichever method you pick, it’s important to attach the posts securely to the deck. Kits come with the needed hardware, like carriage bolts, and sometimes gaskets or metal parts for a lasting setup.
If your balusters span 6 feet or more, adding support blocks or extra screws might be needed. For bigger balusters, using two screws at each end can make them more stable. The kits usually include detailed instructions for a smooth porch railing balusters setup.
Glass balusters provide a special look but need careful installation. They can fit between the rails or be face-mounted. Use plastic washers with metal balusters on treated wood to avoid rust.
Wood porch railing systems have gotten better. Now, they come with better hardware and can hold more balusters. This means they’re stronger and safer, meeting or surpassing building codes.
| Baluster Type | Installation Method | Special Considerations |
|---|---|---|
| Standard | In-between or Face-mounting | Ensure even spacing, max 4 inches apart |
| Decorative | In-between or Face-mounting | Additional support may be needed for larger designs |
| Glass | In-between or Face-mounting | Varies by brand; use plastic washers with metal on treated wood |
| Metal | In-between or Face-mounting | Plastic washers advisable with treated lumber |
With good planning and the right tools, putting in porch balusters is doable as a DIY project. By following safety rules and instructions, your porch will look great and be safe for years.
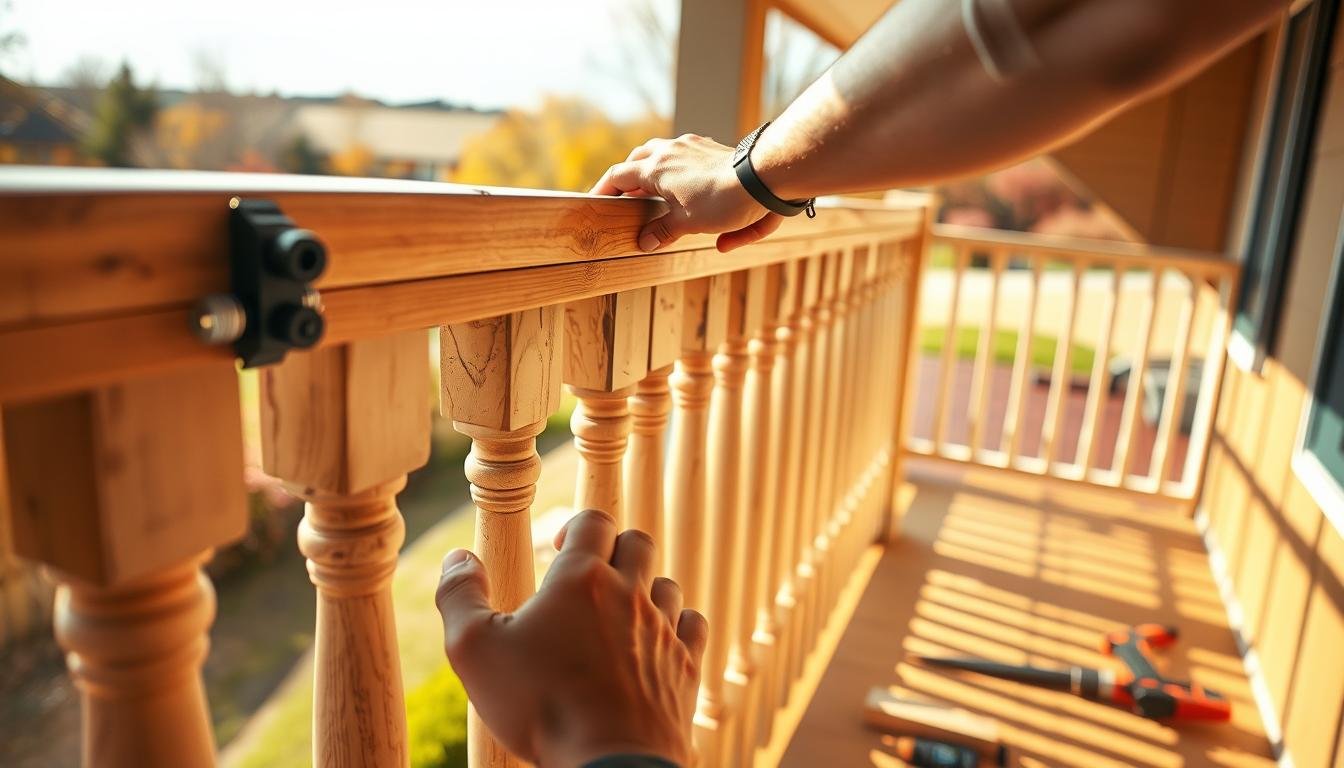
Installing the Top Rail
Putting up the top rail is a key part of your porch railing job. This step is about securing top rail on porch by joining the top rail to the balusters and posts. First, make sure the top rail lines up with the bottom one for a good look. Use a level to keep it straight.
Then, check out your detailed top rail installation guide. It usually tells you to drill pilot holes at where the top rail meets the posts. This keeps the wood from splitting and makes sure it fits well. It’s smart to use post brackets for more stability, spreading the weight evenly.
Next, attach the top railing to the corner posts first to make sure it’s tight and even. Keep going by attaching top railing to the rest of the posts and balusters to finish building it. Rail connectors will make sure it fits tight and stops any wobbling or sagging.
By doing a good job of securing top rail on porch, you make it look better and also make your porch safer and stronger. Always check for any loose screws or parts that don’t line up right after putting it in. This will help keep your railing in good shape for a long time.
Finishing Touches on Your Porch Railing
As you near the final steps of your railing installation, it’s key to focus on finishing touches. This improves both how your porch looks and how long it lasts. First, sand any rough spots on the railings for a smoother feel. This makes your enhancing porch railing safer and nicer to look at.
Next, apply a top-quality paint or stain. Using a Kilz primer is great because it sticks well to hard or shiny surfaces, making your finish last longer. Staining one part usually takes about 30 minutes, so keep an eye on the clock. A sealant adds protection against bad weather, helping your finishing porch railing last longer.
Checking all connections is also very important. Tighten every bolt and screw and check that the whole thing is safe according to local rules. For the Riverside Retreat renovation, which was supposed to take two months, we kept checking to ensure the railings were safe and strong. Knowing your local codes helps make sure your railing is not only beautiful but also up to standard.
For the last part, remember these steps:
- Sanding all rough edges
- Applying paint or stain (Kilz primer recommended)
- Sealing the surfaces to protect against weather
- Checking all connections for tightness
- Ensuring compliance with local safety standards
Here’s a comparison overview of some key considerations:
| Aspect | Details |
|---|---|
| Sanding | Approx. 2 hours for complete railing |
| Painting/Staining | 30 minutes per section |
| Sealing | Requires weather-resistant sealant |
| Inspections | Thorough check for overall stability |
By following these steps, your finishing porch railing will not only look great but also be strong for many years. Whether you do it yourself or hire a pro, these final steps in railing installation greatly improve your porch’s safety and looks.
Safety Considerations During Installation
Safety should always come first when installing your porch railing. Over 224,000 people got hurt in porch accidents in four years, says the U.S. Consumer Product Safety Commission. Wear gloves, safety glasses, and sturdy shoes to avoid any injuries.
Check for buried utilities before you dig post holes. This prevents accidents. Make sure all materials follow local safety rules. Your railing height and the space between balusters must meet building codes. For example, deck railings should be 36 inches tall. And if deck steps are over 30 inches high, they need a guard rail. Also, install railings inside the deck’s frame to make it more stable.
Always follow the instructions given by the manufacturer carefully. This ensures your railing is safe and keeps your warranty valid. The kits usually have special fasteners for assembly. Some even include foot blocks to handle weight better. Railings are built to handle loads up to 50 pounds and concentrated loads up to 200 pounds. But Fortress Building Products makes railings that can handle up to 500 pounds. And remember, keep balusters less than 4 inches apart for the safety of kids and pets.