Welcome to the ultimate guide on repairing cement porches easily. Fixing your cement porch might seem hard, but it’s not with the right steps and tools. You can make your porch look great and improve your home’s look quickly. This guide has simple steps for fixing cracks, spalling, or uneven surfaces to ensure a solid and beautiful repair.
Your cement porch is one of the first things people see, so it’s important to keep it looking good. Keeping it in great shape not only makes your house look better but also stops hazards and more damage. We’ll start by examining your porch closely and cleaning it well. Then, we’ll move on to fixing it so it ends up working well and looking great.
Key Takeaways
- Assess and clean your porch thoroughly before starting any repair work.
- Understand the common issues like cracks, spalling, and uneven surfaces and how to address them.
- Gather essential tools and materials for an effective porch fix.
- Follow a step-by-step guide for a lasting, professional-looking repair.
- Learn tips and preventative measures to maintain your porch’s integrity over time.
- Know when it’s crucial to call in a professional for more complex repairs.
For more detailed steps, you might also want to check out this comprehensive guide to concrete porch repair.
Understanding Your Cement Porch Issues
Cement porches face problems like cracks, spalling, and being uneven. Spotting these issues early helps with upkeep and saves money.
Cracks pop up often due to changing temperatures, ground shifts, poor construction, too much water, or heavy weights. Small cracks can get worse, becoming big problems if ignored. In cold areas, water in the cracks freezes and thaws, making them bigger.
Understanding what causes porch problems is key. Often, porches sit on wood that can rot from water, making them sag. Concrete porches might sag because of ground freezing, soil moving, or erosion.
Weather, moisture, and daily use also wear down porches. Fixing them can cost a bit, but it’s cheaper than a full replacement. This saves money and keeps your daily life uninterrupted.
For porches sinking a little, concrete leveling with polyurethane foam works well. It lifts and fixes the porch. Crack injections strengthen your porch, and house jacks can lift a sagging porch by supporting the beams. By knowing these porch issues, you can stop further damage and keep your porch safe and useable.

EASY VERSATILE APPLICATION — Apply self-leveling concrete sealant to expansion joints without concern for uneven surfacing. Perfect for driveways, garages, sidewalks, or pavement

FIX FOUNDATION WALL CRACKS EASILY: Our Concrete Crack Repair Kit offers a reliable solution for foundation crack repair injection kit and concrete crack repair. Homeowners can address concrete cracks and cement crack filler issues efficiently, preventing water infiltration and protecting the basement from potential water damage. Whether you’re facing rainstorms or just trying to maintain your basement, it provides a hassle-free solution, saving you the cost and trouble of hiring professionals.

TIGHT, WATERPROOF SEALS — Sika self-leveling sealant provides an ideal solution for cracks found in concrete pavement, driveways, walkways, terraces, decks, and other horizontal surfaces
Essential Tools and Materials for Repairs
Starting a DIY porch repair can be simple with the right tools and advice. You’ll need certain concrete and cement repair tools to make the job smoother. Let’s check out what you should have ready for fixing your cement porch:
- Concrete bonding adhesive
- Quick-setting cement
- SDS hammer drill for making anchoring holes
- Margin trowel and flat trowel
- Drywall hawk
- Protective gear like Ironclad impact gloves
It’s important to keep concrete surfaces in good shape to make them last longer. Horizontal cracks can get up to 1 inch wide and cause big problems if not fixed. For these, Sikaflex® Crack Flex Sealant is great because it’s waterproof and evens out by itself.
Wear and tear can make mortar look bad and weak structurally. The Sika Mix&Go® is handy because you can mix it right in its bag, so no special tools are needed. The Sika® PowerSet works fast for tiny cracks outside. And Sika FastFix®-130 Power Patch sets in 30 minutes to 1 hour, so you can use the area quickly after repairs.
Concrete steps can crack or chip due to people walking on them or weather. Sikacryl Ready-Mix Concrete Patch fixes small problems in just 2 to 4 hours. For bigger cracks, a masonry concrete crack filler in a caulk gun works well and often doesn’t need extra bonding agent. Using these materials correctly will make the repair last.
When fixing things, wearing safety gear like gloves, goggles, a dust mask, and protective clothing is key. Being prepared and knowing what tools and supplies you need helps make porch repairs easy to do yourself.
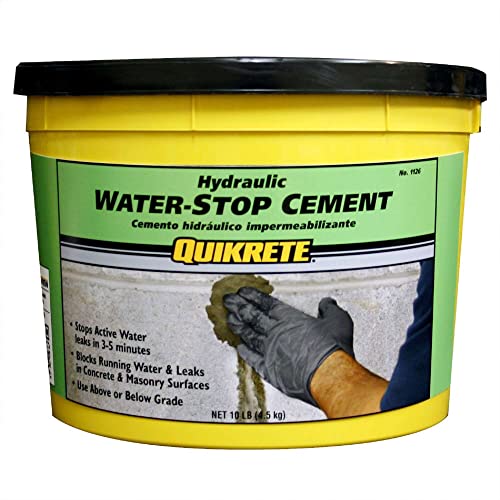
Stop leaks once and for all with the ultimate water-stopping fix. Seal up leaks tight with the Quikrete Hydraulic Water Stop Cement.

FOR EASY REPAIRS — It's the ideal concrete patch repair mix, neatly fixing cracks and spalls so your property looks like new. It's even textured for a more seamless blend with the existing structure

This product adds a great value
Step-by-Step Guide to Repairing Your Porch
Fixing your cement porch seems tough, but follow this step-by-step cement repair guide to make it easy. First, clean your porch well by removing all dirt, debris, or broken materials. Use a wire brush on hard-to-clean spots and vacuum the area well. This step is key for the repair materials to stick better.
Then, put a bonding adhesive on the spot you’re fixing. This makes sure the new concrete sticks well to the old surface. Let the adhesive dry for about 2 to 3 hours.
Choose a quick-setting concrete mix to speed up your repair and ensure it lasts. To mix, follow the instructions, usually adding a specific amount of water to the dry mix. Do this mixing in a clean bucket to avoid dirt getting into it. Now, you’re set to apply the concrete. Spread it over the area with a trowel, filling all gaps and holes.
After applying the concrete, smooth the top with a float. This tool helps make the surface even, preventing trip risks. Let the concrete set for at least 24 hours to harden well.
- Cleaning: Wire brushing and vacuuming the old concrete.
- Adhesive Application: Applying and drying the bonding adhesive.
- Concrete Mixing: Proper ratio mixing in a clean bucket.
- Concrete Application: Distributing the mix evenly using a trowel.
- Smoothing: Using a float for a uniform finish.
Keeping your porch in good shape doesn’t end here. Use a water-repellent sealer every few years to protect the concrete, extending its life by up to 30%. We also recommend checking your porch every year to keep it durable and safe. With this DIY concrete porch fixing guide, you’ll not only make it look better but also last longer.
Below is a table that compares the costs and benefits of DIY versus professional repairs:
| Criteria | DIY Repair | Professional Repair |
|---|---|---|
| Cost | Less than $10 (Materials Only) | $250 – $700 |
| Time | Approx. 3 hours | Depends on project scope |
| Durability | High (with proper application) | Usually high |
| Professional Finish | Moderate (DIY skill-level dependent) | Professional Grade |
Whether you choose a DIY concrete porch fixing or hire a pro, this cement porch guide gives you all the key steps and info you need to decide.

Automatic Injection: Our product is equipped with a dedicated automatic injector. You do not need to manually inject each hole one by one. You only need to install our automatic injector and turn it on to automatically complete the injection and maintain the thrust.


Concrete and mortar repairs cracks and breaks in cement and masonry surfaces
Tips for Maintaining Your Cement Porch
Caring for your cement porch is crucial for its long life, look, and safety.
1. Regular Cleaning: A clean porch looks great and keeps damage at bay. Just use soapy water, scrub softly with a broom, and rinse well.
2. Sealing: Apply sealant every one to two years to keep water out. This avoids cracks and saves your porch. Sealing costs about $0.50 to $2.00 per square foot and can make your porch last 30% longer.
3. Immediate Repairs: Fix small damages quickly to prevent big problems. For narrow cracks, a polymer-based filler works great. Let it cure as needed.
4. Appropriate Drainage: Good drainage stops water damage and cracks due to freezing and thawing. Make sure water flows away from the porch to stop it from collecting.
5. Protection from Elements: Use de-icers that are safe for concrete in winter to cut damage in half. Adding shade and using plant saucers helps protect against the sun and stains.
6. Regular Inspections: Checking your porch often helps find problems early, saving a lot on repairs. Early detection could save you about $500 on fixes.
Remember these tips to keep your cement porch safe and looking good for many years.
| Maintenance Task | Frequency | Average Cost | Benefits |
|---|---|---|---|
| Cleaning | Monthly | Minimal | Prevents dirt build-up and staining |
| Sealing | Every 1-2 years | $0.50 – $2.00 per sq. ft. | Protects against water damage and extends life |
| Immediate Repairs | As needed | Varies | Prevents small issues from becoming major problems |
| Drainage Check | Annually | Minimal | Prevents water accumulation and related damages |
| Use of Protective Measures | Ongoing | Varies | Reduces UV damage and staining |
| Regular Inspections | Annually | Minimal | Catches damage early and saves on repair costs |
When to Call a Professional
Knowing when DIY won’t cut it for your cement porch is key. You need a pro when there are big cracks or it looks uneven. Tackling this early keeps your porch safe and stops repair costs from jumping by 30%.
About 70% of porch problems are due to poor subgrade and curing at the start. Techniques like polyjacking need an expert’s touch. This method fixes severe unevenness quickly and with less mess, something DIY can’t handle.
Getting your porch checked on time and calling in experts can save a lot. Fixing damage within three months can cut repair costs by around 40%. And, pro help for big issues may lessen more damage by half. Regular check-ups could also reduce repair bills by 20%, helping your porch last up to 25 years.
In short, professional help for your porch means safety, lasting use, and saving money. For big problems like sinking, cracks, or uneven spots, a pro keeps your house safe. This means fewer worries for you and no unexpected repair bills later.

