Making a garland wreath by yourself is fun and easy on your wallet. You only need a few basic items to start. This DIY project lets you create a special Christmas wreath. It adds a cozy vibe to your place. Crafting your own holiday wreath not only saves cash but also gives you a sense of pride. Adding fresh greenery makes your wreath look classy and fresh, unlike store-bought ones. Let’s get into this easy guide on making a beautiful garland wreath in half an hour!
Key Takeaways
- Creating a homemade garland wreath is cost-effective, with materials costing around $20.
- The process takes approximately 30 minutes and is perfect for a fun, festive DIY project.
- Using fresh greenery enhances the natural beauty and longevity of your wreath.
- A 16 to 18-inch wreath form is recommended for an ideal size and proportion.
- Get creative with multiple embellishments like bows, ornaments, and bottle brush trees to personalize your wreath.
- Regularly misting your garland with water helps maintain its freshness throughout the holiday season.
- Handmade garland wreaths offer a unique and heartfelt touch to your festive decorations.
Materials Needed for Your Garland Wreath
Making a garland wreath is not only fun but also easy on your wallet. You just need the right wreath materials to begin crafting your beautiful piece.
- Garland: Get a 20 ft length of garland for a full look. You can find it at stores like Hobby Lobby. For tips, see this guide.
- Wreath Frame or Hoop: Pick a frame or hoop that matches your wreath’s style. Metal, foam, and grapevine are good choices. A double-wire frame works well for heavy decorations.
- Wire Cutters: You’ll need these to cut the garland and floral wire to size.
- Floral Wire: This secures the garland and decorations to your frame.
Add garland DIY supplies like ribbons and dried orange slices for a personal touch. Buy these extras at craft stores which often have deals, like 17% off Tenn Well Thin Jute String, now £5.
DIY wreaths are cheaper than store-bought ones. By using affordable wreath making equipment, you save money. This method also adds a unique charm to your holiday décor.

Iridescent Christmas Tinsel Garland:The Christmas tinsel garland is designed with full of pink shiny tinsels,it will show iridescent appearance.

Package includes:This Christmas party supplies set includes 4 red and green bow banners, each consisting of 8 red and green bow cards, providing enough for your holiday decoration needs. The Christmas bunting banner comes pre-strung, requiring no assembly or DIY. Start your celebration right away!

PACK OF 4 GARLAND CHRISTMAS DECORATIONS: Each Diamond Ice Wire Clear Plastic Branch Garland measures approximately 5 feet (1.5m) long, 20 foot (6m) in total. Branch Length: 5ft /150cm, Stem Length: 5" /12.5cm, Each branch has 45 stems, each Stem has 4 shining diamond ice beads, and one branch has 180 transparent diamond ice beads in total.
Preparing Your Workspace
Getting your crafting area ready is key to a fun DIY experience. It’s important to have everything organized and comfy for creating. This means doing a few important steps.
A clean, bright space is very important. Pick a spot with lots of natural light or get good artificial lights to keep your eyes happy. You’ll also want a clean, big table for your projects. It helps in spreading out your materials.
Having your supplies sorted out is crucial. Use bins, drawers, or shelves to keep everything in order. This makes finding things easy and keeps your work smooth.
Protect your working area from messes. Lay down newspapers, plastic sheets, or craft mats. This makes cleaning up easy after crafting.
If you’re using acorns, they need extra prep. Wash them and bake at a low heat for 20 minutes to get rid of mites. This makes your acorns clean and your wreath look better.
Make a list of what you need for your wreath. Here’s what you might include:
- Colored papers
- Scissors
- Glue
- String
- Paint and brushes
- Beads
- Fabric scraps
These DIY wreath workspace preparation tips can help turn a simple spot into a creative space. With the right setup, you’ll boost your creativity and enjoy crafting even more.
Creating the Base of the Garland
Starting to make a stunning garland wreath begins with a strong foundation. Picking a durable frame or hoop is how to start making a garland wreath. This base supports every layer of your design. Crafters often choose a wire frame. Yet, using greenery from local sources adds a unique touch and lessens waste.
To start building a wreath base, wrap the garland around your chosen frame tightly. Make sure each wrap is secure to stop it from coming undone. Evenly spread it across the hoop. As you go, use 22-gauge floral wire to fix each section. This step makes the structure stable for the holiday season.
Fixing common problems is key for a good wreath. If the layers look uneven, rearrange the greens or change their spots. It matters to use the right mix of greens — one strong kind for structure and several decorative ones for looks and depth.
To keep it fresh longer, consider chicken wire for better water holding. Mixing 2 teaspoons of vinegar or lemon juice, 1 teaspoon of sugar, and a crushed aspirin or 1 teaspoon of bleach with a quart of water helps too. Building your wreath this way means it will last and stay bright.
With these steps, you’re ready to make a garland wreath that impresses and brightens the season, keeping its beauty alive.
Adding Foliage and Greenery
Embellishing your DIY garland wreath with greenery is a great way to add texture and volume. Choosing fresh or faux plants like eucalyptus, ivy, and cedar makes it look great and last long. Fresh greenery is especially loved for its natural beauty and unique feel, perfect for a beautiful wreath.
Mix it up with big blooms like roses and small flowers like baby’s breath for a nice look. Most garlands get a full appearance by layering small groups of flowers and plants. Remember to overlap each group a bit, keeping green stems around 8-12 inches and flower stems about 6 inches. This way, your wreath will look full and lively.
You’ll need the right tools to keep everything in place on your garland. Use 24 gauge florist wire or twine, with a base diameter of 1/4 inch. Before attaching, cut to the right length. Wrap the wire around each group three times for a strong hold, especially if your wreath will be outside.
For a lush wreath, pick at least three types of greenery. Cut each to about 12 inches and prepare ten sections of each. Space the bunches 3-4 inches apart for a full look. Adding things like ribbons, ornaments, or dried fruits gives it a personal touch, making it great for any event.
If you’re using fake elements, large wreaths often need shaping to look their best, like those from Balsam Hill. Use special bags for safe storage year after year. For pre-lit wreaths, make sure the lights and decorations are well-placed. Fluff by shaping tips in one direction for a natural, full appearance.
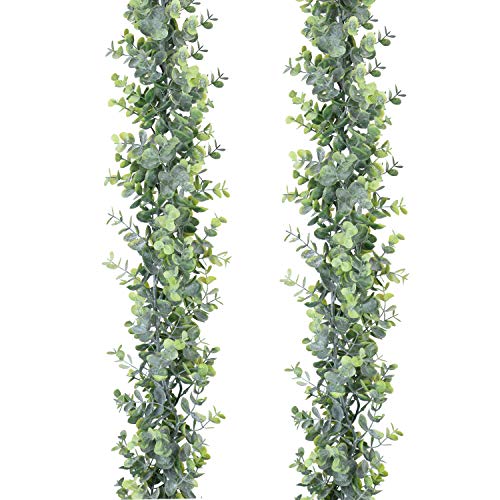
Quantity:2 Pack Faux eucalyptus garland , Each pack with 134 Pcs large fake eucalyptus leaves, total 268 Pcs Eucalyptus Leaves,This eucalyptus garland has many branches,Looks very realistic and Three-dimensional.

Size: Each eucalyptus garland is about 5.9 feet with 156 leaves. The total length is about 12 FT. The leaf size is about 2.18 x 2 inches, and the leaves are detachable

Quantity:6 Pack Faux eucalyptus garland , Each pack with 134 Pcs large fake eucalyptus leaves, total 268 Pcs Eucalyptus Leaves,This eucalyptus garland has many branches,Looks very realistic and Three-dimensional.
Incorporating Decorative Accents
Personalizing your garland wreath can be fun and creative. Adding decorations like bows, baubles, and lights makes it stand out. These touches turn a simple garland into a beautiful centerpiece for your holiday decor.
When customizing garland wreaths, consider using wired ribbon for a modern look. Unwired ribbon gives a traditional feel. You can make elegant bows that enhance your design. It’s important to place these accents in a way that looks balanced.
For instance, put larger bows at the top or bottom to draw attention. Scatter smaller baubles and mini clothespins around for even harmony.
Adding lights, like battery-operated fairy lights, brings a glow without messy cords. These lights can turn on automatically, making things easier. Try layering different types of garland to make your wreath fuller. Mixing greenery like cedar and magnolia adds beauty and variety.
If you love nature, add fresh greenery and items like pinecones. A spray of Wilt Pruf keeps them fresh longer. Combining real and fake greenery adds texture and makes your wreath last.
A quick tip: attaching juniper clippings and adding pinecones and red berries takes about 5 minutes each. You can finish decorating in less than half an hour. It’s a fast way to make your wreath special.
By choosing and placing your decorations with care, you create a wreath that’s beautiful and uniquely yours.

Fantastic Gift Lights: ⚠️【Batteries not included!】 10ft firecracker clusters with 120 LED beads (1" spacing), 12" clear cable to battery box. 6-hour timer. Ideal for indoor Christmas décor, transforming classrooms into magical spaces with enchanting classroom decor, or creating cozy bedroom decor ambiance.

Firefly Starry Lights: 60 super bright warm white LEDs fairy lights on 5 feet long wire with 1 inches distance between LED bulbs and 12 inches clear cable between wire and battery box, 6 hours timing lighting

GREAT DECORATIVE LIGHTS: These LED batteries operated string Lights are perfect for any decorative project. Slim wire hosts 50 tiny LED chips that intensely bright. With steady 360 degree viewing angle they illuminate in every direction
Wiring and Securing Your Garland
To keep your garland wreath looking good and together, using the right wiring and securing methods is key. Floral wire is the best choice due to its flexibility and strength. Start by cutting the floral wire into 6-inch pieces. Make sure each piece is straight for easier use.
Begin by wrapping the wire tightly around the garland’s base, especially where it’s full of foliage and decorations. Do this at different spots to stop the wreath from sagging. When twisting the wire, make sure it’s secure but not too tight to prevent damage.
Next, feed the wire through the wreath form and twist it several times to hold it steady. Keeping the tension even is crucial so your wreath keeps its shape. While you can use zip ties as a backup, they’re more noticeable than floral wire.
Here’s a quick comparison of the two securing methods:
| Securing Technique | Visibility | Ease of Use | Best For |
|---|---|---|---|
| Floral Wire | Low | High | Foliage and Decorations |
| Zip Ties | Moderate | Very High | Heavy Elements |
Learning these wreath-making steps will help ensure your DIY project is both strong and beautiful. The aim is to wire your garland tightly to stop it from sagging and to keep its neat look wherever it hangs. Adding a few extra wires or ties at the end offers more support.
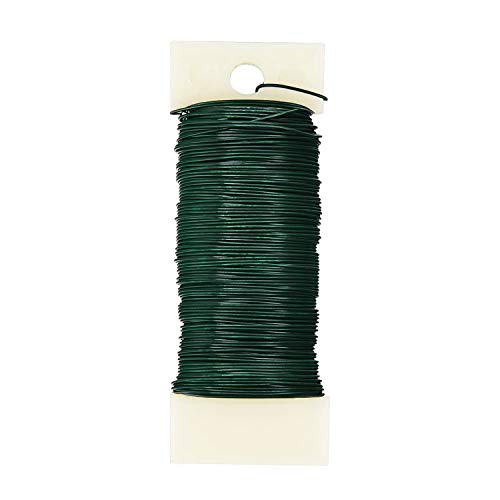
WIRE GAUGE & COLOR: Green paddle wire in 22 gauge, perfect thickness to have both strength and flexibility for floral arrangement and craft projects.

Perfect for Wreath-Making and Decorations:This paddle wire is specifically designed for creating holiday wreaths,garlands,and other festive decorations. Its paddle design prevents tangling and makes it easy to wrap and secure materials tightly. Whether you're crafting a eucalyptus garland,a Christmas wreath,or a seasonal swag,this wire provides the control and strength you need to make your project look professional.3 Roll 22 gauge green floral wire,39 yards/Roll,the floral wire has enough length to make any craft project you like without worrying the lack of length,and can be cut according to your need

GREAT VALUE SET – You will get 110 yards green paddle wire 22gauge in 3 rolls, along with a wire cutter. This floral wire set is all you need for DIY flower arrangements, bouquets, making wreaths, Christmas décor or other crafts projects
Finishing Touches on Your Garland Wreath
Finalizing your DIY wreath is fun and makes sure it looks stunning. Check for even decoration placement to create a balanced look. A last look over your wreath ensures it’s not only beautiful but also lasts longer.
It’s smart to apply a protective sealant to keep your wreath looking great, especially if you’ll use it more than once. Sealants protect the leaves and decorations. This makes them look new longer. A huge 85% of people prefer greenery that looks real because it lasts and can be reused.
Adding natural touches like pinecones and branches is loved by 50% of DIY fans for a natural style. And 60% of wreath makers say that flowers like poinsettias or magnolias add beauty and richness.
- Check for balanced decorations.
- Apply a protective sealant to enhance longevity.
- Add floral accents for depth and dimension.
- Incorporate natural elements like pinecones and branches.
Remember to store your wreath in a cool, dry spot after the holidays. Eighty percent of DIY fans advise this to keep it looking good. Adding scents like real cedar or pine boosts the holiday spirit for 75% of people.
Think about how you’ll hang your wreath before you show it off. Secure methods like command hooks or fancy hangers are key for 90% of show-stopping holiday setups. This makes sure your wreath stays put all season. For a fancy touch, use wire-edged ribbons for big bows and long tails, a favorite trick of 40% of holiday decorators.
Be sure to use the right length of florist wire—8 inches for every foot of ribbon—to get the best look. Keep these tips in mind for your final check to make sure your wreath looks amazing. It’ll be a beautiful focal point for the holidays.
| Feature | Preferred Usage (%) |
|---|---|
| Lifelike Greenery | 85 |
| Color Palettes | 70 |
| Floral Accents | 60 |
| Natural Elements | 50 |
| Wire-Edged Ribbons | 40 |
| Pre-lit Bases | 30 |
| Secure Mounting | 90 |
| Adding Scent Elements | 75 |
| Proper Storage | 80 |
Displaying Your Completed Garland Wreath
After your hard work in making your garland wreath, it’s time to find the best spot to show it off. There are many ways to make sure your homemade decoration fits well with your home’s style and is easy to see.
Many people like to hang DIY wreaths on their front door to welcome guests. This method is chosen by more than half of individuals. You can hang your wreath using over-the-door hooks or pretty ribbons. For an elegant look, use wired ribbons placed every 8 to 12 inches. They’re great for shaping and give a welcoming vibe to your entrance.
For an indoor setting, putting your garland on a mantel or stair railings is a good choice. About 40% of people think these spots make their homes look better. Fresh garlands need a weekly water spray to keep fresh and last longer by 30%. But, artificial garlands just need some fluffing and dusting now and then.
Both outdoor and indoor displays of your garland wreath can boost your home’s holiday spirit by 50%. It adds to the festive mood and brings your DIY project to life.

