Want to bring timeless beauty into your home? Making an artificial flower wreath is a great DIY project. It lights up any room easily. This guide will show you how to make your own floral wreath. It’s perfect for your front door or as a beautiful piece inside your home.
Key Takeaways
- Utilize a 14-inch foam wreath for a manageable and visually striking base.
- Choose an odd number of flowers for a balanced and appealing design.
- Incorporate 2-3 primary colors and 1-3 contrasting colors for depth.
- Ideal flower arrangement includes peonies, hydrangeas, ranunculus, boxwood, billy buttons, and lavender.
- Recommended tools include secateurs, scissors, wire, moss pins, and wreath wrap for assembly.
Introduction to Wreath Making
Wreath making is a time-honored tradition. It has deep roots in culture and history. It’s used to celebrate many occasions, from weddings to seasonal holidays. Making wreaths is a key part of home decor crafts. It’s a skill that crafters at any level can enjoy and benefit from learning.
To start making a DIY wreath, you will need some basic tools. These include secateurs, scissors, wire, moss pins, and wreath wrap. The type of base you choose is important. You can pick from wire frames to Styrofoam forms that are light and simple to use.
Choosing the right materials is vital. Fresh greens like eucalyptus and pine are great for their fresh look. For wreaths that last, dried flowers such as lavender are perfect. They ensure your wreath looks good for longer, indoors or outside.
Using artificial flowers and berries is another great option. They make your wreath bright and easy to care for. For example, check out this DIY guide for making a wreath with artificial green peonies and hydrangeas. They look real and come in many colors, letting you be creative.
Sharing your wreaths at local craft fairs can be fun and rewarding. Creating a unique style and an online shop are good ways to start a business. This can help you succeed in the wreath-making world.
In conclusion, wreath making is a fulfilling home decor craft. Learning the basics of wreath making and using varied materials lets you make beautiful wreaths. This not only beautifies your home but can also turn into a business opportunity.
Selecting Your Artificial Flowers
Choosing the right artificial flowers is key for a beautiful wreath. There are many colors, textures, and materials. Consider realism, durability, and how they look together.
Silk flowers look delicate and real, making them a top choice. Silks Are Forever sells beautiful ones for costly projects. Polyester flowers are also convincing and more affordable. You can find them at Nearly Natural and Jeffrey Surles Designs. Plastic flowers are less real-looking but cheaper and good for some crafts.
- Color coordination: Pick colors that look good together and fit your wreath’s theme. Like red and green for Christmas.
- Texture variety: Use different textures, like soft silk and sturdy plastic, to make your wreath more interesting.
- Realism and botanical accuracy: Choose flowers made with care that look like real ones. This makes your wreath look better.
Buy from trusted sellers with good customer feedback. Look for ones with at least 4-star ratings on Amazon. DIY projects are popular, with 65% of people who like crafting using these products.
Good artificial flowers cost between $5 to $15 each. They are a smart choice because they last long and need little care. Keep them in a cool, dry spot and clean them often to keep them looking good.
Before you start, check out a guide on making a wreath. It has tips and ideas to help make your wreath special and durable.

LIFELIKE WREATH: YNYLCHMX spring summer wreath is surrounded by lush eucalyptus leaves and purple pansy flowers that make this 18-inch wreath look more vivid and colorful, adding a fresh breath to your home around the whole year.

2 BUNCH LUXURY SUNFLOWER SET:Includes 2 full bouquets with 14 large 4-inch sunflower heads, 60 small sunflowers, and 72 matching leaves. Total stem length 17.7 inches; flexible wire stems bend and trim easily for any vase or arrangement

Preparing Your Workspace
First things first, get your crafting area sorted. This is key to being productive and enjoying your DIY projects. A well-set-up space makes tasks easier and boosts your creativity and efficiency. Choose a spot in your home where you can lay out all your stuff without being disturbed.
Your workspace doesn’t have to be big. The important thing is to have enough space to keep your tools and supplies in order. You could use two chef’s tables in an L-shape for more room. And don’t forget at least one trash can nearby for easy cleanup and keeping your space clean.
Keeping finished products organized is also easy. Use S hooks and a grid wall to hang up finished wreaths, making the most of vertical space. Clear storage bins are best for keeping materials tidy. They let you easily see what’s inside, which helps when sorting ribbons by print and color. And keep seasonal ribbons together for better organization.
Set up a special spot for taking photos of your projects. A four-foot table on bed risers works great, especially with the right lights, such as boom lights and a ring light. This is especially handy if you plan to sell your stuff online or show it off on social media.
Also, set aside a shelf for all your shipping needs like boxes, stickers, mailers, and tape. This makes packing simpler and faster. And sorting picks and stems by color on shelves helps keep everything in order.
Having an organized place to work can really help you do better in your projects. Setting up your crafting area is a crucial step. Never undervalue the power of a well-organized space dedicated to your crafts.
Assembling the Wreath Base
Starting to make a beautiful wreath means making a strong base first. The base you pick is key for how your wreath looks and holds up. Choosing between a grapevine or a foam base is important, and knowing how to put together your DIY wreath foundation matters a lot.
We’ll use an 18-inch wire wreath form for our project. You’ll need things like grapevine, foam, wire, and floral tape. Follow these simple crafting techniques for a good start:
- Wrap the wire wreath form with floral tape first. This is key, especially with a foam base, to keep the foam in place.
- Make sure to wrap the wire around at one-inch spaces. This makes it stronger and supports decorations better.
- Add moss for looks and to keep moisture. Moss makes it look nice and helps plants stay fresh longer.
- Use moss pins to keep the moss in place. Make sure each pin is secure to prevent shifting.
Before you add flowers, cut the stems of fake peonies to three inches for easy grouping. For an 18-inch wreath, eight groups of faux peonies work well. Each group should have four to five flowers. Use florist wire to hold the groups together before attaching them to the wreath.
To make the wreath look full and even, place the last group of peonies under the first one. This hides the ribbon completely. Also, attach a wire loop for hanging, and twist it tight to the wreath form with florist’s wire for strength.
A well-made DIY wreath foundation can be made with different materials, each with its own advantages. Grapevine wreaths give a natural look and are good with fewer plants, while foam bases make flower insertion easy and hold water better. No matter your choice, using these crafting techniques will result in a beautiful, lasting wreath.
| Material | Benefits |
|---|---|
| Grapevine | Natural appearance, allows visibility of branches |
| Foam | Easy insertion of flowers, retains water better |
| Moss | Enhances appearance, helps keep greenery fresh |
By carefully following these steps and understanding the details of creating a wreath base, you’ll have a strong and nice-looking base ready for decorating.

Stylish Green Wreath Rings: Add a touch of green to your decor with these 2 wreath rings, each 18 inches in diameter

Sufficient quantity: The package comes with 5-pack wire wreath frames, enough for you to arrange a decoration, also have spare for replacements and DIY extras.

Great Starter Kit for Wreaths: The package comes with 6 pack wire wreath frames, 6 pcs adhesive hooks, and 38 yards 22 gauge paddle wire. Great combo for your wreath handcrafts.
Incorporating Foliage and Accents
Adding greenery to wreaths makes them look better and feel more natural. This section discusses choosing and using different foliage and decorations to improve your DIY wreaths.
Faux stems like eucalyptus, ruscus, and hydrangeas are top picks for adding to wreaths. Try using 4 stems of faux ruscus and 1 bush of mixed eucalyptus for a lush look. Adding 12 stems of large faux hydrangeas and 8 stems of ranunculus brings in a mix of textures and colors.
Grouping flowers in odd numbers helps make the arrangement look better. It looks more natural and pleasing. Using one roll of wired ribbon can make elegant bows or loops for decorating. You can also add big bows or small ornaments to make your wreath unique.
Decorative touches like holiday garlands or faux cotton balls can make your wreath stand out all year. Artificial foliage is great for wreaths because it doesn’t need care, which is perfect during the holidays.
Experimenting with different mixes and where to place them is key to making great DIY floral accents. With lots of colors to choose from for paint and the chance to change flowers with the season, you can create wreaths that last all year and fit every occasion.
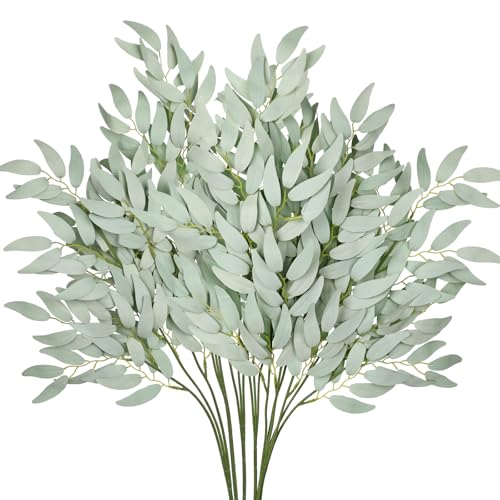
Material & Realistic Design: Using double-sided embossing technology, the material is thick and the feel is realistic, Eucalyptus leaves are meticulously crafted and arranged in an alternating pattern, featuring vibrant veins that intricately replicate the natural details found in real foliage. Each leaf is delicately designed to capture the organic texture and shape, ensuring a lifelike appearance that adds authenticity to any decorative arrangement or setting.

【4 Kinds Fake Flowers】: You will receive 5 fake hydrangea 20 eucalyptus stems, 20 fake silver-dollar eucalyptus stems and 10 babysbreath. Non-fading, odorless. You can either place the roses alone in a vase or combine them with other accessories to create your own unique style.

artificial hydrangea flowers Full Flowers with Stems:Each meticulously crafted hydrangeas Flowers bloom features 96 delicate petals and comes with 2 lifelike leaves for enhanced realism. With a total height of 45 cm (17.72 inches) and a fully opened flower diameter of 20 cm (7.87 inches)Please Note: The priceof the product is 6 pcs.The vase is not included!
Securing and Finalizing Your Wreath
Once your wreath is ready, it’s time to make it durable and add the final touches. Using wire and hot glue guns can help a lot. Wire or string holds heavier decorations tight, crucial for ensuring everything stays in place. Hot glue guns are great for sticking on lighter items, used in most wreath projects.
Making your wreath look sharp and professional is about the style you add. Consider using ribbons, ornaments, or things from nature. Most wreaths feature these items. Instead of fresh flowers that wilt quickly, try silk peonies. They come in many colors and last much longer.
Before calling it done, double-check how everything looks. Half of the wreaths decorate front doors; others beautify indoor spaces. Make sure yours looks just right wherever you plan to show it off. Choosing the right size for your wreath and leaves gives it a balanced look that catches the eye.
Making a wreath secure and pretty is not hard with these tips. Enjoy making your wreath. Besides looking great, crafting has great benefits like stress relief and feeling proud of your work. It’s rewarding at every step.

Glue Gun with 40 Sticks Set: The hot glue gun kit comes with 8pcs heavy duty hot glue guns in 4 colors, including white, pink, deep green and dark yellow, and 40pcs strong adhesive odorless glue gun sticks with good fluency. Lacoccinct glue guns are enough for your daily use and replacement needs.
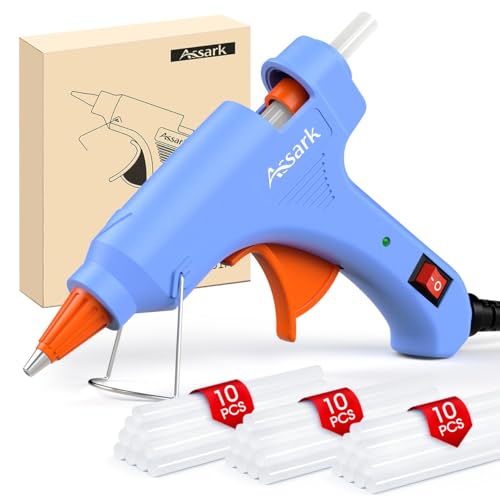
【30W and Faster Heating】:This 30W mini hot glue gun only needs 1 minute to warm up, which is faster than 20W hot glue gun, and keeps the temperature constant automatically.

Dual temp: Use the right hot glue temperature for the job; Low Heat for delicate materials like floral, fabric, foam, jewelry, and more; High Heat for strong bonding on wood, plastic, metal, glass, and more
Displaying Your Wreath
Knowing the right way to hang wreaths makes them look better and last longer. Displaying artificial flower wreaths gives many creative choices. Doors, walls, and windows are perfect places, each offering a special way to show off your wreath.
For doors, a grapevine wreath base, 16 to 20 inches big, works great. Use strong hooks or over-the-door hangers for support. Changing your wreath with the seasons makes your decor always feel new.
Use the same base and swap flowers like pink peonies and dried Gomphrena to match your style. This saves money and is good for the planet. Dried flower wreaths can look good for many seasons.
Wall displays can be the main attraction in any room. Use adhesive hooks that won’t hurt your walls for hanging wreaths. Switching out different wreaths, like a colorful 24 Inch Faux Floral Wreath or a Mossy Nest Wreath, makes it easy to change your room’s look.
Windows add a fun touch with artificial flower wreaths. Light wreaths, like the 16-18 Inch Hydrangeas Spring Wreath, can hang on windows with suction cups. Seeing the wreath’s reflection makes the room look even nicer.
| Wreath | Ideal Placement | Pros | Cons |
|---|---|---|---|
| 24 Inch Faux Floral Wreath | Front Door | Bold & Eye-catching | May be heavy |
| Mossy Nest Wreath | Living Room Wall | Whimsical Design | Requires Secure Mounting |
| 16-18 Inch Hydrangeas Spring Wreath | Window | Lightweight | Limited Size |
It’s important to keep your wreath looking good. Clean artificial flower wreaths often, and you can fix any loose parts with a hot glue gun. Rotate your wreaths now and then to avoid them fading from the sun. This keeps your decor fresh all year.
Conclusion and Inspiration
We’ve reached the end of our guide on making a wreath with fake flowers. This journey shows the power of creativity and DIY projects. By picking the right supplies and following our guide, you can make a unique piece. Remember, wreaths can be from 12 inches to 24 inches wide. This gives you the freedom to choose the size and look.
Finding inspiration in nature and the seasons can make wreath-making even more special. Whether you use leaves, decorations, or different flowers, the possibilities are endless. DIY wreaths are also cost-effective since you can gather many materials for free or at a low cost. This makes for wonderful, affordable decor.
We hope you’ll share your beautiful wreaths and stories with other DIY lovers. This way, you help build a community full of creative ideas. Whether your wreath decorates your door, your mantel, or it stars as a table centerpiece, it’s sure to inspire. So, get your supplies ready, let your creativity flow, and start your wreath project now!

