Making a layered bow for wreaths can make any decoration or home look better. Coach Mel, a craft expert, shows how easy it is. Whether for the holidays or to add something special to your home, this guide has what you need.
A layered bow is great because you can use simple items. You just need different ribbons, pipe cleaners, scissors, and an EZ Bow Maker. It only takes 15 minutes to make a beautiful bow that improves any wreath.
With 70% of DIY craft videos being about bows, it’s a popular skill. By following these steps, you’ll quickly make a stylish bow. For more help, check the detailed guide at Southern Charm Wreaths.
Key Takeaways
- Creating a layered bow can significantly enhance the appearance of your wreath.
- The process involves minimal materials: 2 types of ribbons, a pipe cleaner, scissors, and an EZ Bow Maker.
- A majority of crafters (65%) prefer using twine for tying their bows.
- Following the provided steps can help you complete your bow in roughly 15 minutes.
- Understanding basic skills like cutting, folding, and tying are crucial to this craft.
Understanding Bow Basics
To begin making a great layered bow for your wreath, learn the basic skills first. Choosing the correct ribbon types is essential. For an attractive layered bow, mix:
- (2) 2.5-inch ribbons
- (2) 1.5-inch ribbons
Using tools like the EZ Bow Maker makes crafting easier. For instance, making three 6.5-inch loops with the 2.5-inch ribbon as the first layer and three 6-inch loops for the second layer creates balance. Check out the loop sizes:
| Ribbon Width | Layer | Number of Loops | Loop Size |
|---|---|---|---|
| 2.5 inches | First | 3 | 6.5 inches |
| 2.5 inches | Second | 3 | 6 inches |
| 1.5 inches | First | 3 | 5.5 inches |
| 1.5 inches | Second | 4 | 4 inches (first loop), 5 inches (remaining loops) |
For each bow, use (2) 10-inch tails for both 2.5-inch and 1.5-inch ribbons. This makes your bows look neat and elegant. Getting the loop sizes and tails right is vital for a good bow.
It’s also crucial to secure the bow well. Use pipe cleaners or zip ties to keep its shape under any condition. Tailoring tail lengths for different parts of the wreath adds a nice touch to your design.
Whether you’re a beginner or an expert, focus on symmetry and strength in your bows. The right ribbon, tools, and approach will help create perfect bows that improve your wreath’s look.
Choosing the Right Ribbon
Choosing the right ribbon is key for making a stunning layered bow for your wreath. Think about the ribbon’s width, fabric type, and if it has wires. These aspects greatly affect how the bow will look and how easy it will be to make.
For layered bows, 2.5” and 1.5” ribbon widths are often suggested. These sizes help get the layered effect just right. Mixing widths can also add depth to your bow.
The type of fabric your ribbon is made of matters a lot. Wired ribbons are best for keeping their shape. Choices include satin, grosgrain, and organza, each giving a different look and feel.
Choosing wired ribbons is smart because they hold shapes well. Non-wired ribbons are softer but can be harder to work with to get a nice look.
Think about colors for the season or event when picking ribbon colors. Here are some ideas:
- Spring: Go for soft pastels like light green, pink, lilac, and baby blue.
- Summer: Choose bright colors like yellow, coral, turquoise, and fuchsia.
- Autumn: Pick rich tones like burnt orange, deep reds, browns, and mustard yellows.
- Winter: Use cool colors like icy blues, silvers, whites, and deep greens.
To make bows pop, use ribbons with different patterns and textures. Here are some good choices:
- Solid Color Ribbons: Good for a base layer in bows with many ribbons.
- Polka Dot Ribbons: They work for many themes, like holidays or summer.
- Striped Ribbons: Perfect for patriotic or nautical designs.
- Chevron Patterns: They add a modern touch and more texture.
When mixing patterns, pair simple and complex ribbons while keeping colors matched. Also, use various ribbon widths for more depth. This balance makes bows look great.
Tools like the EZ Bow Maker and Bowdabra Bowmaker make bow-making easier. Use floral wire or pipe cleaners to securely attach your bows.
Joining communities like the Design With The Pros Club gives you access to over 100 wreath tutorials and a supportive group. Look for classes in places like Boston, New Jersey, and Portland, or take online classes to learn from home.
Follow these tips, and you’ll enjoy picking out the perfect ribbons for your bows. It’ll make your crafting journey fun and rewarding.

Size: Continous 20 yards length, 1 Roll per package, convenient for you to use and store

Color: White satin wired ribbon crafted from glossy and shiny elegant surface satin texture with the same double-faced backing, wired edges, great for making bows for your wreath, centerpiece, door hanger, lantern, garland, gift wrap and other
Step-by-Step Instructions for a Layered Bow
To make a beautiful layered bow for your wreath, start with knowing the right tricks and being detailed. First, measure and cut your ribbons carefully. Measure 7” for the tail and 12” for the loops. It’s key to use exact measurements to make a bow that looks right.
Now, choose your ribbons. Picking high-quality ribbons from special stores makes your bow look better. Use wired ribbons because they keep their shape well. For this guide, you need two types of ribbons for a bow with six loops—three loops from each type.
Get your materials ready: Florist Wire, Scissors, Wire Cutters, and a Craft Mat or Ruler. Cut the first ribbon into sections—7” for the tail and 12” for each loop. Do the same with the second ribbon. Put the tail piece at the back and start making loops by bending the ribbons.
Make your bow by placing the loops on top of each other, switching between the two ribbons. Begin with three 1.5-inch ribbon loops (6 inches on each side) at the bottom. Then, add two 5.5-inch ribbon loops, and end with a 5-inch ribbon loop at the top. Make sure each loop matches the others in shape and position.
Use a pipe cleaner to tie the bow’s center tightly, holding all layers together. Tweak the loops and tails to make the bow full and even. If the bow is thick, use an extra pipe cleaner to keep it secure.
| Ribbon Type | Loops per Side | Length of Each Loop |
|---|---|---|
| 1.5-inch Ribbon | 3 | 6 inches |
| 5.5-inch Ribbon | 2 | each side |
| 5-inch Ribbon | 1 | each side |
Once you get the hang of it, making a layered bow takes less than five minutes. With clear directions, even someone new to this can make a lovely bow. It’s a great way to add a welcoming vibe to any wreath.

VALUABLE PACKAGE: You will receive 4 rolls of wired edge ribbons, featuring 2 green rolls and 2 Pink rolls, providing enough supplies for your daily crafting and gift wrapping needs.
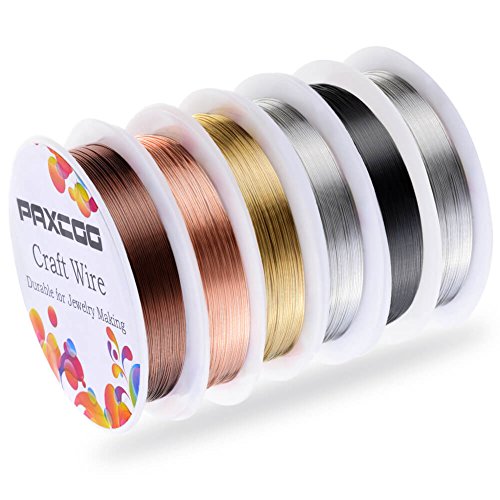
WHAT YOU GET?: Paxcoo jewelry wire set includes 6 rolls of different color copper wire. They are easy to use and works with different types of beads, necklace and bracelet designs

All-in-One Patriotic Design Collection:This 8-roll patriotic wired ribbon set combines 4 iconic styles—stars, stripes, classic plaid, and solid red white blue. Perfect for 4th of July, Memorial Day, and patriotic-themed crafts, the designs capture the spirit of American pride in every roll.
Tips for Perfecting Your Bow
To make a pro-looking bow, learn some key techniques and solve common problems. Following advanced tips will make your bow the highlight of your wreath.
Always choose wired ribbon for your bows. It keeps its shape and makes the bow look better. The best ribbon width is at least 4 inches for big projects. But, 2.5 inches is perfect for wreaths.
Getting the right size is important. Use 36 inches for the main part, 24 inches for the middle, and 6 inches for the center. The 24-inch piece should overlap by 1 inch. You’ll need 2 staples for the 6-inch piece.
Try mixing different ribbons for more beauty. Use:
- 4″ wired ribbon
- 2.5″ wired ribbon
- 1.5″ wired ribbon (two pieces)
Measure your tails right: 8 inches for 4″ ribbon, 7 inches for 2.5″, and 6 inches for 1.5″ ribbon.
To make your bow full, adjust each loop carefully. Pull the inside left loop down and the right one up, focusing on the middle loop.
Keep your bow tight on the wreath. Use floral wire or hot glue. A zip tie is also good. Make sure it’s tight, then cut off the extra. This keeps your bow even and steady.
If loops or tails are off, it’s okay to cut or tweak them. Making a perfect bow takes patience. If you want an easier way, the Bowdabra Bow Maker helps make stunning bows without much effort.
Last tip: try other materials like tulle, crepe paper, or burlap for something special. They give different looks and feels. With many colors and patterns, you can match any theme, making your bow unique and pro-looking every time.

[Ribbon Size]--Each roll of wired burlap ribbon is 20 yards long, conveniently cuttable to your desired size, spooled for easy use and storage.

4 inch burlap ribbon - 10 yards - Natural burlap color - Made from 100% jute burlap - Wired ribbon

Pattern Designs: This patriotic ribbon designed with American flag stars and stripes pattern paired with a navy blue backing. The overall classic Americana color palette is celebration, freedom and festive, perfect for summer, patriotic events and holiday décor
Displaying Your Layered Bow
After making a beautiful layered bow, consider how to show it off on your wreath. Where you place the bow makes a huge difference in how the wreath looks. Many like to put the bow at the top for a classic, charming look that pulls eyes upward.
Putting the bow at the bottom gives a sophisticated vibe, especially if the wreath has lots of decorations at its base.
For a fresh and trendy look, try the bow on the side of the wreath. This unique spot can make your wreath pop. Think about the wreath’s overall style and how full it is when deciding on the bow’s location. A bushy green wreath might look nice with a bow in the center, while a flower-filled wreath could shine with a bow on the side or bottom.
It’s also important to blend the bow smoothly into the wreath. Use a wired ribbon so your bow keeps its shape over time. A Grapevine wreath form is good for attaching the bow easily and moving it around.
This way, your wreath can change with the seasons. You can swap out different decorations, like faux berries or sunflowers, to give it a new look without starting over. Adding seasonal touches and playing with colors and textures will keep your bow and wreath looking great for any event.

