Welcome to our bow wreath tutorial! In this guide, we will show you the art of DIY bow wreath making. It’s perfect for making any festive display extra special. We’ll guide you through each step, from picking the right ribbon to adding your bow to a wreath. We use the ‘Pro Bow The Hand’ and include a video and written instructions. This will help you get professional-looking results easily. Whether you’re just starting or have crafted for years, our step-by-step bow creation guide will enable you to make beautiful bow wreaths with confidence.
Key Takeaways
- A medium-sized bow needs about 4 feet of ribbon.
- To keep its shape and look its best, use wired ribbon.
- Learning to make bows only takes a few minutes.
- Depending on the ribbon width, bows can be different sizes.
- You only need floral wire to attach the bow to a wreath or gift.
- It takes 15 minutes or less to make a layered bow.
- Total shares of the bow-making guide on social media are 8,185.
Understanding Bow Wreaths
Bow wreaths are key for decorating your home, especially during holidays like the 4th of July. Learning the bow wreath basics can make your home look stunning. We’ll look at different bow styles and wreath types and their effects on decoration.
The right bow placement can change everything. A big, fancy bow grabs attention, making any wreath stand out. The Rosette Bow, with its 16 to 19 loops, adds elegance to big wreaths. For smaller ones, fewer loops keep things looking good.
The layered bow is another great choice. It uses two ribbon types for more depth. Usually, you’ll need double the ribbon length of the bow size you want. This helps make sure your bow looks perfect.
Holiday bow wreaths let you get creative. Using things like real magnolia leaves in your bows can give a natural vibe. Always using florist’s wire is key for making sure your wreath lasts.
| Type of Bow Wreath | Distinctive Features | Recommended Ribbon Length |
|---|---|---|
| Rosette Bow | 16-19 loops for large wreaths; fewer for smaller wreaths | Varies based on size |
| Curly Bow | 24-36 inches long ribbons, uses wired ribbon | 24-36 inches |
| Layered Bow | Utilizes two different types of ribbon; wider ribbon as the base | Twice the size of the desired bow |
Knowing these bow wreath basics lets you make decorative bow wreaths that reflect your style and impress others. No matter if it’s simple or fancy, your bow wreath will add something special to your celebrations.
Choosing the Right Ribbon
Choosing the perfect ribbon for your wreaths is crucial. It makes your creation pop and stay in shape. Think about texture, width, and material to make your design look great and last long. We’ll look at various ribbons to help you pick wisely for your craft.
Satin ribbons shine and feel smooth, making them great for elegant wreaths. They come in many sizes, fitting both big and small bows. Grosgrain ribbons are strong because of their ribbed texture. They’re perfect for outdoor use since they keep their shape.
Wired ribbons include thin wires on the edges. These wires let you shape the ribbon easily, making your designs look pro. They are especially good for big, fancy bows that need to keep their form.
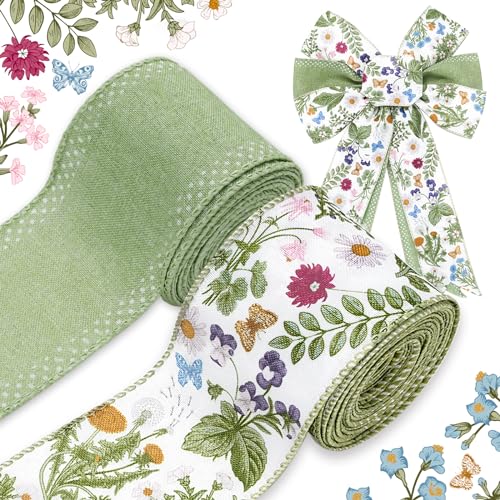
The *Magnolia Ribbon* is perfect for natural-looking bows thanks to its color and 1.5-inch width. The *wildflower deluxe ribbon* mixes reds, yellows, and blues for a lively color scheme. Adding different sizes like blue denim or wildflower ribbons makes your wreaths more interesting.
For pink and yellow themes, use sizes like 5/8-inch macrame and 1/2-inch pink scallop edge for a soft look. Texture is key, so adding features like scalloped edges and fake burlap lifts your wreath’s design.
Below is a detailed table to help you select the right ribbon based on various design elements:
| Ribbon Type | Recommended Width | Ideal Uses | Color Options | Special Features |
|---|---|---|---|---|
| Satin | 2.5 – 3 inches | Elegant bows, indoor wreaths | Various, including pink and yellow | Glossy finish |
| Grosgrain | 2.5 inches | Durable outdoor bows | Blue, red, yellow | Ribbed texture |
| Wired | 1.5 – 2.5 inches | Fuller, elaborate bows | Moss green, taupe | Moldable shapes |
| Wildflower Deluxe | 1.5 – 4 inches | Vibrant spring projects | Reds, yellows, blues | Bright color palette |
| Macrame | 5/8 inch | Delicate, feminine designs | Pink | Texture variation |
To pick the best ribbon, know its features and how it fits your project. Think about your bow’s theme and effect. Whether it’s for a lively spring event or a classy celebration, the perfect ribbon will highlight your wreath.

Size: 1-1/2 inch wide ribbon, continuous 10 yards per spool, convenient for you to use and store
THE PACKAGE INCLUDES: Package includes 2 rolls wired edge ribbon with exquisite designs, quite suitable for crafts making and gift wrapping
Preparation Steps
Starting to make a bow means planning well and getting the right supplies. You’ll need 2 yards of ribbon, a heavy-duty stapler, and scissors. You may also want floral wire, wire cutters, and a tool like ‘Pro Bow The Hand’.
Begin your wreath by cutting the ribbon to lengths of 36, 24, and 6 inches. Make sure the 24-inch piece overlaps by about an inch when folded. Secure the 6-inch piece with a staple at each end, using two staples in total. For a big visual effect, choose ribbons at least 4 inches wide or use different materials like tulle, crepe paper, or burlap.
Getting ready to make wreath bows also means setting up your tools. If you’re using an EZ Bow Maker, gather a hammer or rubber mallet, wired ribbon, wire, scissors, and wire cutters. This tool is great for those with arthritis or hand pain, making it easier to hold the ribbon tight. Crafting is more fun when you have all your tools ready and organized.
To give your wreath life and appeal, try making 3 loops of 7 inches on each side, 2 loops of 6 inches on each side, and 1 loop of 5 inches on each side with the EZ Bow Maker. This gives your bow depth and variety. The first tail of the bow should be about 24 inches to have a nice long tail, and tie the center of the bow with a 10-inch piece of ribbon.
For tying the bow, an 18 gauge wire can work instead of cable ties. If the ribbon is wider than 1 inch, cutting it in half makes it easier to handle. The best ribbon width is 2.5 inches, especially if it’s jute wire-edged ribbon. It’s good to use a second cable tie at a right angle for a strong hold on the wreath.
Finally, make sure your workspace is tidy and all your materials are easy to grab. This organized approach makes making a DIY wreath both efficient and fun.
Basic Bow Tie Techniques
When we talk about bow tie methods for wreath decoration, learning the basic techniques can really improve your crafts. It doesn’t matter if you’re new or you’ve been doing DIY projects for a while. Knowing how to tie bows can make your decorations look amazing without much trouble.
First, let’s go over the loop-and-pull method. It’s one of the easiest ways to make a simple bow:
- Start by cutting your ribbon to about 12 inches long.
- Make a 7-inch tail, then fold the ribbon 3 inches from the end to form your first loop.
- Make another loop on the other side, making sure both loops are the same length.
- Tighten the middle of the bow with a pipe cleaner to keep its shape.
- Put a drop of hot glue under the knot to make it sturdy and neat.
If you want something fancier, try the multi-layered Terri Bow. It looks more detailed and full:
- Cut three 14-inch pieces of 2.5-inch wide ribbon and a 12-inch piece for the center.
- Lay the ribbons in a cross shape and tie them together with a zip tie.
- Loop each ribbon piece around your fingers 10 times, keeping the ribbon lengths consistent for each layer.
- Stack and twist the looped ribbons onto the center, and use hot glue to hold them together.
- Finish with a 6-inch piece to cover any exposed parts.
The bouquet bow is another great choice. It adds a luxurious feel:
- Take three 20-inch pieces of 2.5-inch wide ribbon and three pieces of 1.5-inch wide ribbon.
- Layer them alternately for more depth.
- Loop the ribbon around your fingers 10 times to make big loops.
- Tie the middle with a pipe cleaner and trim the tails to 8 inches.
- Add a dot of hot glue for security and fluff up the loops to look fuller.
Keep in mind, whether you’re into simple bow making or complex DIY bow techniques, it’s best to use extra ribbon. This way, you won’t run out and can easily make adjustments. Having enough ribbon lets you craft beautifully balanced, hand-tied bows. These bows will be the crowning touch for your wreath creations.
- Tools required: scissors, pipe cleaner, zip tie, hot glue gun
- Estimated yield: 1 beautifully tied bow per session


WHAT YOU GET: This satin ribbon includes 1 roll of 2-1/2 inch wide satin ribbon. Each roll is 25 yards, to satisfy your various needs

2.5 inch burlap ribbon - 25 yards - Made from 100% jute burlap - Wired edge ribbon
Adding Flair to Your Bow
When you’re sprucing up your customizing wreath bows, every little detail adds up. Try out various decorative bow techniques and mix different textures and shades. This way, you achieve a look that’s eye-catching. For a spring vibe, soft pinks and pale blues are perfect. They give off a lively and fresh feel. On the other hand, deep oranges and burgundies are ideal for fall wreaths. They create a beautiful contrast.
For that winter or Christmas spirit, think about using rich reds and greens. Also, adding elements in gold and silver can give it a timeless, festive flair.
Layering different ribbons can take your bow to the next level. Use a wider ribbon for big wreaths to make a bold statement. A thinner ribbon works best for smaller, delicate looks. Plus, adding creative bow enhancements like beads or small flowers can really set your design apart. Imagine a bow with layers that each increase by one inch, starting at 5 inches. It catches the eye and looks professional.
Don’t forget to leave some space at the top of your bow for hanging. This ensures it fits perfectly on the wreath. To avoid fraying, use clear nail polish or fabric glue on the ribbon edges. It’s a smart, simple way to keep your bow looking great. Store your ribbons in a cool, dry place to keep them vibrant and smooth. Use a low-heat iron or steamer to remove any wrinkles.
Creating a stunning bow doesn’t mean spending a lot of money. Combine pricey ribbons with affordable ones to keep costs low but still look lavish. By using these decorative bow techniques and tips, your wreath bow will be a beautiful focal point in your home decor.
| Season | Color Suggestions | Pattern Suggestions | Ribbon Width | Loop Sizes |
|---|---|---|---|---|
| Spring | Soft pinks, Pale blues | Floral patterns | 1-2 inches | 5 inches |
| Summer | Sunny yellows, Vivid corals, Turquoise | Solid colors | 1-2 inches | 6-7 inches |
| Fall | Deep oranges, Rustic browns, Burgundy | Leaf patterns | 2-4 inches | 7-8 inches |
| Winter/Christmas | Rich reds, Greens, Metallics | Plaid or Gingham | 2-4 inches | 8 inches |
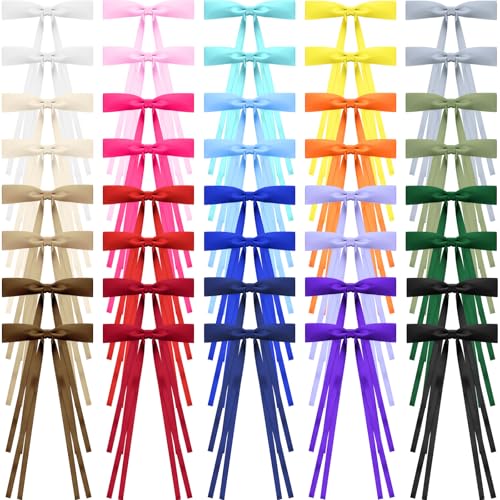
Mother's Day Graduation and Party Hair Bows: this set includes 40 bow hair clips in 20 vibrant pastel and bright colors, ideal for Mother's Day gifts, Teacher Appreciation, nurse week, graduation celebrations, dance recitals, birthday parties, and spring to summer outfits; These charming ribbon barrettes add a sweet and stylish touch to women's everyday wear, party looks, and holiday styling

【Package Contents】The package contains 100 colorful mini bows for crafts to meet your DIY handicraft needs. The quantity is sufficient to meet your daily use needs. These bows can add surprise and beauty to your decoration
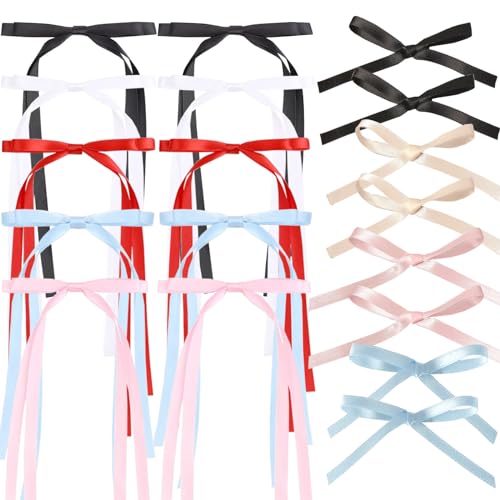
【18pcs Hair Bows for Women】You will receive 10pcs long tassel ribbon clips and 8pcs small ribbon hair clips.The tassel ribbon bowknot clips are great for women and girls who pursues simple fashion!
Attaching the Bow to the Wreath
Putting a bow on a wreath the right way is key. It ensures the bow stays put and looks great the whole time it’s displayed. We’re about to share some smart tips on fixing a bow to a wreath. We’ll talk about different ways, tools, and steps to do it.
First up, get all you need ready. You’ll need a pretty bow, floral wire, zip ties, and maybe a glue gun. Each plays a big part in making sure your bow sticks well.
Now, let’s measure and cut some floral wire. For wreaths sized between 16 and 26 inches, you’ll want a ribbon that’s 7 to 8 feet long. Bigger wreaths might need a bit more ribbon. Once you have your ribbon, follow these steps to get the bow on tight:
- Decide where you want the bow on the wreath.
- Wrap floral wire around the middle of the bow and the wreath’s frame. Make sure it’s snug but not too tight.
- Twist the wire ends together and hide them in the wreath’s greenery.
- If you want it extra secure, use a zip tie. Loop it around the bow’s back and through the frame of the wreath. Pull it snug.
- After the bow is on well, puff out and arrange the loops to look just right.
When picking a ribbon, think about the wreath’s size and the time of the year. Bigger wreaths look good with wider ribbons, 2-4 inches across. Smaller ones are nice with 1-2 inch wide ribbons. Color choices change with seasons: think soft colors for spring, bright for summer, deep for fall, and rich tones for winter.
| Ribbon Dimensions | Wreath Size | Recommended Colors |
|---|---|---|
| 7 to 8 feet long | 16″ to 26″ | Soft pinks, pale blues (Spring); Sunny yellows, vivid corals (Summer); Deep oranges, rustic browns (Fall); Rich reds, greens, metallics (Winter) |
| 2-4 inches wide | Over 26″ | Soft pinks, pale blues (Spring); Sunny yellows, vivid corals (Summer); Deep oranges, rustic browns (Fall); Rich reds, greens, metallics (Winter) |
| 1-2 inches wide | Under 16″ | Soft pinks, pale blues (Spring); Sunny yellows, vivid corals (Summer); Deep oranges, rustic browns (Fall); Rich reds, greens, metallics (Winter) |
Adding a bow is easier with these tips. Whether you use floral wire or zip ties, these methods will keep your bow in place. Always fluff and adjust the bow for the final touch.
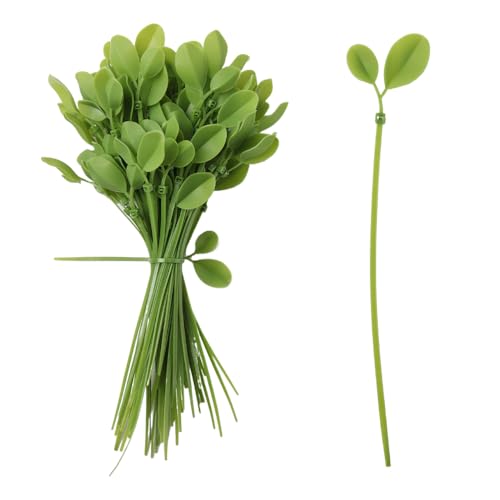
Unique Design: These nylon cable ties are designed to simulate leaf tree leaves, adding a touch of nature to your cable organization.
45lb Load Capacity: Medium Tensile Strength, Ideal for Organizing Garden Plants, Securing Bundles, and Holding Fixtures
Precision Flush Cutters: With 0.6-inch beveled sharp jaws, these small wire cutters can easily reach narrow gaps for clean cuts. Excellent for your precise work like repairing electronic components, trimming circuit boards, making jewelry, etc.
Final Touches for Your Wreath
Now you’ve crafted your bow, it’s time to add the final touches. Start by checking every part is in place and secure. Adding things like faux berries, pussy willows, or seasonal items brings it to life.
Make sure your bow looks balanced and in the right spot. Adjust the bow’s loops and tails to make it look better. A tip: using five loops per side might make it look nicer.
Here are some tips for finishing your wreath:
- Ensure the bow is securely attached using floral wire or a chenille stem.
- Consider adding faux foliage or flowers for a more intricate look.
- Adjust the bow tails to keep your design even.
- Step back and check your wreath design from a distance, making tweaks as needed.
By using these decoration tips, your wreath will look polished and well-made. Paying attention to the little things can make a big difference. Your wreath will not only look great but last long too.
For a budget-friendly option, use one wreath year-round. Just swap out the bow and accents as the seasons change. This approach saves money and is easier than storing different wreaths.
| Item | Cost |
|---|---|
| Bare Twig Wreath | $14 |
| Faux Berry Stems | 50% off + 20% off coupon |
| Pussy Willow Branches | 50% off + 20% off coupon |
| Wired Ribbon | Varies |

VALUABLE PACKAGE: You will receive 4 rolls of wired edge ribbons, featuring 2 green rolls and 2 Pink rolls, providing enough supplies for your daily crafting and gift wrapping needs.

VARIETY PACK: Includes 3 rolls of spring-themed ribbons featuring green grid, pink plaid, and a spring floral wired ribbon, perfect for wreath bow making and seasonal crafts

Fresh Spring Floral Design – This spring ribbon set includes two charming patterns: pink and green dots ribbon and elegant tulip ribbon with leaves. The soft pastel colors create a bright seasonal look, making this pink and green ribbon perfect for spring and summer ribbon decorations, wreath bows, and farmhouse DIY crafts.
Celebrating Your Creation
After learning bow making and wreath assembly, enjoy the pride of showing your handcrafted bow wreaths. You’ve changed simple materials into beautiful decorations. Now, it’s the right time to pick the perfect place for your wreath. It could be your front door, above the mantel, or your entryway.
Share the joy of your DIY wreath projects online. Sites like Pinterest, with over 1,227 shares of this tutorial, and Facebook are great. You can meet others who love crafting and inspire them with your projects. Showing off your wreaths gives you recognition and motivates others to make their own.
Use your skills to make wreaths as gifts for friends and family. They make thoughtful presents for special days like Christmas, Halloween, and Valentine’s Day. Each wreath can be unique for different times and events. By expanding your creativity, crafting becomes a loved habit. Ready for a new project? Check out this guide for more steps on making great wreaths.

