Want to brighten up your front door with spring colors? This DIY guide makes it simple. With basic items like a wire form, false tulips, ribbon, and glue gun, you can make a welcoming wreath. It’s lovely and easy on your wallet.
Getting materials won’t bust your budget – head to Michael’s for tulip bunches at $3.99 each. After a 50% sale and an extra 25% discount, each bunch is about $1.50. If you’ve got a grapevine wreath already, the whole project is less than $12 with 9 bunches.
You’ll need around 20 mini tulip stems. Assembling is easy: use floral wire and glue to fix stems. Aim for 8 tulips on each side of the bow for a nice look. And it’s great for any climate – it works even if frost stops you from planting real flowers.
Key Takeaways
- Create a beautiful homemade tulip wreath with minimal investment.
- Purchase tulip bunches at Michael’s with discounts to keep costs low.
- Use a grapevine wreath form, floral wire, and hot glue for easy assembly.
- Balance your design with tulips on either side of the bow.
- The wreath is suitable for outdoor use if placed on a covered porch.
Gather Your Materials for the Tulip Wreath
Before making a tulip wreath, first gather all the needed materials. Start with 10 mini tulip bushes from a craft store, each around $1.99, totaling about $19.90. Make sure to cut the stems to 3-4 inches long for best results.
You’ll also need an 18-inch wire wreath form. With a 40% coupon, it’s less than $4, making the total cost below $25. You’ll need more supplies like burlap ribbon, florist’s wire, wire clippers, and a hot-glue gun. These items will help create a sturdy base for your colorful tulips.
Choose faux tulips in vivid colors like orange, pink, white, and yellow. Look for discounts up to 50% at stores like Michaels. Group the tulips in twos or threes for a full look. For an even fuller wreath, tie two 12-inch grapevine wreaths together with zip ties.
A pipe cleaner can work as a loop for hanging your wreath. Use optional hot glue to keep the stems in place. The whole project takes about 20 minutes. It’s a quick and fun DIY that adds beauty to your space with little effort.

【Handmade Spring Wreath】:Using a natural grapevine base,the wreath is full of tulips, daisies and lavender, paired with eucalyptus leaves and wildflowers to create a warm, charming and vibrant atmosphere.

Package Includes: The package includes 4 PCS mini spring summer kitchen cabinet wreaths with ribbon. Each spring butterfly lavender hanging wreath is crafted with attention to detail, featuring tulip, butterfly, lavender and eucalyptus leaves,complemented by berries and artificial green leaves, creating a natural and vivid look. Bring the essence of spring into your home with this charming artificial small lavender eucalyptus wreath for front door

Patriotic 4th of July Tulip Candle Rings:You will receive 4 pieces of vibrant patriotic candle ring wreaths, perfect for 4th of July, Memorial Day, and Veterans Day decor. Each wreath features realistic red, white, and blue tulips, lifelike berries, and soft lamb’s ear leaves, bringing a fresh, festive look to your home. With an outer diameter of 7.87 inches and an inner diameter of 3.15 inches, they fit most pillar candles jar candles lanterns and candle holders to elevate your table displays.
Preparing the Wreath Base
To start making your tulip wreath, first get the wreath form ready. Wrap a wire wreath form, between 14 to 16 inches, with your chosen ribbon. Make sure the ribbon is 2.5 inches wide, as experts suggest.
Use a hot glue gun to keep the ribbon in place. This makes sure the base is tight and stable. You’ll need about 4 yards of ribbon to fully cover the form.
Then, use U-shaped floral pins at three spots around the form to secure the ribbon. Making the base for your tulip wreath strong is key. This way, it stays in shape and holds the tulips well.
For a wreath form with a 12-inch diameter, you need around 16 bunches of faux tulips. You can buy these tulip bushes for about $1.99 each at stores like Michael’s. Aim for a mix of light and dark pink tulips, 8 bunches of each, for a nice balance.
The tulips will cost you roughly $30, which is a good deal for a homemade decoration. Getting the base ready takes about 15 minutes. Then, you’ll spend another 30 minutes adding and securing the tulips.

WHAT YOU GET: This satin ribbon includes 1 roll of 2-1/2 inch wide satin ribbon. Each roll is 25 yards, to satisfy your various needs
THE PACKAGE INCLUDES: Package includes 2 rolls wired edge ribbon with exquisite designs, quite suitable for crafts making and gift wrapping

Color: This ribbon features a sheer base with stripes of soft pink and white crossing its surface, adds a touch of elegance and sweet to gift wrapping and craft projects
Arranging the Tulips
Start by placing your tulips on the wreath form wrapped in ribbon. Work from one spot and go around the wreath. Attach each tulip bunch with an 8-inch piece of floral wire. Use one wire for every three tulips to keep them in place.
Overlap each bunch slightly on the one before it. This makes your tulip wreath look full and colorful. It creates a welcoming design.
To keep everything sturdy, use wired ribbon on each bunch. The common 2 1/2-inch ribbon works best. Find these materials at Michael’s or Dollar Tree, where deals like 50% off tulips might be found. It’s also wise to prepare your floral materials beforehand, as this guide for creating a tulip wreath suggests.
When finishing your wreath, check the innermost wire. If it’s showing, add more tulips to hide it. This ensures a smooth look all over. Achieving this visual harmony is a big part of making successful wreaths.
Adding different flowers can make your wreath stand out. Including yellow tulips could bring joy and positivity. It aligns with using around three flower types in a design.

Perfect for Wreath-Making and Decorations:This paddle wire is specifically designed for creating holiday wreaths,garlands,and other festive decorations. Its paddle design prevents tangling and makes it easy to wrap and secure materials tightly. Whether you're crafting a eucalyptus garland,a Christmas wreath,or a seasonal swag,this wire provides the control and strength you need to make your project look professional.3 Roll 22 gauge green floral wire,39 yards/Roll,the floral wire has enough length to make any craft project you like without worrying the lack of length,and can be cut according to your need
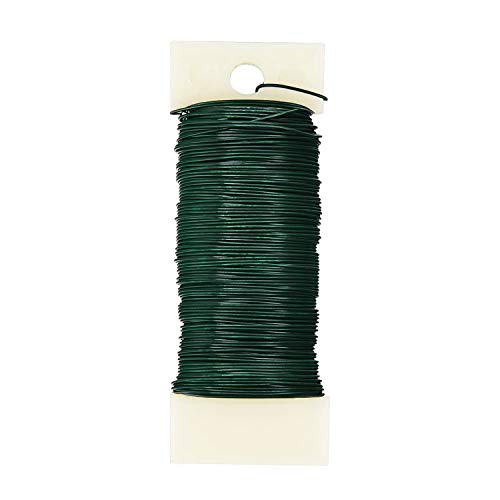
WIRE GAUGE & COLOR: Green paddle wire in 22 gauge, perfect thickness to have both strength and flexibility for floral arrangement and craft projects.

Adding Final Touches
To make your tulip wreath look its best, consider adding some final touches. Try using various tulip colors to create a beautiful gradient. Or, tie a seasonal ribbon for a special flair. Make sure to check your wreath from all sides to see everything looks perfect. If needed, use a little hot glue or wire for any adjustments without harming its look.
Here are some tips for a professional-looking wreath:
- Use leaves from your tulips to enhance fullness and add color.
- Incorporate a combination of light and dark pink tulips. This project used a total of 84 tulips arranged meticulously for a balanced and dynamic design.
- Add a seasonal ribbon that complements the Sherwin Williams 6479 Drizzle, the color of your front door.
- Ensure your wreath is the right size for your front door, which is 48 inches wide, by using a 26-inch grapevine frame.
When creating DIY tulip wreaths, it’s best to keep things simple. Too many glued parts might cause burns and look less natural. Also, buying materials on sale, like at Michael’s, can help save money. Making your own wreath might only cost about $40. This is much cheaper than store-bought versions, which can be up to $150.
| Material | Quantity | Cost |
|---|---|---|
| Light Pink Tulips | 4 Bunches (56 Stems) | $20 (on sale) |
| Dark Pink Tulips | 2 Bunches (28 Stems) | $10 (on sale) |
| Grapevine Frame (26 inches) | 1 | $10 |
By following these easy steps and suggestions, you’ll make a stunning seasonal wreath. It will beautify your home and wow your visitors with its professional look.

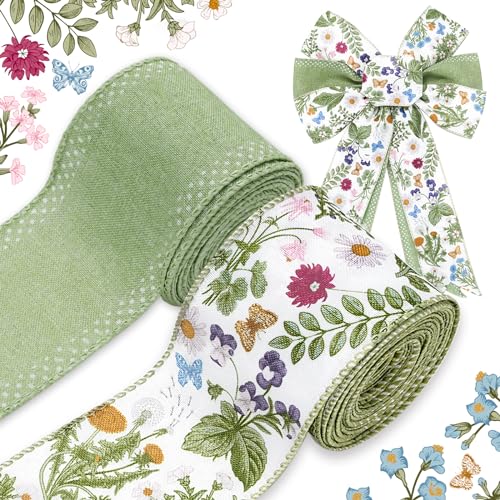
Design: The spring bows are composed of two ribbons, one is a pink burlap ribbon, the other is a natural burlap ribbon with flowers leaves pattern. These exquisite holiday bows are enough for your daily use and add special festival feelings.

Dimension: the wire wreath frame is approx. 12 inches/ 30 cm in diameter, proper size for any festival decoration

Fresh Spring Floral Design – This spring ribbon set includes two charming patterns: pink and green dots ribbon and elegant tulip ribbon with leaves. The soft pastel colors create a bright seasonal look, making this pink and green ribbon perfect for spring and summer ribbon decorations, wreath bows, and farmhouse DIY crafts.
Caring for Your Tulip Wreath
To keep your tulip wreath looking fresh and lasting long, proper tulip wreath care is key. Storing it in a plastic bag when not displayed helps a lot. This protects it from dust and moisture that could ruin its colors and materials.
For storage, choose a cool and dry place. One good spot is behind a closet door, away from direct sunlight and moisture. Following these steps will keep your tulip wreath in top shape for years.
Choosing durable floral wreaths made from quality materials helps them last longer. Customer reviews back this up, showing people are happy when they care for their wreaths well. One customer said their wreath kept its color brilliantly, even through tough storms in Western New York.
Did you make a tulip wreath from our guide using faux tulips in different colors? With the right care, it will look as good as new every year. These tips ensure your tulip wreath remains a beautiful part of your home decor for a long time.

Durable & Protective - You want to keep your wreath safe and secure from year to year, and we've got your back! Our new special design wreath storage container was designed with you in mind! Our box will keep them safe for years to come.

DURABLE & PROTECTIVE - You want to keep your wreath safe and secure from year to year, and we've got your back! Our new special design wreath storage container was designed with you in mind! Our box will keep them safe for years to come.

SPACIOUS & VERSATILE STORAGE: This clear wreath storage bag fits wreaths up to 36 inches and offers ample space for multiple wreaths or other seasonal décor like garlands, lights, and holiday decorations. Also ideal as a moving storage bag or packing solution for college and home organization
Displaying Your Tulip Wreath
To showcase your tulip wreath, make sure it is the main focus on your front door or inside your home. Start by attaching a loop of florist wire at the back of the wreath. This helps you hang wreaths securely and with style.
Choose a place that makes your tulip wreath pop and matches your home’s decor. Placing it in areas where many people pass, like your entryway, will impress your guests.
When showing off tulip wreaths, where you put them matters a lot. You want to welcome everyone with the beauty of spring, catching their eyes and beautifying your space.
Keep your tulip wreath somewhere easy to see but protected from bad weather, especially if it’s outside. This will help your decorative spring wreaths last longer and stay beautiful.
Troubleshooting Common Issues
Sometimes, you might find problems with your tulip wreath. If it starts to sag or if pieces come loose, don’t worry. You can fix it with hot glue. Reattach the tulips firmly to the wreath base.
Seeing glue or wire can be bothersome. Check your wreath closely. Gently move the tulips to hide these parts. This keeps your wreath looking elegant and well-made.
Is your wreath uneven or feeling weak? Make sure the ribbon and wire support it properly. Strengthen any weak spots. Spread the tulip’s weight evenly. These steps will keep your wreath stunning for a longer time.
Remember these tips for fixing minor wreath problems. This way, you can keep enjoying your beautiful tulip wreath. Happy decorating!

