Looking for a fun and useful baby shower gift? You’re in the right place! Making a nappy wreath is simple, fun, and provides something beautiful and helpful for new parents. In under an hour, you can put together a gorgeous DIY nappy wreath. It blends usefulness with creativity perfectly for a baby’s welcome. We’ll show you an easy way to make one, filling it with essentials for the little one. This project is great for those who love DIY and want to mix beauty with practicality.
Key Takeaways
- Wreath form size: approximately 18 inches.
- Number of diapers needed: about 30-40.
- Total time to create the wreath: 45 minutes.
- Customization potential: high; can match nursery themes or baby shower aesthetics.
- Practicality and decoration ratio: 1:1, for balanced functionality and beauty.
What Is a Nappy Wreath?
A nappy wreath is also known as a diaper wreath in the U.S. It’s made mostly with size 1 diapers shaped into a circle. It looks beautiful and can be the main decoration for a baby shower. Adding things like a plush dinosaur, vapor bath for relief, and a travel kit makes it both pretty and useful.
This gift is a cool way to give new parents what they need in a pretty way. Adding stuff like an essential oil roll-on, a medicine dispenser pacifier, and cute ribbons makes the wreath useful and unique. So, it’s not just a memorable gift, but one that’s really appreciated too.
Making a nappy wreath starts with getting a 20-inch wire frame from a craft store, costing about $16. The stuff you need to decorate it costs around $20. Parents see this as a good buy because it makes the baby shower special. Plus, you can make this wreath in less than an hour, making it a great DIY project.
More and more people love nappy wreaths because they are both pretty and practical. They can jazz up a nursery or be a standout piece at a baby shower. A nappy wreath is both thoughtful and practical, making a strong impression.
Materials Needed for Your Nappy Wreath
Making a nappy wreath is a fun project that needs certain supplies. You will use these to create a lovely and useful wreath. Below is a list of essential DIY nappy wreath elements and their prices. This helps you get ready for this special craft.
You’ll first need a wire wreath form for structure. A 20-inch floral wire wreath is a good choice and costs about $16. Next, get 32 newborn diapers, which will cost around $25 for a box of Pampers. Rubber bands to hold the diapers cost about $6 for a 32 count pack.
Ribbons add a festive look to the wreath. You will need short ribbons for tying, about 8 to 9 inches long costing $10, and thicker decorative ribbons for $12. Use green ribbons to decorate the back of the wreath form.
For added decoration, you might like a dinosaur stuffed animal for $19, a baby medicine dispenser for $13, and essential oil vapor bath relief for $8. An on-the-go travel set and slumber and sleep oil roll-on both cost $13 each. You can also add wooden letters painted with pink and green acrylic craft paint. Secure them with Modge Podge. Crafting flowers can also be added with Modge Podge for a better look.
| Item | Cost ($) |
|---|---|
| 20 Inch Floral Wire Wreath | 16 |
| 1 Box Pampers Size 1 (32 Count) | 25 |
| Rubber Bands (32 Count) | 6 |
| Thin Ribbon | 10 |
| Thick Ribbon | 12 |
| Dinosaur Stuffed Animal | 19 |
| Essential Oil Vapor Bath Relief | 8 |
| On-The-Go Travel Set | 13 |
| Slumber and Sleep Essential Oil Roll-On | 13 |
| Baby Medicine Dispenser | 13 |
The total for all these nappy wreath materials is about $135. With creativity and the right supplies, you’ll create a unique and lovely gift quickly.


This package contains one 20 inch wire wreath form.
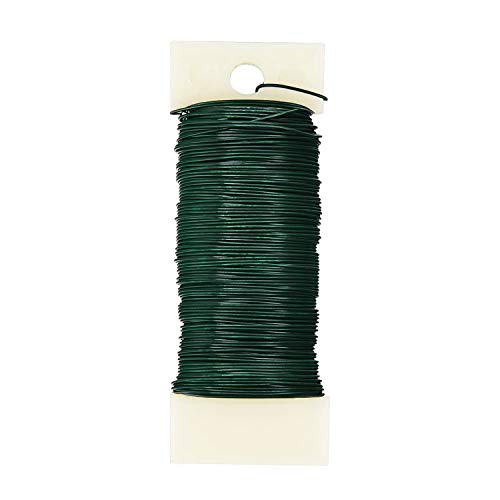
WIRE GAUGE & COLOR: Green paddle wire in 22 gauge, perfect thickness to have both strength and flexibility for floral arrangement and craft projects.
Step-by-Step Instructions for Making a Nappy Wreath
Creating a nappy wreath is fun and rewarding. Follow this easy DIY nappy wreath tutorial to make a special gift. Let’s get started:
1. Prepare Your Base: Begin by cutting a cardboard circle. It should have an outer diameter of 13.5 inches and an inner diameter of 8.5 inches. This circle will be the base of your nappy wreath.
2. Roll the Diapers: Roll 22 diapers tightly. If needed, keep them in place with rubber bands. Getting good at rolling might mean you won’t need bands.
3. Attach the Diapers: First, secure a wide ribbon’s end to the cardboard. Then, attach the rolled diapers around the base, making a circle. Use double-sided tape to make them stick better.
4. Wrap the Wreath: After placing all diapers, wrap the wreath in 5 yards of wide ribbon. Make sure it looks neat and covers any gaps.
5. Add Narrow Ribbon: Then, use 10 yards of narrow ribbon to tie a bow. Create a striking look by using both wide and narrow ribbons together.
6. Personalize the Decorations: Add fun decorations like baby shoes, flowers, and leaves. Popular choices include handmade leather shoes and blue tulips. Attach these with popsicle sticks or tape.
7. Final Touches: Finish your wreath with 12-inch long tulle strips. Mix in silver and white confetti tulle for sparkle. This adds beauty and dimension.
By following these steps, you’ll find making a nappy wreath both easy and fun. Adding your personal touch makes each wreath unique and a precious gift for new parents.

PREMIUM QUALITY MATERIAL: Made from high-quality fabric with wired edges that hold their shape, allowing you to create beautiful bows and decorative arrangements that maintain their form

Package Contains: You will get 2 rolls of spring ribbons, 1 roll of magnolia ribbons and 1 roll of flaxen striped ribbons.

What You Will Get - 10 rolls of ribbon, each has a different design, sufficient quantity and rich styles can be applied to many occasions and can be made into many crafts.
Tips for Personalizing Your Nappy Wreath
To make a nappy wreath special, add touches that mean a lot to the parents. Here are tips to make your customize nappy wreath designs into memorable personalized baby shower gifts.
Start with the baby’s nursery theme or the baby shower vibe. Pick colors and decorations that match these themes. For example, use pastel ribbons for a traditional style or bright patterns for something more modern. You can also add unique touches like cardstock messages or baby items like booties to make it stand out.
Decorate with bows, soft toys, and colored Styrofoam balls to make it look great. If you want to be more green, use cloth diapers instead of disposable ones. This choice is perfect for parents who love the environment.
To customize nappy wreath even more, add small but useful items like baby toiletries or teething rings. These add beauty and are also useful. Make sure to secure the wreath well with ribbons or plastic wrap. This keeps it together during transport, making it both nice and practical.
Last, personalize your personalized baby shower gifts with the parents’ preferred colors or characters. This shows you care and makes your gift even more memorable. The parents will surely notice and cherish this thoughtful effort.

Add Exquisite Colors To Easter: this bow garland banner has 5 colors which will add to the mood of your decor with its elegant and charming designs, and the garland can be hung on the mantel, hung on the wall, or placed on the party table an ideal your party decoration

Charming Pastel Rainbow Design: this rainbow ribbon tassel garland features soft macaron colors including pink, ivory, yellow, mint, blue, and lavender, enhanced with adorable white daisy card accents 1.6 inch for a dreamy and festive backdrop at birthday parties or photo sessions

Pastel Bow Garland Decor: You will receive 2 bow banners with 10 bows each, pastel bow garland features a unique dovetail cut at the end, which is perfect for flirty birthday decorations and bow-themed parties, adding a touch of charm to the party and adding elegance and sophistication to the decoration
Nappy Wreath Ideas for Different Occasions
Nappy wreaths are great for more than just baby showers. They can be used for many events in a child’s early life. They are both a thoughtful and useful gift.
For baby showers, a nappy wreath is not only cute but also useful. It typically uses about 40 diapers. You can add small baby items to it. Look for cheap crafting materials to keep costs low.
You can theme nappy wreaths for holidays like Christmas or Easter. Just add special decorations to fit the season. This adds a festive touch.
These wreaths are also perfect for welcoming new moms in the hospital. They make the hospital room feel more personal. You can start with an 18″ frame from Wal-Mart.
For a baby’s first birthday, mix in some baby toys with the diapers. You can also add a fun cake topper. This celebrates the big day in a unique way.
Look for deals to save money on supplies, like Huggies Snug & Dry Diapers. Buying in bulk, you can save and make several wreaths. Each wreath needs 30-40 diapers.
But remember, these wreaths are more than just decorations. They are a practical and appreciated gift for new parents. They’re perfect for baby showers and other celebrations.

Baby Shower Ribbon with Floral Designs: included in your package are 4 rolls of ribbons of 4 different patterns, suitable for DIY or gift box wrapping; Functional and ornamental, these ribbon decorations serve as an optimal accessory for most spaces

Baby Shower Ribbon with Floral Designs: included in your package are 4 rolls of ribbons of 4 different patterns, suitable for DIY or gift box wrapping; Functional and ornamental, these ribbon decorations serve as an optimal accessory for most spaces

Package Content: You will receive 2 rolls of blue baby shower ribbons,each approximately 2.5 inches wide and 5 yards long.You can cut it to any length and shape you like.
Frequently Asked Questions About Nappy Wreaths
Entering the world of nappy wreaths brings up a lot of questions. This nappy wreath FAQ is here to tackle common questions about nappy wreaths. It’ll help you make a wonderful decoration for baby-related events.
People often wonder about the perfect size for a nappy wreath. A wreath will use 16 to 28 size 1 or 2 diapers. The fullness can be adjusted. Choosing a strong base is key. Bases are usually made of foam, plastic, or wood for good support.
Another frequent question is about the time needed to make a nappy wreath. This depends on how skilled you are and the design. Yet, most wreaths take less than an hour to put together. Step-by-step guides, like the one found here, make it easier, even for starters.
Customizing your nappy wreath offers many options. Add ribbons, themed decorations, and baby items like pacifiers and socks to make it special. A mini Bowdabra tool is great for making lovely bows that give it your unique touch.
| Aspect | Details and Tips |
|---|---|
| Number of Diapers | Typically 16-28, based on how full you want it. Using less can cause gaps. |
| Materials for Base | Usually, bases are foam, plastic, or wood of different shapes. |
| Additional Items | Pacifiers, socks, small toiletries, and sports-themed items. |
| Decorative Elements | Matched ribbons, curling ribbons, and themed decor. |
Lastly, people ask about the use of nappy wreaths. They are great for more than baby showers. Use them for hospital doors, in the nursery, or as special gifts. The creativity in making them leaves a lasting impression.
For more help and creative ideas, check online guides. Making a nappy wreath is fun and fulfilling, especially when you make it personal for the occasion.
Caring for Your Nappy Wreath
Keeping your nappy wreath looking good needs a little effort. No matter if you’re new to this or have done it many times, here are some key tips. They will keep your nappy wreath looking its best.
Where you put your nappy wreath is very important. Keep it away from wet places or direct sun. This stops the diapers and decorations from getting damaged quickly.
Be gentle when you touch the wreath. Make sure each diaper and decoration is firmly in place but not too tight. This prevents tearing and ugly folds. You might want to use rubber bands, not hot glue. This way, everything stays where it should be and can be moved if needed.
For storage, pick a place that’s dry and cool. If you have to move the wreath, wrap it in plastic or tissue paper. This keeps it safe from dust and moisture. Make sure the light stuffed animal and other decorations are secure too.
Look over your wreath often to make sure it’s still in good shape. If a diaper looks worn out or damaged, change it right away. You can also fix or switch out ribbons and other parts if they start to look bad. Doing this makes your wreath last longer.
| Aspect | Recommendation |
|---|---|
| Placement | Avoid direct sunlight and high humidity |
| Handling | Handle gently to prevent damage |
| Storage | Store in a dry, cool place |
| Inspection | Regularly check for wear and tear |
| Replacement | Replace worn or damaged components promptly |

Wider band provides more resistance for cleaner breaks between color
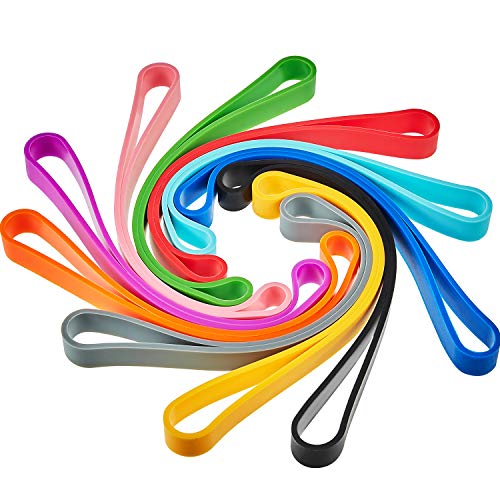
Package include: comes with 10 pieces silicone rubber bands in 10 diverse colors, black, yellow, pink, red, blue, light blue, green, orange, purple and grey, these bright and cute colors make the bands easily satisfy with your different packing and decorating needs

What You Can Get: you will receive 10 pieces of black heavy duty silicone bands, enough quantity will meet your different packing and decorating needs, you can also share them with your family and friends
Where to Find Inspiration for Nappy Wreaths
Looking for ideas for nappy wreaths and baby showers can be fun. Sites like Pinterest offer tons of designs and how-to guides to make the perfect wreath. With a quick search, you’ll find simple to fancy options, including safari themes or Texas Longhorns.
Instagram and Facebook are great for finding nappy wreath ideas. Many DIY fans and parents post cool designs and how-tos. By joining DIY groups, you can meet others who love crafting and share tips.
Parenting blogs are full of baby shower tips, including how to make your nappy wreath special. They show off wreaths that have baby stuff like pacifiers and bottles. No matter if you’re new to crafting or experienced, these sites can help you make a beautiful gift.

