Adding a porch roof to your house shines up its outside look. It makes an outdoor area you can enjoy more. Planning well before starting helps make sure your new roof fits right and lasts long.
First, mark the existing roof to show where the new porch roof will go. You have to take off some shingles to see the decking. This makes sure the new shingles match the old ones. Doing things right, like using good flashing and underlayment, stops leaks and keeps your porch roof solid.
Key Takeaways
- 70% of homeowners report enhanced outdoor living spaces with a new porch roof.
- Avoid costly mistakes: 30% of DIY home improvement projects go wrong, especially roofing.
- Hiring professionals can cost between $2,000 to $5,000, depending on project complexity.
- Over 50% of homeowners start projects without knowing local building codes.
- 60% of homeowners prefer matching porch roofs to their existing roof for seamless aesthetics.
Understanding the Benefits of a Porch Roof
Adding a porch roof brings many key advantages. One main benefit of a porch roof is it boosts your home’s curb appeal. With careful design and construction, a porch roof can instantly make the outside of your home look better and more inviting. This improvement not only makes your home more appealing to those living there and visitors, but it also adds value if you ever decide to sell.
Putting in a porch roof improves porch usability enhancement too. About 60% of homeowners say they use their outdoor spaces more with a porch roof. It provides a sheltered spot that’s cool and dry, perfect for relaxing or having fun with friends. Now you can enjoy being outside whether it’s sunny or raining, thanks to your covered porch.
A porch roof is also a smart investment for your home’s property value. On average, this addition can increase your home’s value by 10-15%. This boost comes from more usable space and the improved look, which draws in potential buyers. Costs usually range from $5,000 to $15,000, making it a cost-effective way to raise your home’s price.
| Benefits | Impact |
|---|---|
| Curb Appeal | Enhances the home’s exterior and attracts potential buyers |
| Porch Usability Enhancement | Increases outdoor living space usability by providing shelter |
| Property Value | Increases home value by an average of 10-15% |
The materials you pick for your porch roof, like 3/8” or 1/2” tongue and groove plywood, matter a lot. The way it’s installed is important too, with the right fasteners and flashing keeping it sturdy. Most homeowners prefer asphalt shingles because they’re affordable and look good. For trickier projects, getting a pro’s advice ensures everything meets local building codes.
Planning Your Porch Roof Addition
When planning your porch design planning, it’s vital to make sure it matches your current home. Choosing the right roof style is critical. The gable roof is popular for its distinctive triangle shape. It can make a home more attractive. It comes in various pitches, offering several design choices.
The architectural considerations for a porch roof are important. You need to understand how different roof styles, like hip or shed roofs, affect your house. Hip roofs are more complex and may cost more. But shed roofs are simpler and fit one-story homes well.
Getting building permits is crucial and can’t be skipped. Every area has its own rules, so check with local authorities to avoid problems. This will make sure your project meets all required standards. It helps avoid fines or delays due to non-compliance.
Plan the right size for support columns to ensure your porch roof is stable. Common sizes include 4”x4”, 6”x6”, and 8”x8”. Choose the correct lumber size for the frame, too, from 2”x4” to 2”x10”. Also, keep in mind the frost depth to avoid frost heave. Footings should usually be about 3 feet deep.
Hiring a licensed architect or engineer is very helpful. They can make sure your project follows all architectural considerations and local rules. Proper planning of rafter spacing, usually 16 inches apart, also helps. A well-thought-out porch addition increases your home’s appeal and value.

Well-Designed 12-Pitch Gable Plate: Designed specifically for 12-pitch trussed roofs, this steel bracket securely supports your frame structure with pre-drilled clearance holes for #10 and 1/4" screws

Packing List: 1pc x Gable Plate 24x13.5 (63, 27, 27, 63 deg)

Commercial grade-11 gauge steel construction
Choosing the Right Materials
Choosing the right roofing materials for your porch is key. It ensures the porch looks good and functions well. Consider durability, cost, and how well materials stand up to your local weather. For example, metal or asphalt shingles are best in places with lots of rain due to their water resistance.
In places that get a lot of sun, reflective roofs can keep your home cooler. This means choosing metal or light-colored shingles. In snowy areas, a steep roof is best to stop snow from piling up. Metal roofs are also excellent for handling the tough conditions of winter. In windy spots, it’s smart to pick materials like architectural shingles or metal that resist the wind.
Table:
| Climate | Recommended Material | Reason |
|---|---|---|
| High Rainfall | Metal, Asphalt Shingles | Excellent water resistance |
| Hot and Sunny | Metal, Light Asphalt Shingles | Reflects heat |
| Snowy | Metal | Durable against snow buildup |
| Windy | Architectural Shingles, Metal | Wind resistance |
Good roof ventilation is vital too. Using soffit or ridge vents helps avoid heat build-up. Roof materials can vary in cost. Asphalt shingles are less expensive, while copper or slate costs more. Think about both upfront and maintenance costs when choosing.
Always look into local building rules or HOA standards before you start. Picking the right roofing materials does more than just match your home’s look. It makes for a roof that lasts longer and can handle whatever the weather throws at it.

Polymer Material: The roofing sealing membrane is primarily composed of high-density anti-aging polyethylene sheets (waterproof layer) laminated with geotextile fabric (thermal insulation, soundproofing, and vibration damping layer), and a polymer self-adhesive film. Features exceptional bonding strength and anti-aging properties

Polymer Material: The roofing sealing membrane is primarily composed of high-density anti-aging polyethylene sheets (waterproof layer) laminated with geotextile fabric (thermal insulation, soundproofing, and vibration damping layer), and a polymer self-adhesive film. Features exceptional bonding strength and anti-aging properties
Polymer Material: The roofing sealing membrane is primarily composed of high-density anti-aging polyethylene sheets (waterproof layer) laminated with geotextile fabric (thermal insulation, soundproofing, and vibration damping layer), and a polymer self-adhesive film. Features exceptional bonding strength and anti-aging properties
Tools and Equipment You’ll Need
Taking on a DIY roofing project, like adding a porch roof, requires certain tools. You must understand how to use each tool and follow local building codes. For example, be aware of New York City’s Building Code §3300 or Portland’s zoning laws under the 2021 Oregon Residential Specialty Code (ORSC).
Below is a must-have list of roofing tools and equipment:
- Measuring Tools: Get accurate measurements. A tape measure, carpenter’s square for angles, and a level for even rafters are essential.
- Cutting Tools: Use a circular saw for wood rafters and posts. Metal snips are for flashing and metal roofs.
- Fastening Tools: You’ll need a power drill, drill bits, an impact driver, and a hammer for nails and lag screws.
- Lifting Equipment: Ladders and scaffolding let you safely reach high areas.
- Protective Gear: Wear safety harnesses, hard hats, gloves, glasses, and sturdy boots for protection.
To ensure your porch roof is strong, use the right fasteners. For example, 15 lag screws, 5 inches each, should secure the ledger board. It supports half the roof’s weight. Rafter hangers placed every 16 inches along the ledger board add more stability. It’s also key to have weather-resistant sheathing such as 1/2-inch plywood or OSB for a solid foundation.
A durable porch roof must be well-installed. Use underlayment, flashing, and drip edge to avoid leaks. Pick long-lasting materials like asphalt shingles or metal roofing. Remember, a square of shingles covers 100 square feet, which fits most porch roofs.
Roofing is a team effort. Have at least one helper for heavy lifting and safe work on support posts and beams. These are usually made from six-by-sixes and two-by-sixes.
For a step-by-step guide, check out how to add a gable porch roof to your house. This link provides the right tools and equipment needed for this DIY project.

Precision sharpened teeth for fast, smooth cuts and longer life

The product is 7-1/4" Stl/iron blade

Powerful 15-amp motor delivers 5 300-RPM for greater speed and faster cuts
Step-by-Step Guide to Adding the Porch Roof
To start your DIY porch roof project, first focus on framing. This is key to building a strong porch roof.
1. Framework Construction: Start with 2-by-4, 2-by-8, and 4-by-4 wood pieces for the frame. Set columns 6-10 feet apart. Always place a column three inches from the corners for support.
2. Preparing the Existing Roof: Take off shingles that block the area. This makes sure the new and old roofs merge well. Attach the ledger board to your house with structural screws.
3. Installing Roofing Panels: You might pick asphalt shingles or similar panels. Make sure they’re straight and fastened properly.
4. Integrating Flashing and Underlayment: This step stops water damage. Put flashing where the new roof and house meet to protect against rot and shingle damage.
5. Aligning and Securing Materials: Use a rafter square to cut rafters accurately. Secure the roof with the right fasteners, like lag screws or bolts. For a strong porch roof, use 2×6 or 2×8 planks and a ½ inch plywood layer in the middle.
| Material | Purpose |
|---|---|
| 5/8 inch plywood | Roof Sheathing |
| 2×4, 2×8, 4×4 wood pieces | Framing |
| Structural Screws | Ledger Board Attachment |
| Rafter Square | Precise Cuts |
By sticking to this step-by-step roofing guide, your porch will be sturdy and look good. Using top-quality materials boosts your home’s value by up to 15%.
It’s crucial to follow local codes and get necessary permits. Regular checks during construction cut down on future repairs. This step-by-step roofing guide lays out basics for adding a porch roof successfully.

By Crafters, For Crafters - Crafting and building with wood is our number one priority. Bringing you more of the wood craft supplies you love is our job. Please dont hesitate to get in touch.


Solid Hardwood - Select White Hard Maple
Insulating and Ventilating Your Porch Roof
Insulating and ventilating your porch roof properly is key for energy saving and keeping moisture away. By focusing on critical points like the edges of the slab and outer walls, you could cut your heating costs by 10% to 20%. For example, high-density R-30 batts work great in cathedral ceilings to keep indoor temperatures steady.
Ventilation is also crucial, needing one square foot of Net Free Vent Area (NFVA) for every 150 square feet of attic space. This changes to one square foot per 300 square feet with certain vapor retarders. This balance is vital for airflow and preventing condensation. Using effective vents, like ridge or gable vents, helps keep temperatures even and cuts down on HVAC use.
Insulation isn’t just about saving money; it can make spaces like basements cozier and more usable. Methods like loose-fill insulation ensure even coverage, while insulating concrete forms add both structure and warmth. It’s also important that ventilation systems are installed correctly to avoid leaks and expensive fixes.
Proper insulation and ventilation of your porch roof boosts your home’s energy efficiency and extends the life of your roofing materials by reducing thermal stress and damage from moisture. Seeking advice from professionals like McElroy Metal, experts since 1963, can help ensure your porch roof insulation and ventilation meet standards and maximize performance.
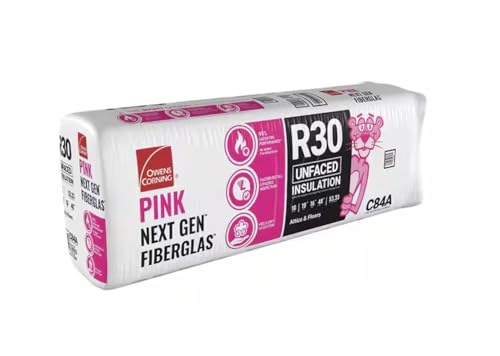

Attic This product is recommended for an attic application. Place this in between your trusses. For unfaced insulation make sure there is 2 inches of properly vented air space to prevent moisture in the insulation. High Density Material is less thick than normal R30 density material. 2 x 8

$20 off if you pick up in one of our 150 warehouses through out the US
Final Touches and Finishing
After you’ve built the main part of your porch roof, focus on the final touches. These steps make your roof look great and blend well with your home. Adding trim work is key for a nice look and covering any gaps.
Adding unique details like cupolas or decorative railings makes your porch special. These features show off your style. They turn a regular roof into something standout.
It’s important to paint and seal your porch roof. Use top-quality paint or stain. This looks good and protects the roof from weather damage. Choose products meant for outside to make sure they last.
Installing overhangs that reach 12 inches extra is also important. They give shade and handle rain, preventing water damage. You can even go for 24-inch overhangs for more safety.
| Item | Description | Average Cost |
|---|---|---|
| Lumber (for trim and custom details) | High-quality treated lumber for durability | $100+ |
| Shingles | High-quality shingles for roofing | $30+ per bundle |
| Paint/Sealant | Exterior use, designed to withstand weather conditions | $40+ per gallon |
| Optional Features (gutter, ventilation) | Enhancements for functionality and aesthetics | Variable |
Be mindful of local building codes affecting your project. Different states have rules, especially about the environment. Following these keeps you from fines and ensures your porch is safe and lasting.
A beautiful roof raises your home’s value. The effort and money you put into these final details pay off. Your new porch roof will look better and last longer.
Maintenance Tips for Your New Porch Roof
Keeping your new porch roof in top shape requires a steady maintenance plan. Begin by inspecting it regularly to catch any leaks, wear, or damage early. Focus especially on shingles, metal flashing, and the underlayment to avoid bigger problems later.
Clean your gutters and downspouts to prevent water damage. Blocked gutters can cause rot, mildew, and damage to the porch. Clear out leaves and debris regularly, especially during fall.
Check and reapply sealants and caulking around roof flashing to keep water out. If you have asphalt shingles, they usually come with a 20 to 30-year warranty. Yet, taking care of your roof can help those shingles last even longer. In places with a lot of snow, consider a metal roof for its durability and fire resistance. No matter what your roof is made of, taking care of it will make it last longer and keep your porch looking good all year.

