
Much like the time-worn fences that marked America’s earliest homesteads, your backyard boundary can tell a story through carefully chosen materials and construction methods. You’ll need to contemplate board thickness, spacing intervals, and wood species before settling on a design that balances visual weight with structural integrity. The thirteen approaches we’ve compiled address everything from grain orientation to fastener placement, ensuring you won’t overlook critical details that separate amateur work from lasting craftsmanship.
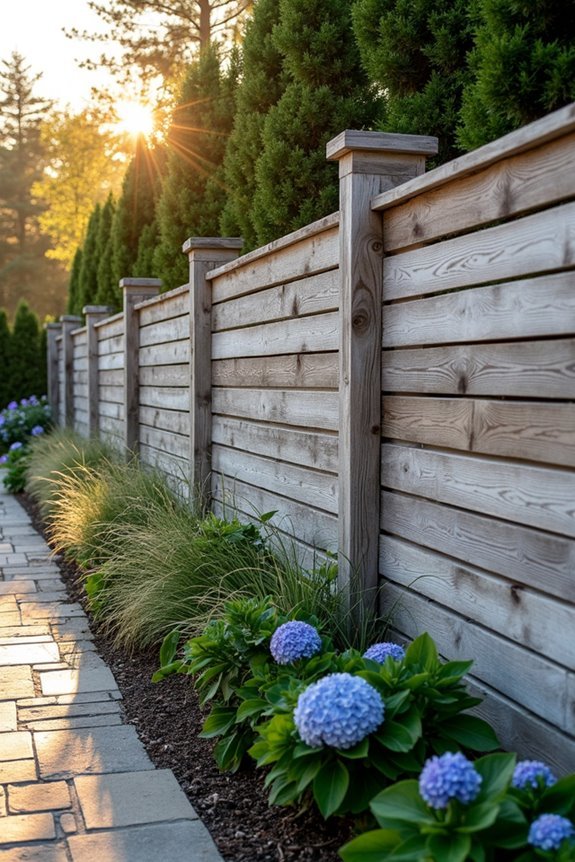
Classic Horizontal Slat Patterns
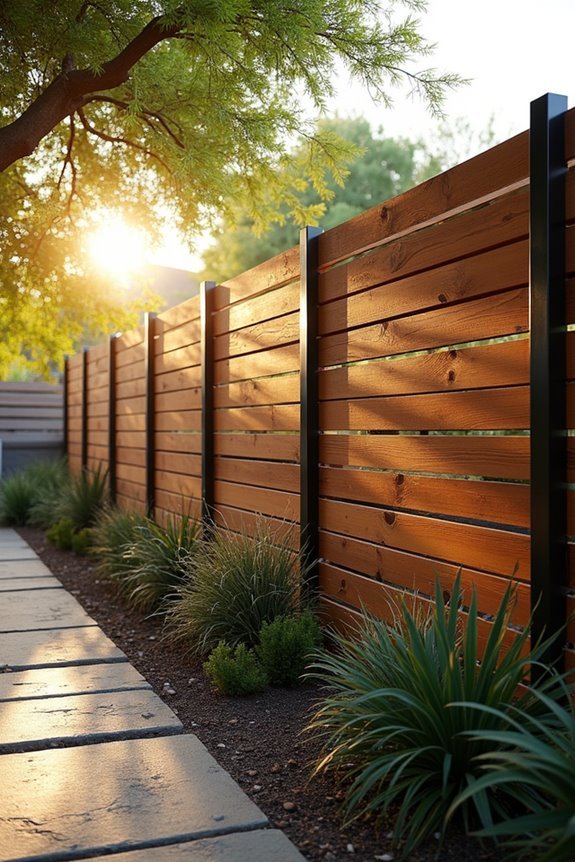
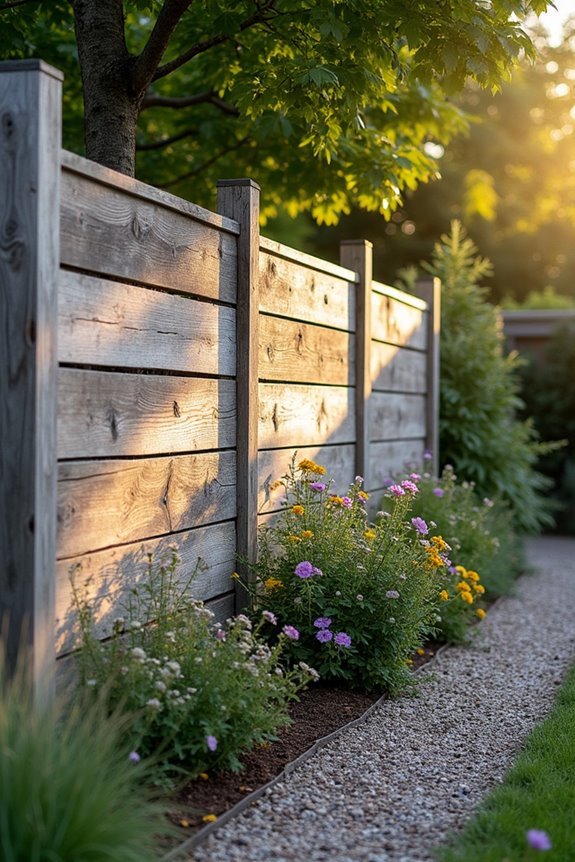
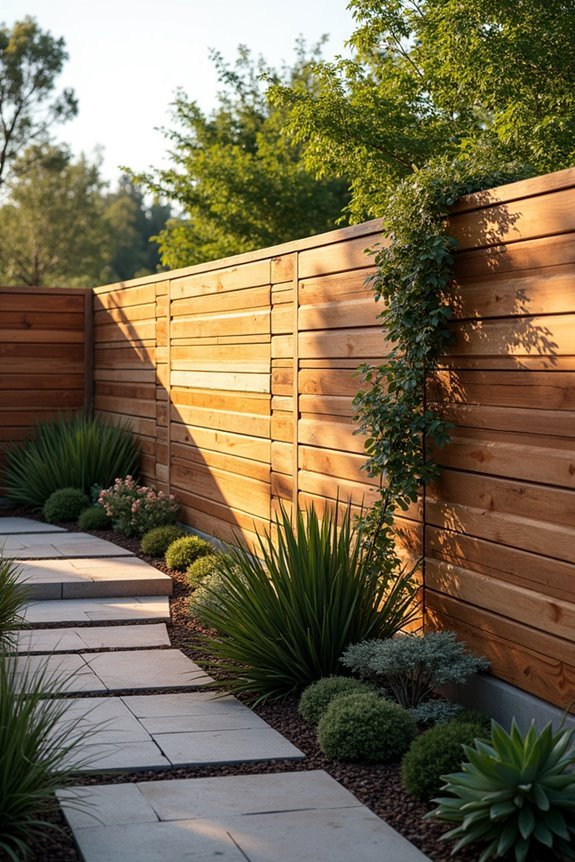
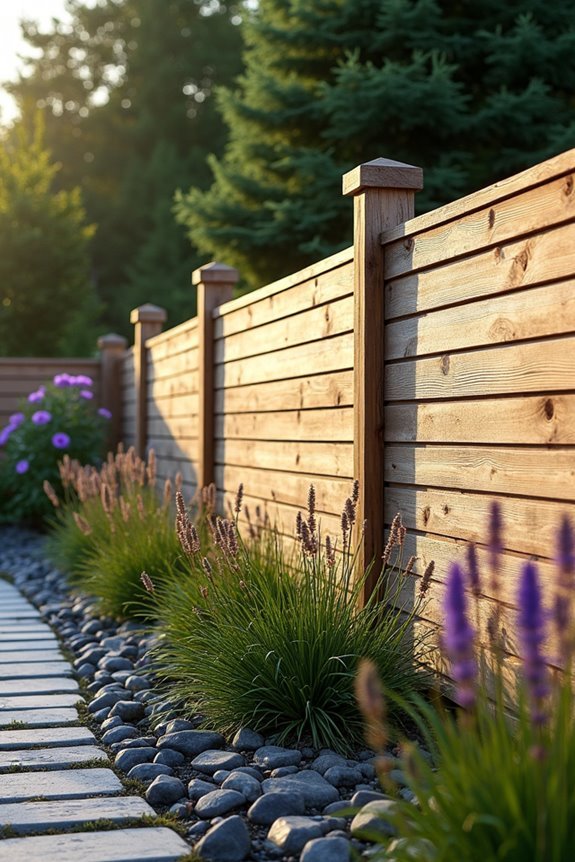
When planning a horizontal slat fence, you’ll work with boards mounted parallel to the ground between vertical posts set 6 to 8 feet apart. You’ll need to determine slat width, spacing intervals, and whether you’re creating single-sided or double-sided construction. Standard 1×4 or 1×6 boards work best for minimalist slat designs, maintaining clean lines while providing structural integrity.
For classic wood finishes, cedar and redwood offer natural weather resistance and develop rich patinas over time. You can space slats tightly for privacy or leave 1-to-3-inch gaps for airflow and visual interest. Mount rails between posts using galvanized brackets, then attach slats with exterior-grade screws. Consider alternating board widths or mixing stained and natural finishes to add depth while maintaining the pattern’s horizontal emphasis.
[affiai keyword=”horizontal slat fencing materials” template=”carousel” count=”3″]

Package contains 4 CritterGuard fence panels

American Wood Common Board

Made in the USA from chemical-free North American cedar
Weathered Barn Wood Aesthetic
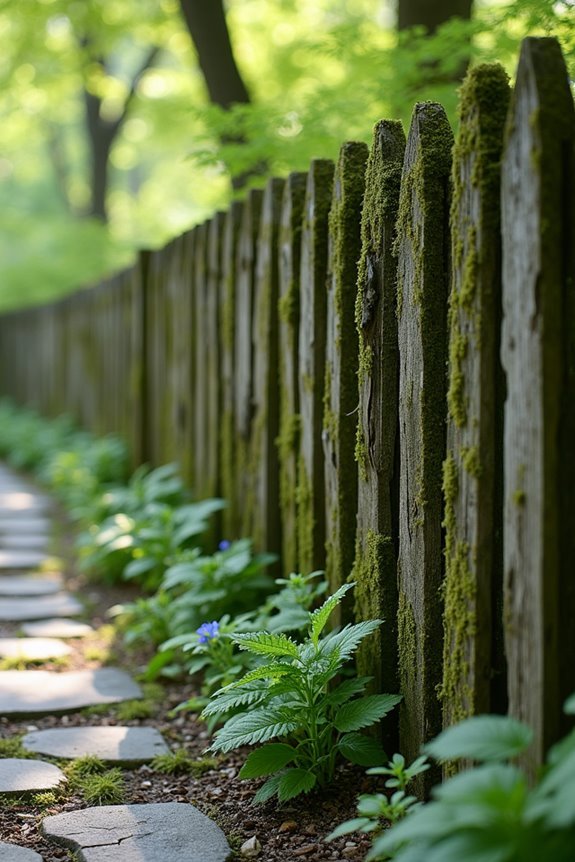
Reclaimed barn wood brings decades of natural weathering patterns that you can’t replicate with new lumber. The silver-gray patina, nail holes, and checking add authentic character to your fence design. You’ll find boards ranging from 6 to 12 inches wide, with thicknesses between ¾ to 1½ inches—ideal for horizontal or vertical installations.
When sourcing barn wood, inspect each piece for structural integrity. Weathered textures shouldn’t compromise strength. Look for boards free from rot or excessive splitting. Mix widths within your fence panels to create visual interest while maintaining consistent spacing between slats.
Mount barn wood with the weathered face outward, positioning boards 1 to 3 inches apart. This spacing showcases each plank’s unique grain patterns and color variations, from warm browns to cool grays.
[affiai keyword=”weathered barn wood for fencing” template=”carousel” count=”3″]
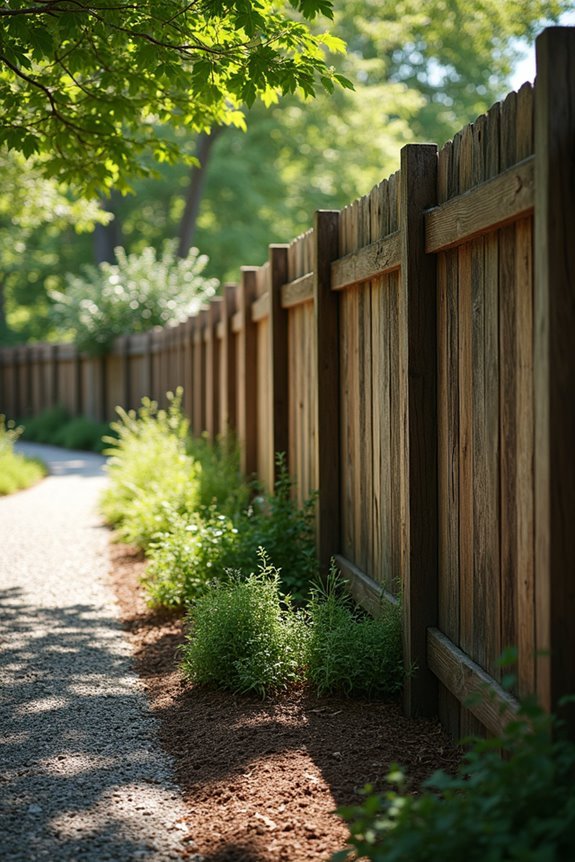
Vertical Slat Privacy Screens
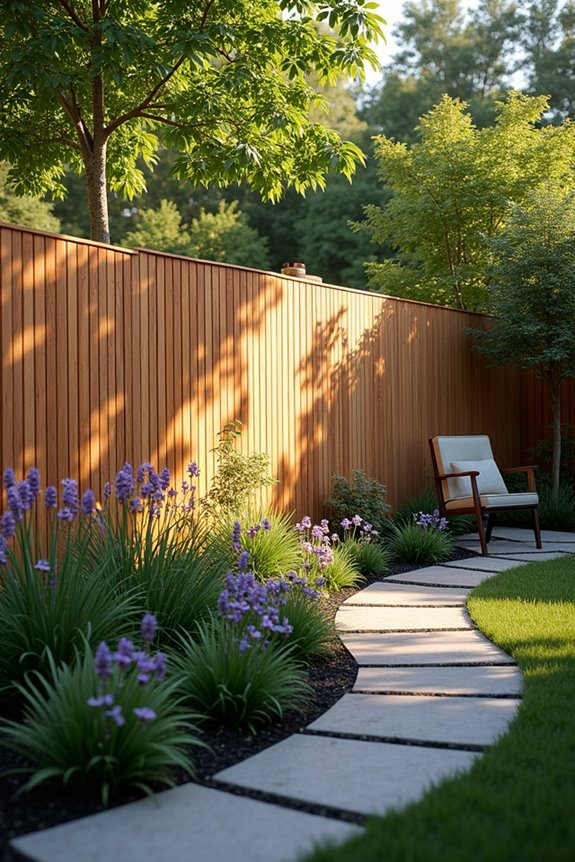
Vertical slat screens transform open yards into secluded spaces through strategic board placement and height variation. You’ll achieve stylish privacy by installing 1×4 or 1×6 cedar boards with 1-2 inch gaps, mounting them to horizontal rails. Standard 6-foot heights block sightlines while 8-foot installations create dramatic boundaries.
Vertical aesthetics depend on consistent spacing—use a template board as your guide during installation. Cedar, redwood, or pressure-treated pine withstand weathering best. Mount slats to three horizontal 2×4 rails: top, middle, and bottom. Spacing affects both privacy and airflow; tighter gaps (½-1 inch) maximize seclusion, while wider gaps (2-3 inches) maintain ventilation.
Consider alternating board widths or incorporating darker stain variations between sections. This adds dimensional interest while maintaining the rustic character.
[affiai keyword=”vertical slat privacy screens” template=”carousel” count=”3″]

Single-Wall Privacy Slats: Designed specifically for 4' high fences, these bottom locking privacy slats are approximately 44.5" in length, ensuring a ideal fit and avoiding slats from extending above the fence top.

DIMENSIONS: Each screen measures 47in H x 48.125 W

FENCE PRIVACY: Unlike fence tape, these slats are designed to easily slide vertically through your chain-link fence for optimal outdoor privacy. Determine the diamond size of your fence by measuring diagonally between the parallel wires, not corner to corner. The added privacy of the wings leaves no unsightly perforations or wave pattern. Compatible with 4', 6', and 8' height fences.
Mixed Width Slat Arrangements
By combining boards of varying widths—typically 1x4s, 1x6s, and 1x8s—you’ll create dynamic fence panels with organic visual rhythm. This approach using mixed width materials breaks the monotony of uniform slat spacing while maintaining structural integrity.
Install your widest boards first as anchor points, spacing them 24-36 inches apart along your rails. Fill gaps with narrower slats, alternating widths randomly rather than in predictable sequences. You’ll achieve asymmetric patterns that feel naturally composed rather than designed.
Consider board placement carefully—position wider slats at visual focal points like corner posts or gate entries. Maintain consistent gaps between boards (typically ¾ to 1 inch) regardless of width variations. This technique works exceptionally well with reclaimed lumber, where varying board dimensions become design assets rather than installation challenges.
[affiai keyword=”mixed width fence slats” template=”carousel” count=”3″]

Enhanced Security: Enjoy increased privacy and protection with chain link fencing; easily integrate privacy fence slats for a more secluded outdoor space

Beige Fence Slat - Designed for a 6' high fence, slats are approximately 68.5" in length to accommodate the bottom locking channel and to prevent the slats from being above the top of the fence. (Available Colors: Beige, Black, Brown, Gray, Green, Redwood, Royal Blue, Sky Blue, White)

Quality: These brown fence tapes are made of weather resistant PVC material and are designed for long-term use.
Reclaimed Railroad Tie Borders
Weathered railroad ties anchor rustic fence installations with unmatched mass and character, transforming standard perimeter structures into robust boundaries with industrial heritage. You’ll position these reclaimed wood elements horizontally at ground level, creating a 6-8 inch foundational border that establishes visual weight. The ties’ creosote-treated surfaces resist rot while providing dark contrast against lighter slat materials above.
For ideal landscaping integration, you’ll excavate 3-4 inches below grade, setting ties on compacted gravel for drainage and stability. Space pressure-treated posts every 6 feet, notching them to accept tie placement. The ties’ standard 8-foot length eliminates mid-span joints, while their 7×9-inch cross-section offers substantial backing for fence posts. You’ll secure connections using lag bolts or galvanized brackets, ensuring structural integrity throughout the installation.
[affiai keyword=”reclaimed railroad tie border” template=”carousel” count=”3″]
Rustic Cedar Post Accents
Natural cedar posts introduce dimensional contrast to slat fence designs, extending 12-18 inches above standard fence lines to break monotonous horizontal patterns. You’ll want to position these accent posts at 6-8 foot intervals, maintaining structural rhythm while adding rustic charm to your perimeter. Cedar’s natural oils provide exceptional post durability, resisting rot and insect damage without chemical treatments. Install posts with 30-inch below-grade depth in concrete footings for stability. The wood’s grain variation—from tight vertical lines to dramatic swirls—creates visual interest as it weathers to silver-gray patina. You can leave posts rough-cut for authentic texture or plane them smooth for refined contrast. Cap tops with beveled cuts to shed water and prevent splitting.
[affiai keyword=”rustic cedar fence posts” template=”carousel” count=”3″]

Complete Package: the package comes with 4 pieces of fence cedar post caps, designed to fit ideally on 4 x 4 inch posts, providing complete guard and coverage for your fence or deck

SOLID WOOD CONSTRUCTION: The garden picket fence is crafted out of 100% fir wood finished with varnish paint, which is a sustainable natural resource known for its strength and durability. Built to withstand the elements
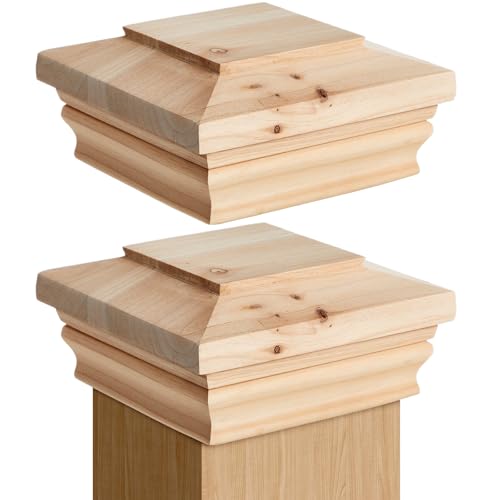
Package: includes 2 pcs 4 x 4 inch post caps
Natural Branch Interwoven Details
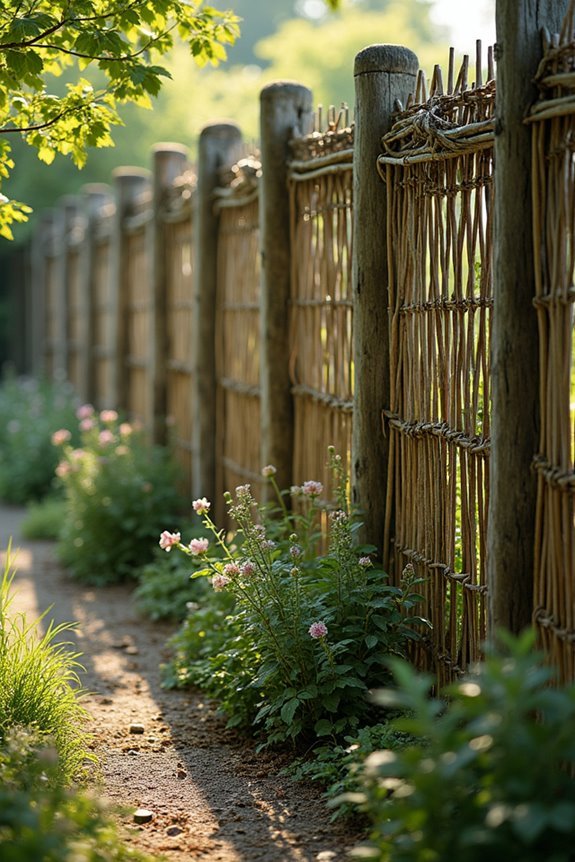
Flexible willow, dogwood, or birch branches woven between fence slats create three-dimensional texture at strategic 24-36 inch vertical intervals. You’ll achieve ideal natural aesthetics by selecting branches 1/4 to 1/2 inch in diameter, harvested while green for maximum pliability. Soak branches in water 24 hours before installation to prevent splitting during manipulation.
Thread branches through drilled pilot holes or wrap them around alternating slats in figure-eight patterns. Secure endpoints with galvanized wire or small-gauge screws recessed into the wood. Branch weaving works best on fences with 2-4 inch slat spacing, allowing adequate clearance for the interlaced material.
Apply exterior wood sealant to preserve branch integrity and prevent premature decay. This technique transforms standard slat fencing into organic barriers that soften geometric lines while maintaining structural boundaries.
[affiai keyword=”natural branch fence weaving” template=”carousel” count=”3″]
Stained Driftwood Finish Options
Achieving authentic driftwood aesthetics requires a three-step staining process that replicates coastal weathering patterns through controlled pigment layering. You’ll apply a gray base coat first, followed by whitewash streaking in horizontal planes matching your slat orientation. The final step introduces diluted brown undertones that settle into wood grain recesses.
Driftwood color options range from silvered platinum to warm taupe variations. Select your palette based on existing hardscape materials within a six-foot visual radius. Apply each layer with directional brush strokes parallel to grain lines, maintaining 24-hour cure intervals between applications.
Maintenance tips include annual UV-protectant topcoat renewal and quarterly inspections for moisture penetration at fastener points. Reapply whitewash accents every three years to preserve dimensional contrast across slat surfaces.
[affiai keyword=”driftwood stain kit” template=”carousel” count=”3″]
Twisted Wire Decorative Accents
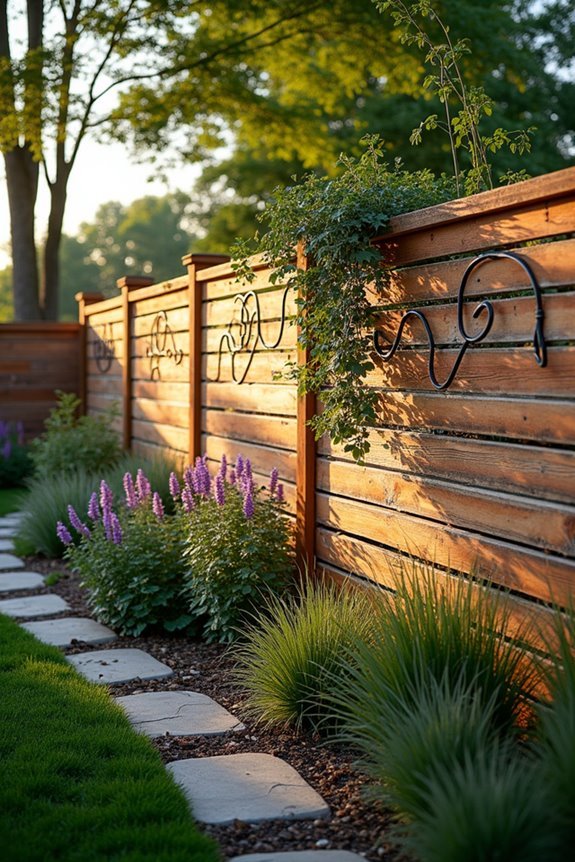
Galvanized 16-gauge twisted wire creates three-dimensional visual interest when woven through horizontal slat gaps at 18-inch vertical intervals. You’ll achieve peak structural integrity by securing wire ends with stainless steel staples driven 0.5 inches into fence posts. These twisted wire designs complement reclaimed wood textures while adding kinetic movement during windy conditions.
Install decorative accents in geometric patterns—diagonal crosshatches, figure-eight configurations, or vertical zigzags—to break up monotonous slat repetition. You can introduce copper or black oxide wire alternatives for contrasting metallic finishes against weathered wood grain. Pre-twist wire sections using a cordless drill at 200 RPM for consistent spiral density. Space your patterns strategically: concentrated clusters near gate entries, sparse arrangements along property lines. Wire gauge matters—anything thinner than 16-gauge lacks durability for outdoor applications.
[affiai keyword=”twisted wire decorative accents” template=”carousel” count=”3″]
Charred Wood Shou Sugi Ban
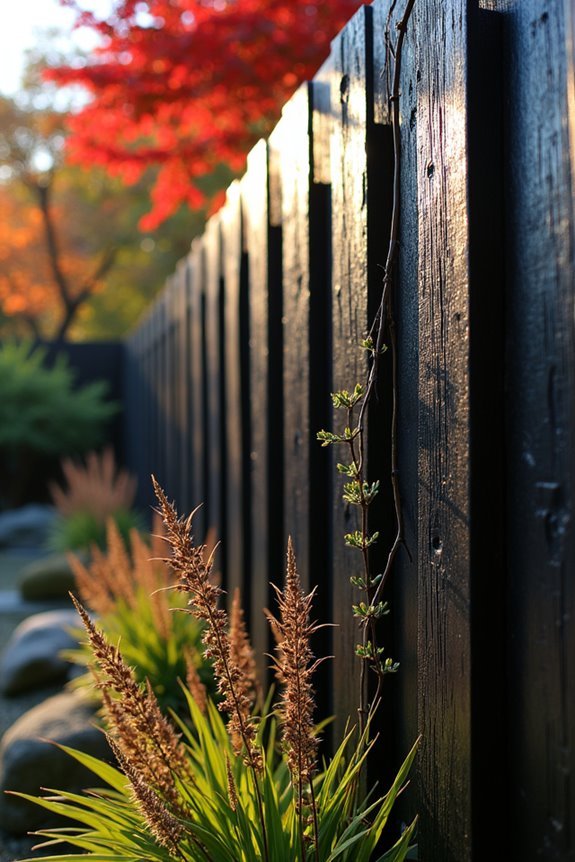
The ancient Japanese technique of Shou Sugi Ban transforms standard cedar or pine slats into weather-resistant charred surfaces through controlled burning at 1,200-1,800°F. You’ll achieve three distinct charred texture depths: light surface char (yakisugi), medium penetration, or deep carbonization reaching 1/8-inch depth. Position your torch at 45-degree angles, moving systematically across each slat’s face to guarantee uniform carbon layer formation. This process creates a naturally water-repellent barrier while eliminating maintenance requirements for 80+ years. You’re working with sustainable materials that resist rot, insects, and UV degradation without chemical treatments. Install charred slats with the burned side facing outward, spacing them 1/4-inch apart to accommodate thermal expansion while maintaining the fence’s protective carbon coating integrity.
[affiai keyword=”charred wood shou sugi ban” template=”carousel” count=”3″]
Split Rail Rustic Corners
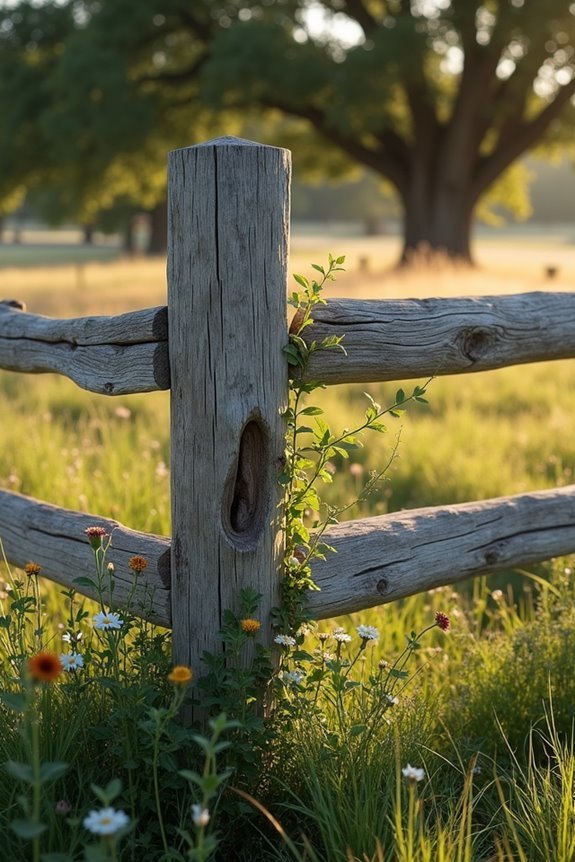
When you’re constructing split rail corners, you’ll need to master the mortise-and-tenon joinery system that connects perpendicular fence sections at 90-degree angles. Your corner post options include rounded cedar posts measuring 6-8 inches in diameter or squared locust timbers that provide enhanced stability. You’ll drill mortise holes at alternating heights—typically 12 inches apart—to accommodate rails from both fence runs. The tenon ends of your split rails should fit snugly into these 2-inch deep mortises without requiring fasteners. For split rail maintenance, check joint integrity annually and replace deteriorated rails before structural compromise occurs. Cedar and locust species naturally resist rot, but you’ll extend longevity by ensuring proper drainage around corner posts and maintaining 6-inch ground clearance.
[affiai keyword=”split rail fence materials” template=”carousel” count=”3″]
Moss-Covered Aged Picket Gaps
While split rail construction emphasizes structural joints, picket fence aging creates beauty through controlled deterioration and organic growth patterns. You’ll achieve authentic moss coverage by maintaining consistent moisture through north-facing orientations and partial shade conditions. Apply buttermilk or yogurt solutions to accelerate moss establishment on weathered surfaces.
Aged wood treatments require strategic preparation. You’ll sand high-traffic contact points while preserving natural patina in recessed areas. Space pickets 2-3 inches apart to create shadow gaps that enhance moss visibility and texture contrast. Apply clear penetrating sealers to stabilize wood fiber without eliminating weathering character.
Monitor moisture levels weekly during establishment phases. Moss preservation techniques include misting schedules and organic debris retention between pickets. You’ll maintain structural integrity while encouraging controlled biological colonization that defines authentic rustic aesthetics.
[affiai keyword=”moss covered picket fences” template=”carousel” count=”3″]
Rusty Metal Strap Hardware
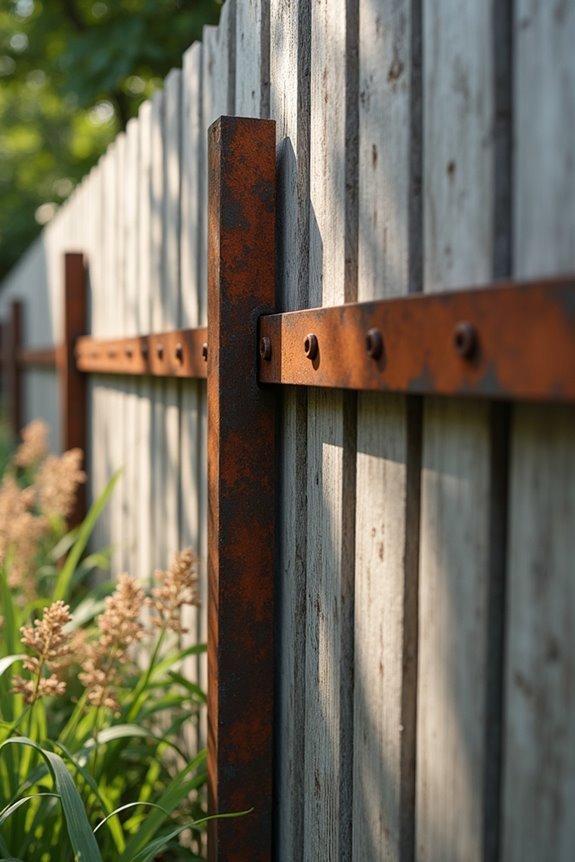
Industrial authenticity emerges when oxidized metal straps replace conventional galvanized fasteners in slat fence assemblies. You’ll achieve rustic appeal through naturally weathered steel bands that contrast beautifully against weathered wood slats. Position 1.5-inch-wide straps horizontally at 24-inch intervals, securing them with lag bolts driven through pre-drilled pilot holes to prevent wood splitting.
The patina develops organically as iron oxide forms protective layers that enhance functional durability rather than compromise structural integrity. You can accelerate the aging process by applying vinegar solutions or salt water to bare steel straps before installation. Mount straps flush against slat surfaces, ensuring metal edges wrap around fence posts for maximum connection strength. This hardware method provides superior lateral stability while eliminating the need for traditional rails, creating clean horizontal lines that emphasize your fence’s vertical slat pattern.
[affiai keyword=”rustic metal fence hardware” template=”carousel” count=”3″]

[Premium Stainless Steel Cable Zip] Made of all 304 material, the stainless steel cable tie comes with excellent acid and alkali resistance, abrasion resistance, and anti-aging.

COMPLETE HEAVY-DUTY KIT: Includes an efficient, labor-saving cable tie gun and 150 pieces of 11.8-inch 304 stainless steel ties, providing everything needed for immediate wire fence reinforcement, farm metal cage building, or automotive projects right out of the box.

Length: 32 ft(10 m ), Width 1-3/8"(35 mm)