A covered porch adds beauty and a spot for outdoor relaxation to your home. Before starting, you must get a building permit, as covered porches are typically classified with decks by city codes. It’s important to check with your local permitting office for rules on foundation depth. Don’t forget to call 811 before you start digging to avoid hitting underground utilities.
Matching your porch design with your home’s look, such as a Queen Anne style, can make it even more special. You can pick from simple to fancy roofing for your porch, based on what your house can support.
Key Takeaways
- The cost to build a 200-square-foot porch ranges from $4,600 to $22,000.
- DIY screened-in porch kits average around $1,100.
- Building a porch typically takes between three to four days.
- A porch that is 30 inches above the ground requires a railing according to building codes.
- It is generally cheaper to build a porch with concrete rather than wood.
- A gravel base for the porch should be about 6 inches deep, requiring 2 bags of gravel.
Understanding the Benefits of a Covered Porch
Adding a covered porch has many perks for those wanting to better their outdoor home area. It lets you use your outdoor space all year. This is because it shields against tough UV rays, rain, and snow. This protection helps your outdoor furniture last longer and lowers upkeep.
Having a covered porch also makes your home look better from the outside. When designed well, it can be a beautiful entrance that matches your house’s look. This beauty can boost your property’s value. With a smart investment in a porch, about 84% of the costs might come back through a higher home value. In the best cases, you could even get back more than you spent.
A covered porch makes your outdoor living area better by giving more room without the high price of adding a new room. This space can be a cozy spot for hosting, eating outside, or just relaxing. You can also add ceiling fans or heaters to make it comfortable no matter the weather, perfect for get-togethers.
Covered porches are great for saving energy too. They block direct sunlight, which can lower cooling expenses when it’s warm. Choosing easy-to-maintain materials for your porch can save money and time in the long run, giving both financial and practical advantages.
Building a covered porch can see about 84% of your costs returned by boosting your home’s market value.
There’s a rising trend in improving outdoor areas of homes. Adding a covered porch is a smart move for those looking to expand their space without big renovations. This added space can even stretch your kitchen or dining room outdoors.
| Benefit | Description |
|---|---|
| Increased Home Value | Investing in a covered porch can enhance your home’s value, with up to 100% ROI in ideal conditions. |
| Extended Usability | Year-round enjoyment of outdoor spaces, regardless of weather. |
| Curb Appeal | A well-designed porch adds to the aesthetic appeal of your home’s entryway. |
| Energy Efficiency | Reduced cooling costs by blocking direct sunlight. |
| Multi-purpose Space | Extend living areas without a full addition, serving as dining or relaxation spaces. |
| Low Maintenance | Using durable materials minimizes repair and cleaning needs. |
Planning Your Covered Porch Design
First, think about where your porch should go. You want a spot with good sunlight and a nice view. Measure the area carefully to choose the right size and roof. Make sure it matches your house’s look.
It’s important to pick materials that go well with your home. For example, natural stone keeps the porch cool in summer. Adding ceiling fans can help with light and air, making your porch comfortable even when it’s hot.
Consider the small things, like water-resistant outdoor rugs. They make your porch feel more like an outdoor room. Putting matching planters by the door and big lights can make a strong first impression.
Add screens to keep mosquitoes away, improving your porch’s comfort. Change pillows and cushions regularly to keep things fresh. Mix colors and styles to show off your unique taste.
Think about using pavers for the walkway; they look good and handle rain well. And remember to check local building codes. Plan for all costs to keep your project on budget.

IP65 Waterproof Outdoor Ceiling Fan with Light: Designed with a sealed motor and rust-resistant materials, this outdoor fan withstands rain impact and outdoor moisture exposure. Perfect for patios, gazebos, porches, pergolas and other outdoor spaces!

Plug and Play Installation:Outdoor ceiling fan for gazebo (6" and 10" downrod ) can be mounted on ceilings with a 9.9 FT power cord (plug-in ready) for easy setup and no hardwired required. All mounting hardware and clear instructions are included for quick, hassle-free installation
Gathering Necessary Tools and Materials
Building a porch requires the right DIY tools and materials. Planning and organizing these essentials makes the building faster and cheaper. Start with the basics: a tape measure, chalk line, hammer, drill, and saws are key for setup and cutting.
Levels are crucial to make sure your porch is flat. Don’t forget safety equipment like eye and hearing protection. When choosing materials, think about concrete for the base, metal for column support, and treated wood for the structure. Joist hangers and nails are also vital.
If you want a fancy or long-lasting porch, consider special materials. For example, Trex and TimberTech offer great wood alternatives that need less upkeep. PVC decking is best for moisture protection, and mineral-based composites handle heat well.
Posts should be placed 6 to 10 feet apart for a strong porch. Beams, joists, and posts are important for stability. Choose thick, high-quality lumber for these parts. For the roof, you’ll need shingles and moisture-resistant CDX plywood.
- Concrete: Essential for footings
- Metal column bases: Provides support for columns
- Pressure-treated lumber: Used for structural framework
- Joist hangers & nails: For securing joists
- Special tools for hardwoods/composite decking: Required based on material choice
- Shingles and CDX plywood: For roof sheathing and protection
Small things like screws and washers usually cost under $10 a bag at local stores. Having these items ready stops delays. Planning the roof? Space rafter hangers about 16 inches apart and aim for at least 12 inches of overhang.
| Material | Cost | Description |
|---|---|---|
| Lumber | $100+ | Essential for framework; various prices based on type |
| Shingles | $30/bundle | Used for roofing; provides weather protection |
| Screws & Washers | $10/bag | Small items necessary for securing components |
It’s vital to plan for costs and materials carefully. This keeps you within budget and ensures a smooth porch-building process. With the right preparation, you’re all set to start your porch DIY project.

Made from 18 gauge galvanized steel to increase rust and corrosion resistance, creating a stronger, long-lasting joist-to-header connection

Actual size:2"x 6" Rough Lumber,Inner width:2"(50mm)

Black 2x4 Joist Hanger: The joist hangers for pressure treated lumber is made to be installed from joist to header in wood-framed buildings with roofs, decks, floors, deck and ceilings. Creating a stronger, long-lasting joist-to-header connection
Preparing the Site for Construction
Getting your porch site ready is key to making sure it lasts and stays firm. First, clear all plants and trash from the area you’re going to use. Then, measure your porch space and mark the boundaries with stakes or spray paint. This ensures your porch fits just right in your outdoor area.
What you need to do next depends on your foundation type, like concrete or piers. For a concrete slab, you need to dig down to a certain depth. You place form tubes to make sure they go below the frost line. This stops the ground from moving later. After laying down gravel for water to drain, pour the concrete. Then, wait at least 48 hours before putting any weight on it.
Make sure your foundation is flat and strong. The depth for your post holes changes based on where you live but must go below the frost line. About half of all homeowners might need permits, so check local rules first. For more details, check out Wilkerdos’ guide on building a covered porch.
When planning outdoor construction, think about your foundation type, like concrete footings or pier and beam. A well-made site means a sturdy, even foundation for your structure. Nowadays, about 70% of homeowners are making their outdoor spaces nicer to add both beauty and use.
Remember, weather can change your building schedule. Usually, building a covered patio takes 1 to 3 weeks. Prepping the site right helps make construction smooth and results in a strong, good-looking porch.
Building the Framework of Your Porch
Building your porch’s framework needs careful work for it to be stable and last long. First, attaching a ledger board to your house is key. This board is the main support for your porch. Make sure it’s firmly attached to avoid any collapse, which happens with 5% of bad porch roofs.
Then, set up the rim joist and floor joists. These parts lay the groundwork of your porch frame. While building, precise measurements and firm fastening of joists are key. They should be placed as the local codes say, usually 16 inches apart. Using joist hangers adds stability.
Cutting wood accurately is part of porch framing techniques. For a stronger porch, use lag screws and metal brackets together. This method boosts structural strength by 50% over nails only. Also, putting in flashing stops leaks, which affects 10% of roofs.
| Structural Component | Material | Dimension | Fasteners |
|---|---|---|---|
| Posts | Full-size Cedar | 6×6 | 3/8-inch diameter by 10-inch lag screws |
| Headers | Doubled Cedar | 2×10 | 4-inch lag screws |
| Ridge Beam | Doubled Cedar | 2×10 | 4-inch lag screws |
| Rafters | Full-size Lumber | 2×8 | 4-inch lag screws |
| Roof Sheathing | Tongue-and-Groove Cedar | 2×6 | Stainless steel ring-shank nails every 12 inches |
In summary, using these porch framing techniques well means you’ll have a strong and durable framework. Whether you’re doing it yourself or hiring pros, these steps help ensure a stable structure.
Manufactured in china
![#9 x 1-1/2" Connector Screws, Replace for 9112R500, 1/4" Hex Head Wood Screws, Mech Galvanized, 10D Nails Replacement Heavy‑Duty Joist Hanger Screws, for 0.380" Dia Deck Screw, Framing[100-Qty]](https://m.media-amazon.com/images/I/41TVtTwvnpL._SL500_.jpg)
High-Quality Construction:#9 x 1-1/2" joist hanger screws are specially designed for wood-to-wood and wood-to-metal applications, including decking, framing, and structural connections. Featuring a 1/4" hex drive, they provide easy installation and a secure fit for heavy-duty projects.
Direct 10D Nail Replacement: These Connector Screws are specifically designed to replace standard 10D nails in structural connector applications. Their single-fastener load capacity exceeds that of a standard 10D common nail, making them ideal for demanding structural connections.
Roofing Your Covered Porch
When you start putting a roof on your porch, think carefully about various details. This ensures it lasts a long time and looks good with your house. Check that the slope of your porch roof matches your home’s roof, usually a 2:12 slope is needed for shingles. It’s key to properly place and secure roof trusses or rafters.
Start with precisely cutting support posts to fit right. They should be 1-1/2 inches deep by 9-1/2 inches tall. Next, set them in concrete, digging holes beyond the frost line if needed. Add gravel to each hole for better drainage. Secure the ledger board to your house with 15 lag screws and washers, each 5 inches long. Also, install rafter hangers every 16 inches along the ledger.
Picking sturdy materials is vital. Use heavy woods like six-by-sixes for support and two-by-sixes for beams. For the roof, one square of shingles covers 100 square feet. The roof sheathing should be 1/2-inch plywood or oriented strand board (OSB).
To make the roof last, use roofing felt, flashing, and drip edge. These prevent water from leaking in. Getting advice from pros on roofing options is smart. They make sure your work follows local rules. Remember, this is a big job, so having help is wise.
Measuring right is crucial, especially for rafters that need exact cuts. Make sure to secure the header beam with galvanized bolts. This spreads out the load. Use temporary braces to keep support posts stable until the concrete dries. Always follow local building rules.
Thinking of doing your porch roof on your own? Remember to check your home can handle it. Ask experts for help to make sure it’s safe and meets building standards. Your roof’s slope should complement your home for the best look and function.

4 offset nail slots that will not allow bracket to slide up

Finishing Touches and Decor
Adding the final touches makes your covered porch welcoming and warm. Installing railings is crucial for decks higher than 30 inches. They ensure safety and meet local codes. Consider composite decking for a polished look; it’s flame retardant, perfect for fire pits.
Choosing the right outdoor furniture and decor is key for your porch. Wicker sectionals from Restoration Hardware are a top pick. Add comfort with pillows from Target or HomeGoods and a cozy Geyser Pouf. For floors, the Stenhouse Flatweave Rug adds color and texture. Try vertical gardens to turn walls into green spaces.
Adding a water feature like a fountain or birdbath brings peace to your porch. Pergolas provide shade but can pair with screens for weather changes. Lighting, such as chandeliers and sconces, keeps your porch lit at night. Your budget size shapes the porch’s design, but details make it special.
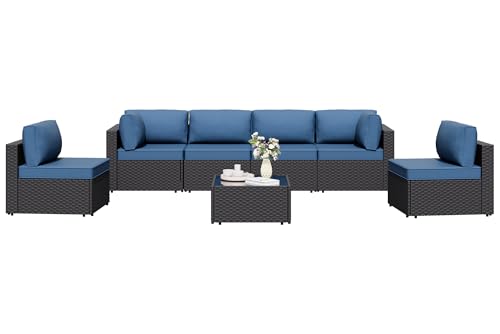
Patio Furniture Set Material: Made of pe rattan wicker and steel frame, all-weather resistant synthetic resin is built to last while having a sleek and stylish finish. Our wicker is strong and durable but also lightweight at the same time. Breathable seat cushions for optimal comfort and relaxation.

Patio Furniture Set Material: This outdoor sectional sofa sets made of PE rattan wicker and steel frame, all-weather resistant synthetic resin is built to last while having a sleek and fashion style.Our wicker patio couch is strong and durable but also lightweight at the same time. Breathable seat cushions for optimal comfort and relaxation.

All-Weather Durable Structure: Features premium PE rattan and heavy-duty metal frame, this 7-piece patio set is fade resistant, rustproof and weatherproof. It stands up to sun, rain and changing seasons perfectly for year-round outdoor living.

