Turning your concrete porch into a wooden deck is a great DIY project you can finish in about a week. This guide will take you through each step, making it easy and fun for those who’ve done some DIY before. By learning how to cover your concrete porch, you’ll see how an outdoor deck can make your home better. It costs $5 to $15 per square foot, depending on what materials you use.
DIYing your deck over concrete saves money compared to hiring pros and boosts your home’s value. It will raise your patio by about 2-1/2 to 3-1/2 inches. Remember to add an extra 1/2 inch for frost heave. Choosing top-notch materials like pressure-treated wood or hardwood deck tiles means your deck could last over 75 years.
Key Takeaways
- The project can be completed in 4 to 5 days.
- Materials cost between $5 to $15 per square foot.
- The concrete porch height increases by 2-1/2 to 3-1/2 inches.
- Hardwood deck tiles can last up to 75 years or more.
- DIY deck over concrete is an affordable alternative to hiring contractors.
Why Build a Deck Over Your Concrete Porch?
Turning your concrete porch into a wooden deck has many perks. One big reason is it makes your outdoor space look better. A wooden deck fits well with many home styles, bringing warmth and charm.
A deck over concrete offers a flat surface, fixing cracks and uneven spots in old concrete. This makes your outdoor area safer, which is great for families with kids or elderly members. You can pick materials like pressure-treated wood or composites that last long and stand up to weather.
When thinking about adding a deck, consider the time and cost. Putting a deck over a concrete porch takes about four to five days. Costs range from $5 to $15 per square foot, depending on your material choice. This upgrade also lifts your patio by about 2-1/2 to 3-1/2 inches, creating a safer and more distinct space.
Decks on concrete porches can be very durable. With good care, they can last 15 to 20 years. Using the right wood or composite materials means less rot and decay. This means your deck will last longer with less upkeep.
Before you start building, check for any water drainage issues. Make sure the concrete is level and slopes right to avoid water pooling. In places with cold weather, adding an extra 1/2 inch to your plans can stop problems from frost.
Overall, a deck over your concrete porch adds value, safety, and beauty. Fixing any problems first and choosing the right materials will make your new deck a loved part of your home.
| Aspect | Details |
|---|---|
| Project Duration | Four to five days |
| Cost per Square Foot | $5 to $15 |
| Height Increase | 2-1/2 to 3-1/2 inches |
| Material Recommendation | Pressure-treated wood or composite |
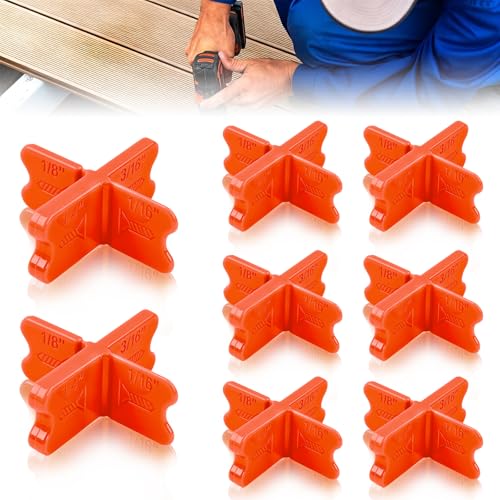
Universal Sizes: 1/16", 1/8", 3/16", and 1/4". These deck board spacers provide precise spacing control for your decking project, eliminating manual measurement errors and ensuring consistent spaces between boards

Functionality: the deck spacers feature either 1/8" or 3/16" shim edges; It spaces deck lumber apart to allow for adequate expansion and contraction to minimize guesswork; The efficient design of this decking tool ensure not only a visually appealing finish but also a solid foundation, elevating the quality and durability of your decking endeavors

Precision in Your Project: our 24 packs of deck spacers come in about 1/8'' (3 mm) in orange, ensuring precise alignment for your decking project; With these dimensioned spacers, achieve uniform and professional spacing
Tools and Materials You’ll Need
Creating a deck on a concrete porch is a big project. You’ll need a complete list of decking materials and the right tools. This will help you ensure everything goes smoothly.
Start by collecting your tools and supplies. This includes a circular saw, a drill or driver that’s cordless, a miter saw, a table saw, a tape measure, and saw horses. Get a quality hammer drill for about $100 to make drilling into concrete easier.
The right materials are key for a long-lasting and safe deck. Make sure you have:
- Pressure-treated 2x4s for sleepers
- Deck screws
- Flash tape for moisture protection
- Plastic shims for leveling
- Self-leveling compound for concrete surface issues
- 1/2-in. x 12-in. PVC trim for clean edges
It’s important to prepare and install the base correctly. Consider using post and footer systems instead of sleepers for better water resistance. Joist flashing tape helps prevent mold, rot, and mildew. Remember, decks taller than 30 inches may need guardrails. Be sure to check your local building codes.
Use spacers to keep boards evenly placed during installation, and hidden fasteners for a clean look. With all these tools and supplies, you’re ready to start your deck project.

SUPERIOR RUST PROTECTION Treated with a premium Tan anti-corrosion coating, these exterior wood screws are built to withstand harsh weather. They are fully compatible with pressure-treated lumber, making them ideal for long-term outdoor decks and fences.

Self-Drilling Point: Together, coarse screw threads and a self-drilling point design eliminate the need for a pilot hole

Self-Drilling Point: Together, coarse screw threads and a self-drilling point design eliminate the need for a pilot hole
Preparing the Concrete Surface
Before starting your deck project, making sure the concrete deck is prepared right is key. This step makes sure the foundation is strong which helps your deck last longer. Begin by cleaning the concrete for decking. Get rid of all dirt, debris, or old coatings. A pressure washer works well to clean the surface completely and remove all dirt.
Then, check the concrete for any cracks or bumps. If the concrete is not even, you might get water pooling or even flooding in your basement. If you’re not sure about the condition of your concrete, it might be a good idea to get advice from an expert. Fixing these issues early can save you trouble and extra work later.
With the surface clean and even, you’re ready to put in sleepers over concrete. This means placing treated wood right on the concrete. This wood serves as a stable base for your deck boards. Make sure the sleepers are put in the right way. They should raise the deck about 2-1/2 to 3-1/2 inches so doorways are not blocked. Also, leave an extra 1/2 inch space for frost heave.
When putting in the sleepers, use specific sized concrete screws. Owning a hammer drill makes this easier. You can get a simple one for under $60 or a better model for over $100. Below are the main tools you’ll need:
| Tool | Purpose | Cost |
|---|---|---|
| Hammer Drill | Drilling into concrete | $60 – $100+ |
| Pressure Washer | Cleaning the concrete surface | Depends on rental or purchase |
| Concrete Screws | Securing sleepers | Varies |
By doing these steps, you make sure your deck is solid, can last a long time, and is ready for fun years ahead. Getting the concrete surface ready properly is essential for a successful deck project.

3 MODES: multi-function selector offers 3 modes of operation; Rotation-only, rotary hammer, and hammer only mode; Variable speed trigger with reverse offers accurate bit starting or easy fastener removing

High-Performance Motor – Equipped with a pure copper motor, this hammer drill delivers 354 in-lbs torque, ensuring strong power, extended lifespan, and reduced noise. Ideal for drilling into brick walls, metal, and wood with efficiency.

Powerful 7. 5-Amp Motor – Corded hammer drill tackle the most demanding projects
Designing Your Deck Layout
Planning your deck layout involves important considerations. The cost to build a deck depends on labor, design, substructure, materials, and fastening options. Labor costs are a big part of the total cost. Adding complex designs like herringbone patterns will make it more expensive.
For decks over concrete, it’s crucial to understand the support needed. Deck joists usually are spaced 12” to 16” apart with blocks to prevent them from moving. Wood decks need upkeep every year, which adds to costs over time. Composite decking, from recycled wood and polymers, needs less maintenance. PVC decking also uses recycled materials and is low-maintenance.
One key tip for deck designing is ensuring footings are below the frostline in cold areas to stop frost heave. Underground utilities can change where you put footings, affecting your deck’s design. Always call 811 before digging to check for utilities.
Your deck’s design should match your home’s style. Classic rectangles work with any style and are easier to build. Bigger and unusual shapes make the project pricier and more complex. Freestanding decks over 2 feet high need special bracing to stay stable. Decks over 4 feet high should be checked by an engineer to be safe.
A deck for four people should be at least 12 feet by 12 feet. This provides space for furniture and moving around. Decks can get very heavy with people and furniture, so they need strong support. Planning carefully ensures a safe and attractive outdoor area for the future.


The Decking Installation Process
Installing a deck over concrete is an adventure that’s both rewarding and detailed. It needs your full attention and patience. The whole process can take you from four to five days. This depends on how experienced you are and how big the project is. Expect to spend $5 to $15 on materials for every square foot, so plan well.
First, check the concrete surface for any cracks or bumps. Fixing these problems early with epoxy or leveling compound is wise. This step prevents future water issues which could harm your basement. If you’re unsure about assessing the concrete, it’s best to get a professional’s help.
Safety comes first. Always wear safety glasses, a dust mask, and hearing protection. Now, let’s look at the installation steps:
- Prepping the Concrete Surface: Make sure to clean the area and fix any issues. It’s important the slab slopes slightly for water run-off.
- Installing Sleepers: Lay down pressure-treated sleepers and secure them with masonry anchors. They’re the foundation of your deck, offering stability and protecting against moisture.
- Framing: Create a frame with deck joists on top of the sleepers. This frame will hold up your deck boards and keep the structure sound.
- Laying Deck Boards: Place the deck boards across the joists. Leave a bit of space between each for expansion and water flow. You can choose from treated lumber, composite, or PVC decking, all durable options.
Use the right screws or nails to attach your deck boards. Don’t forget to apply flashing tape and waterproof sealant for extra protection. This will help your deck last longer.
You’ll need several tools, like a hammer drill (under $60 for simple ones), circular saw, and miter saw. They help you make accurate cuts and secure everything properly. You might need about ten different tools in total.
When you’re done, your patio will be about 2-1/2 to 3-1/2 inches higher. This small change can make a huge difference in your outdoor space. It’ll look refreshed and be more useful.
By following these steps, you’ll make your outdoor area look better. Plus, you’ll save money on labor and the cost of removing concrete. Your hard work will result in a beautiful, lasting part of your home.
Maintenance Tips for Your New Deck
Maintaining your deck is vital for its long life. Start with cleaning it every few months. This stops dirt and mildew from harming the wood. Always check for damage or wear and focus on keeping the wood in good shape.
Every one or two years, apply a protective sealant. This keeps the wood safe from moisture and sunlight. Use only the best sealants for great results. If your deck is made of composite materials, it needs care too but not as much.
Make sure to keep all screws or fasteners tight. This action keeps your deck stable and safe. Replace any broken boards quickly to keep the deck looking good and safe. Taking care of your deck means it will last longer and stay welcoming.
Don’t forget seasonal upkeep. In winter, remove snow and ice to avoid heavy loads. In fall, clear away leaves and debris to keep it clean. By following these tips, you protect your deck and enjoy it for many years.
Conclusion: Enjoy Your New Outdoor Space
Putting a deck over your concrete porch makes your outdoor area better. It turns it into a place that’s both useful and nice to look at. We’ve shown you how to get the concrete ready and shared tips to take care of your deck. It’s important to choose materials like composite or PVC for a lasting deck.
Using advanced materials like TruNorth Composite Decking or Clubhouse PVC Decking has extra perks. For example, TruNorth is eco-friendly because it’s mostly made from recycled stuff. And Clubhouse PVC Decking doesn’t get as hot, which is great for summer. These options also don’t easily crack or warp, which means less upkeep.
Creating a deck over a concrete patio is not just about the looks or function. It helps the environment by reducing waste since you’re not breaking up old concrete. It also helps keep your patio furniture dry by improving drainage. To keep your deck great, clean it regularly, check it, and treat it as needed. Your new deck will become a cozy place for fun, relaxation, and enjoying the outdoors, making your home even better.

