Welcome to a simple guide on turning your concrete porch into a tiled beauty. This is perfect if you’re into DIY and looking to upgrade your porch. Tiling your porch improves its look and makes it last longer and work better. You’ll find out how to get your porch ready for tiling, what tools and materials you’ll need, and tips to keep it looking great. So, let’s get those sleeves rolled up and turn your porch into a beautiful part of your home.
Key Takeaways
- A clean surface increases the chances of achieving a better bond between concrete and tile.
- Moisture control is crucial, particularly in humid climates; wait overnight for excess moisture to evaporate.
- Properly patching cracks and depressions in concrete is essential to preventing weak spots.
- Using a concrete sealer can decrease mold growth and improve the bond between cement and mortar.
- Leveling the subfloor is critical to avoid tile breakage; uneven surfaces can lead to future issues.
Why You Should Tile Your Concrete Porch
Tiling your concrete porch does more than just make it look good. It changes how your home works and its value. Putting tiles on a porch makes it last longer. Tiles are stronger than just concrete and can handle wear and tear much better. This is great for anyone planning to stay in their home for many years. Plus, tiles are easy to keep clean. This is a big help for places like porches that get dirty easily.
If you want to make your concrete porch look better, tiles are a great choice. They give a more elegant look than plain concrete. Picking big tiles, like 8″ x 16″ porcelain ones, means fewer grout lines. This makes your porch look better. Also, porcelain doesn’t soak up water like ceramic does. This makes it better for outside use. It stops tiles from lifting or grout from cracking due to moisture.
Safety is another big reason to choose tiles for outside. Tiles made for outdoor use are less slippery, especially near water, like pools. This makes your porch safer for everyone. When installing tiles, putting mortar on the concrete and tile back helps them stick together well. Using Mapei’s Flexcolor CQ grout helps too. It’s strong and keeps its color, making the job easier.
Tiling your porch is also good for dealing with different seasons and making it more comfortable. If tiles are in a shaded area, they stay cooler in summer. This makes spending time outside more enjoyable. Starting your porch project before winter arrives gives you a good reason to finish it quickly.
Preparing well with a primer for self-leveling underlayment makes sure your surface is even. This helps stop tiles and grout from cracking. Using a waterproof membrane stops moisture problems. This means less chance of stains or damage from water. Also, making sure the water drains well keeps your porch in good shape for a long time.
In conclusion, tiling your porch has many benefits. It’s a smart choice for improving your porch’s function and look. It raises your home’s value and makes your outdoor space nicer and easier to care for. Tiling is a good investment for homeowners.
Tools and Materials You’ll Need
To start your concrete porch tiling the right way, you need the best *tiling tools and materials*. Knowing *what you need to tile* helps make the project smooth and avoids problems.
The essential tools you’ll need are:
- Pressure washer
- Self-leveling sealant
- Underlayment primer
- Wet saw for cutting tiles
- Large format tile mortar with polymer
- Notched trowel
- Tile spacers
- Grout float
- Sponge for cleanup
- Level
- Tape measure
- Industrial scrub brush
- Rubber float
- Caulk gun
- Utility knife
- Bucket
- Tile (porcelain is recommended for its durability)
- Thin-set mortar
- Grout (choose fade- and stain-resistant)
- Grout sealant
- TSP cleaner
- Caulk
Having the right *tiling tools and materials* organized lets you move through each step with ease. You’ll be preparing the area, dry-laying tile, installing it, applying grout, and sealing it efficiently.
| Task | Description | Tools and Materials |
|---|---|---|
| Area Preparation | Clean and level the surface. | Pressure washer, self-leveling sealant, underlayment primer |
| Tile Cutting | Cut tiles to fit with a wet saw. | Wet saw, utility knife |
| Tile Installation | Lay tiles using the right spacing. | Notched trowel, tile spacers, large format tile mortar |
| Grouting | Fill the spaces between tiles. | Grout float, stain-resistant grout, sponge |
| Sealing | Enhance durability by sealing grout. | Grout sealant, caulk gun |
Having all these tools and materials means your DIY tiling project has a better chance of going smoothly. Be ready with everything, and turn your concrete porch into an attractive, long-lasting outdoor area.

Secure Suction Positioning: Double suction cups grip tightly on clean tile, marble, or glass surfaces — essential tile tools for superior grip and stability, ensuring...
Preparing the Concrete Surface
For a great tile job on your porch, start with getting the concrete ready. First, clean the concrete well using a pressure washer. This gets rid of dirt, debris, and old sealers.
| Steps | Description |
|---|---|
| Cleaning | Use a pressure washer to remove dirt and debris. |
| Repairing Cracks | Fill cracks with a self-leveling sealant to create a smooth surface. |
| Priming | Apply a self-leveling underlayment primer for even coating. |
After cleaning, check the concrete for any cracks or damage. Fill these cracks with a self-leveling sealant. This makes sure the surface is smooth and level for the tiles.
Then, put on a self-leveling underlayment primer. This step makes sure the surface is evenly covered and seals it well. It’s a big part of how to prepare concrete for tiling. It helps the tiles stick properly and last longer.
For concrete floors with underfloor heating, big tiles, or big spaces, use an anti-fracture mat. Also, make sure the concrete’s moisture level is 75% or less before you start tiling.
Good concrete surface preparation not just helps tiles stick better. It also makes your tiled porch more durable and last longer.

Effortless Application, No Tools Needed: MOSAMNI self leveling concrete crack filler is ready to use straight from the bag, requiring no additional tools; Equipped with a precision nozzle for easy extrusion into deep cracks, suitable for a wide range of indoor and outdoor surfaces, including roofs, patios, driveways, sidewalks, basements, pool decks, and gutters, saving time and simplifying the repair process
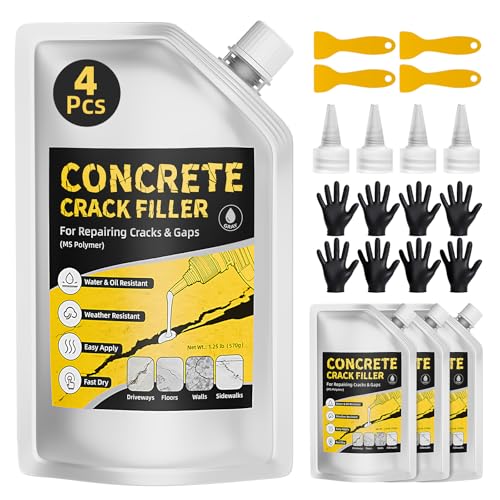
【Complete 4‑Pack Repair Kit】Say goodbye to the hassle of buying extra tools. TQRR concrete crack filler kit comes with everything you need: 4 packs of sealant (570g each, 5.02lb total), 4 screw‑on nozzles, 4 scrapers, and 4 nitrile gloves. Unlike single‑use tubes, our individual pouch design allows you to tackle multiple projects over time without waste. Whether fixing a long driveway or a small patio crack, this all‑in‑one solution saves you time and money, making contractor‑quality results accessible to every DIYer.

EASY VERSATILE APPLICATION — Apply self-leveling concrete sealant to expansion joints without concern for uneven surfacing. Perfect for driveways, garages, sidewalks, or pavement
Choosing the Right Tile
Choosing tiles for outdoor use involves looking at several important points. You want tiles that last, look good, and are safe. Porcelain tiles are great for outdoors because they don’t absorb much water. This makes them strong against different weather and ideal for places that freeze and thaw since their water absorption is below 0.5%, avoiding moisture damage.
Look for tiles that prevent slipping for porches. Textured porcelain tiles not only help avoid slips but also look beautiful and worn. They’re great for areas that see a lot of walking or get wet often.
Also, consider how your tiles will look with your home’s style. Dark tiles work well in bright places to reduce glare. Light tiles can make darker areas feel brighter by reflecting light.
The cost of outdoor tiles changes a lot based on the type. Simple ceramic tiles start at $1 per square foot, while fancy porcelain that looks like stone can be $50 per square foot. Here’s a table showing different tiles’ features and costs:
| Tile Material | Durability | Water Absorption | Slip Resistance | Price Range |
|---|---|---|---|---|
| Porcelain | High | Low (<0.5%) | High | $3-$30/sq.ft. |
| Ceramic | Moderate | Moderate | Moderate | $1-$15/sq.ft. |
| Natural Stone | High | Variable | High | $10-$50/sq.ft. |
| Deck Tiles | Moderate | Low | Moderate | $5-$20/sq.ft. |
The best tiles for your porch fit your needs like foot traffic, weather, and style. If you install them yourself, think about these points to get a result you’ll love. It will make your outdoor space look and work better.

Natural Stone Appearance: Realistic textured design with a matte finish replicates the elegant look of weathered stone.

10.98 square feet, 9 pieces per case. Case weight is 38.25 lbs.

Natural Stone Appearance: Features a dynamic mix of earthy browns and subtle veining, replicating the look of hand-chiseled natural stone.
Installing the Tile
Learning how to install tile on your concrete porch is rewarding. But, it needs careful planning and detail attention. Make sure to apply mortar on the concrete and the tile back for strong adhesion. It’s crucial to pick mortar that’s meant for outside use to ensure it lasts longer.
For perfect DIY tile installation, use spacers for even tile gaps. With big tiles, spread mortar on their back to stabilize them. After placing your tiles, let the mortar dry for at least a day before grouting.
Apply grout in sections. Use a grouting float at 45 degrees to avoid gaps and air pockets. Wipe off extra grout with a sponge in circles to keep the area clean. Choosing grout that doesn’t stain or fade keeps it looking good longer.
To get a safe and strong tiled surface, keep these in mind:
- Pick tiles that prevent slipping for outdoor safety.
- Porcelain tiles are more durable than ceramic due to lower water absorption.
- Use an uncoupling membrane to avoid problems from concrete movement.
- A leveling system gives you even joints across the tiles.
- Testing for moisture beforehand helps prevent future issues.
- Carefully plan your tile layout, starting from the center.
Here’s a table with some recommended products and their features:
| Product | Feature | Benefit |
|---|---|---|
| Mapei Ultracolour Plus Grout | Water Mixing Ratio | Consistent Grout Composition |
| LTP Porcelain Tile Protector | 30 Minutes Drying Time Between Coats | Enhanced Tile Protection |
| Wet Electric Cutter with Diamond Tip Blades | Cool Cutting Temperatures | Precise, Clean Cuts |
By taking these steps, your laying outdoor tiles project will enhance your porch, making it both stylish and useful.

Stone Grip non-slip tile treatment works on most natural stone floors and stairs, including porcelain and ceramic tiles, terrazzo, quarry, slate, brick, travertine, unsealed concrete, honed marble and granite, unsealed concrete and many other stone or mineral surfaces

30 pcs Box. Covers 7.5 sqft. Heavy-Duty Commercial Grade Tile – Designed specifically for high-traffic areas, our 6x6 red quarry tile is ideal for restaurants, kitchens, retail spaces, and industrial settings. Its dense composition and unglazed finish deliver maximum durability under constant foot traffic and heavy equipment.

This moccasin style slipper lined with plush faux fur (vegan) ensures warmth and comfort for your feet.
Maintaining Your Tiled Porch
After installing your tile, it’s crucial to maintain your tiled porch to keep it looking good. Cleaning it regularly with the right products will stop dirt from building up. To care for your porch, clean it with a mild soap and a soft brush. This way, you won’t scratch the tiles. Also, make sure to sweep often to prevent dust and trash from getting into the grout.
Putting a sealant on grout is very important. It makes grout last much longer, about 50% more, by keeping away stains, mold, and moisture. You might need to put sealant on every six months to a year, depending on your tiles and grout. This step is key for keeping outdoor tiles in good shape, especially if they get wet a lot.
Now and then, check if any tiles are loose or if the grout looks bad, and fix these issues quickly. Taking care of these problems early can stop bigger ones later. If you use porcelain tiles, you’ll have less to worry about. They last a long time and help prevent slips. By doing these things, your porch will keep making your home look better and work well for you for many more years.
By cleaning often, sealing when needed, and fixing problems right away, you help your outdoor space last longer and look great. Remember, keeping your porch in good shape is not just about how it looks. It also makes your outdoor space more useful and valuable.
SCS Certified INDOOR ADVANTAGE GOLD

Grout sealer that protects cementitious grout joints and prevents stains.

Keep a clean, NATURAL APPEARANCE and improve the DURABILITY of your grout in your shower, kitchen, bathroom, and tile flooring

