Building a hip roof porch is not only a rewarding DIY project but also adds beauty and function to your home. It perfectly channels rainwater away, blending with various home designs. You’ll need to start with detailed planning and precise measurements. First, measure your building’s width and height to figure out rafter lengths using an online roofing calculator. Cut the wooden planks, making birdsmouth cuts for a secure fit to the wall tops. Then, construct a robust roof frame, topping it off with plywood and shingles to complete your new porch.
This foundational knowledge sets you up for success in adding a stylish hip roof porch to your home. It’s an excellent way to boost curb appeal, create an inviting outdoor area, or even raise your property’s value. Getting these first steps right is crucial for a splendid outcome.
Key Takeaways
- Start by precise measurement and calculation using an online roofing calculator.
- Cut wooden planks and make birdsmouth cuts for secure rafter connections.
- Assemble the rafters to form a sturdy roof frame.
- Cover the frame with plywood and shingles to complete the structure.
- Building a hip roof porch enhances your home’s curb appeal and value.
- Initial planning and accurate measurements are crucial for successful DIY hip roof construction.
- This project merges aesthetic appeal with practical benefits, directing rainwater effectively.
Understanding Hip Roofs: Basics You Need to Know
A hip roof has all four sides sloping downwards to meet at the top. This design boosts stability and resistance to wind. Hip roofs are known for lasting longer, especially with good care.
The architectural style hip roof is more expensive to build. It’s because of its complex design and material needs. But, they can get you up to 32% off on insurance in areas often hit by hurricanes. Their steep, consistent slopes handle wind better than gable roofs.
The structural components of a hip roof include rafters and ceiling joists. Rafters support the roof and are placed 16 to 24 inches apart. They help spread the roof’s weight evenly. This roof type has a lower pitch. It means better water drainage but can limit attic space and snow removal.
When designing your porch, knowing about structural components of a hip roof is essential. They have uniform wall heights but need complex truss sets for the roof. Yet, their modern look fits well with both new and old house designs.
Even though hip roofs cost more at the start and are complex, their benefits are clear. They hold up well against bad weather and look great. Considering a hip roof could improve your home’s durability and style, whether it’s new or classic.
Planning Your Hip Roof Porch
Planning well is key to making your hip roof porch project a success. The Porch Specialist offers different designs. These include Wall & Floor Mounted Porch, Low Brick Plinth Porch, and others. They are made to match many home styles and are easy to put together.
First, check local building rules and get the permits you need. This avoids any legal or insurance problems. For instance, New York City follows the NYC Building Code §3300. Portland, Oregon sticks to the 2021 Oregon Residential Specialty Code (ORSC).
Next, pick the roofing materials that look good with your house and last a long time. Asphalt shingles are a good, affordable choice. Don’t forget to include underlayment and flashing to stop leaks. Measuring your porch area helps you figure out the right size and angle for the rafters. A roof pitch calculator can make this easier.
The Porch Specialist uses wood from France that’s sustainably sourced. They plant three trees for every one they use. Each piece of wood is carefully checked to ensure it meets high standards.
Having a detailed plan makes building easier and helps you spot possible problems ahead of time. You can use a custom builder tool on the product page to design your porch. The company also gives you instruction manuals and planning drawings for help with assembly.
Preparing the Site for Construction
Getting ready to build your hip roof porch starts with careful site preparation. It’s key to creating a strong and lasting foundation. Start by removing any debris or obstacles from the area. Then, make sure the ground is smooth and even.
The next step is digging holes for the support posts. In places where the ground freezes, dig at least 36 inches deep to avoid frost damage. Fill the bottom of each hole with 4 inches of gravel. This helps with drainage and keeps your support posts solid. After that, place the posts in the holes and secure them with concrete.
These site preparation tasks do more than just prepare the ground. They also ensure your porch will be safe and last a long time. It’s important to place support posts correctly, typically every eight feet, but always check your local building codes.
Following these steps gives your porch a solid foundation. Without this, even the best design might fail, leading to damage and expensive fixes. So, take the time for careful site preparation. This way, you’ll make building your porch easier and more successful.

Wide Application - Idea for installing wooden decorative fence, chain link fence, deck, patio, planting trees or shrubs, orchard planting, ice drilling, pile driving, construction, land drilling, and other drilling work

Ideal for securing and stabilizing a nominal 4" x 4" post to a wood post or surface

【Twin Alloy Blade Drill Bit】The auger drill bit features twin alloy blades, boosting its soil penetration capability. This blend of premium materials guarantees strong durability and outstanding cutting performance, enabling it to effortlessly penetrate hard soils, thereby making planting tasks more efficient and uniform.
Constructing the Porch Frame
Building a hip roof porch starts by making the porch frame. First, attach a ledger board to the house’s wall. Make sure it’s placed below the windows to keep the structure strong and avoid problems. It’s important to fasten the ledger board well, creating a stable base.
Then, put metal rafter hangers along the ledger board at regular intervals. These hangers will keep the rafters in place, making the framework stable. Installing the ledger boards and rafter hangers right is key. It helps start the hip roof project on the right foot. Getting the support and alignment right at this point is crucial for your porch’s strength.
Rafter spacing is key, usually between 16 to 24 inches apart, following local building rules. Paying attention to this ensures your structure can carry the roof’s weight and more.
Finally, make sure the support beams are level and tightly fixed to the porch columns. This ensures the whole roof is stable. By carefully doing these steps, you build a strong base. You cover important steps like building the porch frame and keeping the structure strong, leading to a lasting hip roof porch.

High Quality: One-piece Iron Casting is heavy duty and superior quality, maximum load of 2400 Lbs. Perfect choice for all kinds of swing set products indoors & outdoors, including gymnastics rings ceiling mounts, porch swings and yoga swings

The open design and ability to field-adjust the slope make the LRUZ ideal for both retrofit or new applications

Premium Quality: Made of heavy duty and superior one-piece iron. Perfect choice for all swing set products indoors or outdoors including gymnastics rings, porch swings, yoga swings and boxing bag, etc
Constructing the Hip Roof Structure
Building a strong hip roof for your porch is very important. Start by cutting the rafters to the right lengths and angles. Getting this right means you’ll have a stable and good-looking structure. For help, use guidelines from experts, like the ones in this detailed guide. It makes learning complex roofing skills easier.
Then, fix the rafters into the hangers you’ve already put in place. This step makes sure every rafter is secure, creating a smooth frame. Getting the placement of each rafter right is key for a great-looking and strong hip roof.
Hip roofs slope inward from all outside walls. They can look like a pyramid or have four sloping sides. This shape is not just about looks—it makes the roof more stable and better at resisting strong winds. It’s perfect for stormy areas. The slope also helps with rainwater, leading it away and preventing puddles.
In places with lots of wind, choose a hip roof pitch between 4/12 to 6/12. That means the slope will be around 18.5° to 26.5°. Such angles help the roof last longer and perform better. A well-built hip roof can last up to 50 years with regular care.
Here are the main benefits of hip roofs:
- They’re more stable and don’t need as much diagonal bracing.
- They look better and offer room for features like dormers.
- They work with many materials, such as shingles or metal.
Hip roof installation costs range from $20,000 to $50,000, averaging $8 to $12 per square foot for a typical one-story house. This is a good investment because hip roofs have better performance and last longer than simpler roof styles, like gable roofs.
Installing Roofing Materials
Picking the right materials for your hip roof porch is key to its long life and function. A good roof job can make your deck last 10-15 years longer. First, put down plywood sheathing on the frame, then use a water-resistant layer to protect from the weather.
When it comes to choosing shingles, think about how long they last, how they look, and if they can handle wind and rain. You’ll need about 10% more shingles than your roof size because of cuts for complex areas. Tiles or metal panels are also good choices. Metal panels are especially strong and can handle harsh weather better than traditional shingles.
For installing, use the right fasteners to make sure everything stays put. Fastening the roof panels well helps avoid damage from strong winds or storms. A roofing nailer makes the job much faster than a hammer. Also, it’s important to use a leak barrier in colder places to stop leaks at weak spots like eaves and valleys.
Adding a system to vent the roof can stop it from getting too hot or moist. This means less chance of ice dams and other roof damage. With the best materials and methods, your hip roof porch will look great and last longer against the weather.
The cost for roofing materials over a deck is usually $1,500 to $5,000, so plan your budget right. Remember to get the needed local permits, which may cost $50 to $500. Even though it’s pricier to install a hip roof because of its support system, it can increase your property’s value by up to 20%. So, investing in a good roof means adding both beauty and value.

Mesh Roof Repair Fabric

USE FOR - RV roofs, metal roofs, flat roofs, trailers, campers, mobile homes, gutters, foundations, ponds, planter boxes, basements, skylights, vents, gutters, shower liners and more

SIMPLE & SAFE - Non-toxic once cured. Supplied in a 10.5 fl oz (310 ml) cartridge for easy use with a standard caulking gun. Ensure the surface is clean and dry before application
Finishing Touches: Railings and Flooring
After building your hip roof porch, it’s time for the final touches. Elements like railings and flooring are key. They make your porch look good while keeping it safe and functional.
Picking the right porch railings installation is crucial. They should fit your home’s look. Building codes say railings must be 36-42 inches high. But a 25-inch height can keep your view clear, especially if your porch is only 20 inches off the ground. This keeps your porch looking great without blocking the view from your windows.
Choosing the best flooring options is also important. Go for durable wood for a traditional feel but remember it needs care. Or choose composite materials that last long and are easy to keep up. Both choices make your porch look better by offering different textures and finishes, and they help show off its style.
– Wood: It’s cozy and welcoming but needs care like sealing and staining.
– Composite: It fights weather and bugs and is easy to take care of.
Add these features carefully to match your hip roof porch’s design. They should meet safety rules and make your house look better from outside. Good-looking porches can up your home’s value by as much as 15%. So, these final touches are a smart investment. Plus, railings can hold things like lights and plants, making your porch more useful and attractive. By adding these details wisely, you follow the rules and create a porch that’s inviting and stylish for years to come.

【Lightweight Material】Interlocking deck tiles are made of high hardness plastic, lightweight and sturdy. Interlocking patio tiles have good load bearing and stability, odorless, not easy to fade, crack or warpe. Plastic floor tiles are dirty resistant and easy to clean, suitable for long term use.

【Lightweight Material】Interlocking deck tiles are made of high hardness plastic, lightweight and sturdy. Interlocking patio tiles have good load bearing and stability, odorless, not easy to fade, crack or warpe. Plastic floor tiles are dirty resistant and easy to clean, suitable for long term use
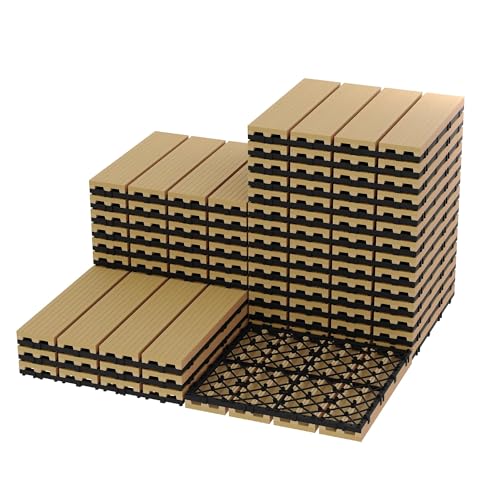
【PREMIUM COMPOSITE WOOD CONSTRUCTION 】: These deck tiles feature a durable composite surface with a realistic acacia wood grain. Lighter than solid wood and reinforced with a high-quality base, they withstand heavy traffic, rain, and harsh sun without cracking or warping—ensuring all-weather durability.
Maintenance and Care for Your Hip Roof Porch
Taking good care of your hip roof porch is key to its durability. Hip roofs are very popular in the USA, making it important to check them regularly. Every year, look for any damage or wear caused by weather or time.
But, looking after your porch means more than inspecting the roof. Check the railings and floor too. Catching problems early can save you a lot of money and hassle. The special design of hip roofs helps against wind and keeps your home warm or cool.
In windy places, half-hipped roofs are even stronger because of their shape. But, they still need cleaning to stay dirt-free. Fixing problems quickly keeps your porch safe and looking great. With regular care, your hip roof porch will remain a beautiful part of your home.

